What is Hubzilla?
Hubzilla is a decentralised communication network with the aim of providing communication options that circumvent censorship, respect privacy and are therefore free from the restrictions imposed by today's commercial communication giants. These primarily provide spy networks for paying customers of all kinds and monopolise and centralise the entire Internet - which was not originally among the revolutionary goals that led to the World Wide Web.
Hubzilla is free, open source and free of charge. It was developed to run on a Raspberry Pi as well as on the largest AMD and Intel Xeon multiprocessor servers. It can be used for communication between a few individuals or connect many thousands of people and more.
Another goal is to be independent of skills and resources. Hubzilla is as easy to use for the ordinary computer user as it is for system administrators and developers.
How you use it depends on how you want to use it.
Hubzilla is written in PHP, making it easy to install on any of today's hosting platforms, including self-hosting at home, on shared servers or on virtual and dedicated servers.
In other words, Hubzilla can run on any platform that has a web server, a MySQL-compatible database and PHP.
Hubzilla offers some unique goodies:
One-click identification: you can access other servers in the Hubzilla network by simply clicking on a link to them. Authentication is easily done automatically behind the scenes. Forget all the different usernames for different sites and passwords - Hubzilla does it all for you.
Clone: You can clone your online identity (or, as we say, a channel). It is no longer tied to a specific server, domain or IP address. Simply import it to another Hubzilla server (or Hubzilla hub, as we call it) - directly online or using a previously generated export. If your primary hub is suddenly no longer online, no problem, your contacts, posts* and messages* are still automatically available and accessible under your cloned identity. (*: only posts and messages created after the moment of cloning)
Privacy: Hubzilla identities (Nomad IDs) can be deleted, backed up/downloaded and cloned. You have full control over your data. If you decide to delete all your data and your Nomad ID, all you have to do is click on a link and it will be deleted from the server immediately. No questions asked, no fuss.
Hubzilla Features
Built-in Social
When you post announcements on your website, they are automatically broadcast to your followers on the Fediverse, Mastodon, and more. You can also interact with them via your website.
Groups & Forums
Building a community is important for your business or nonprofit organization. You can add public, private, and moderated discussion groups & forums. These work across nearly all fediverse platforms.
Cloud Storage
You can store documents directly on your website, and share them with others. Public, private, or restricted access. With the files being stored on your domain name, they will know it comes from you.
Federated Single Sign On
You can use your Hubzilla online identity to log into other websites that support Magic Signon (OpenWebAuth). That way you don't have to create a new account on every website, forum, membership site, or app.
Nomadic Identity
Clone your online identity and content to multiple sites using the Nomad protocol and mirror any changes in near real time. All your friends and all your content are available on any of your cloned instances - at any time.
Functions
The following are some of the main features of Hubzilla that are included in the official version. Hubzilla is a highly extensible platform, so more features and capabilities can be added through additional themes and plugins.
Affinity slider
When adding connections in Hubzilla, members have the option to assign ‘affinity levels’ (how close your friendship is) to the new connection. For example, if you add someone whose blog you follow, you can assign their channel an ‘Acquaintance’ affinity level.
On the other hand, if you add a friend's channel, you could assign them the ‘Friends’ affinity level.
At this point, the Hubzilla affinity slider tool, which usually appears at the top of your ‘Stream’ page, will adjust the content of the page to display channels within the desired affinity range. Channels outside this range will not be displayed unless you adjust the slider to include them.
The affinity slider allows for instant filtering of large amounts of content, grouped by degree of proximity.
Filtering connections
The optional ‘connection filter’ gives you the ability to control exactly what is displayed in your stream. When enabled, the connection editor provides inputs to select criteria that must be met to include or exclude a specific post from a specific channel. Once a post has been allowed, all comments on that post are allowed, regardless of whether they meet the selection criteria. You can select words that, if present, will block the post or ensure that it is included in your stream. Regular expressions can be used for even finer control, as well as hashtags or even the recognised language of the post.
Access control lists
When sharing content, members have the option to restrict who can see the content. By clicking on the padlock below the share field, you can select the desired recipients of the post by clicking on their name.
Once sent, the message can only be viewed by the sender and the selected recipients. In other words, the message will not appear on public walls.
Access control lists can be applied to content and posts, photos, events, websites, chat rooms and files.
Single sign-on
Access control lists work for all channels in the grid thanks to our unique single sign-on technology. Most internal links provide an identity token that can be verified on other Hubzilla sites and used to control access to private resources. You log in to your home hub once. After that, authentication is ‘magic’ for all Hubzilla resources.
WebDAV-enabled file storage
Files can be uploaded to your personal storage area using your operating system's utilities (in most cases by drag & drop). You can protect these files with access control lists for any combination of Hubzilla members (including some third-party network members) or make them publicly accessible.
Photo albums
Store photos in albums. All your photos can be protected by access control lists.
Events calendar
Create and manage events and tasks, which can also be protected with access control lists. Events can be imported/exported to other software using the industry standard vcalendar/iCal format and shared in posts. Birthday events are automatically added by your friends and converted to your correct time zone so you know exactly when the birthday takes place - regardless of where in the world you are in relation to the birthday person. Events are usually created with attendance counters so that your friends and connections can instantly approve.
Chat rooms
You can create any number of personal chat rooms and allow access via access control lists. These are usually more secure than XMPP, IRC and other instant messaging transports, although we also allow the use of these other services via plugins.
Website creation
Hubzilla has numerous ‘content management’ tools for creating web pages, including layout editing, menus, blocks, widgets and page/content areas. All of these tools can be access controlled so that the resulting pages are only accessible to the intended audience.
Apps
Apps can be created and distributed by members. These differ from traditional ‘vendor lockin’ apps in that they are completely controlled by the author - who can control access to the app's target pages and pay for that access accordingly. Most of the apps in Hubzilla are free and can be easily created by people without programming skills.
Layout
The page layout is based on a description language called Comanche. Hubzilla itself is written in Comanche layouts, which you can change. This allows a level of customisation not normally found in so-called ‘multi-user environments’.
Bookmarks
Share and save/manage bookmarks of links provided in conversations.
Encryption of private messages and data protection aspects
Private messages are saved in an encrypted format. Although this is not 100% secure, it usually prevents the occasional spying by the site administrator or ISP.
Each Hubzilla channel has its own set of private and associated public RSA 4096-bit keys, which are generated when the channel is first created. This is used to protect private messages and posts during transmission.
Additionally, messages can be created with ‘end-to-end encryption’ that cannot be read by Hubzilla operators, ISPs, or anyone else who does not know the passcode.
Public messages are generally not encrypted during transmission or storage.
Private messages can be withdrawn (not sent), although there is no guarantee that the recipient has not yet read them.
Posts and messages can be given an expiry date, after which they are deleted/removed from the recipient's page.
Service federation
As well as additional ‘cross-post connectors’ to a variety of alternative networks, there is native support for importing content from RSS/Atom feeds and using them to create specialised channels. Plugins are also available to communicate with others via the Diaspora and GNU-Social (OStatus) protocols. These networks do not support nomadic identity or cross-domain access control; however, basic communication to/from Diaspora, Friendica, GNU-Social, Mastodon and other providers using these protocols is supported.
There is also experimental support for OpenID authentication that can be used in access control lists. This is a project that is being worked on. Your Hubzilla hub can be used as an OpenID provider to authenticate you to external services that use this technology.
Channels can be authorised to become ‘derivative channels’, where two or more existing channels are combined to create a new thematic channel.
Privacy groups
Our implementation of privacy groups is similar to Google's ‘Circles’ and Diaspora's ‘Aspects’. This allows you to filter your incoming stream by selected groups and automatically restrict the outgoing access control list to members of that group when you post. You can undo this at any time (before sending the post).
Directory services
We provide easy access to a member directory and provide decentralised tools that can make ‘suggestions’ to friends. The directories are normal Hubzilla sites that have decided to take on the role of directory server. This requires more resources than most typical sites and is therefore not the default setting. The directories are synchronised and mirrored so that they all contain up-to-date information across the network (subject to normal propagation delays).
TLS/SSL
For Hubzilla hubs that use TLS/SSL, communication between client and server is encrypted via TLS/SSL. In light of recent media revelations about widespread global surveillance and encryption circumvention by the NSA and GCHQ, it is reasonable to assume that HTTPS-protected communications can be compromised in a number of ways. Private communication is therefore encrypted at a higher level before it is sent to the outside world.
Channel settings
When a channel is created, a role is selected that applies a set of pre-configured security and privacy settings. These are selected according to best practice to maintain the desired level of data protection.
If you select a ‘custom’ privacy role, you can set fine-grained permissions for different aspects of communication for each channel. For example, under the heading ‘Security and Privacy Settings’, there are six (6) possible display/access options for each aspect on the left-hand side, which can be selected by clicking on the drop-down menu. There are also a number of other privacy settings that you can edit.
The options are:
- No one but yourself. - Only those you explicitly authorise. - Anyone in your address book. - Everyone on this website. - Everyone on this network. - Everyone who is authenticated. - Anyone who is on the internet.
Public and private forums
Forums are usually channels in which several authors can participate. There are currently two ways to publish posts in forums: 1) ‘wall-to-wall’ posts and 2) via @mention tags in the forum. Forums can be created by anyone and used for any purpose. The directory includes an option to search for public forums. Private forums can only contain posts that are often only seen by members.
Cloning accounts
Accounts in Hubzilla are referred to as nomadic identities because a member's identity is not tied to the hub where the identity was originally created. For example, if you create a Facebook or Gmail account, it is tied to those services. You cannot function without Facebook.com or Gmail.com.
Let's say you created a Hubzilla identity called tina@hubzillahub.com. You can clone it to another Hubzilla hub by choosing the same or a different name: liveForever@somehubzillahub.info
Both channels will now be synchronised, i.e. all your contacts and settings will be duplicated on your clone. It does not matter whether you send a post from your original hub or from the new hub. The posts will be mirrored on both accounts.
This is a pretty revolutionary feature if we consider a few scenarios:
- What happens if the hub an identity is in suddenly goes offline? Without cloning, a member is unable to communicate until the hub is back online (no doubt many of you have seen and cursed Twitter's ‘Fail Whale’). With cloning, you simply log into your cloned account and life goes merrily on.
- The administrator of your hub can no longer afford to pay for his free and public Hubzilla hub. He announces that the hub will be shut down in a fortnight. This gives you plenty of time to clone your identity(ies) and preserve your Hubzilla relationships, friends and content.
- What if your identity is subject to government censorship? Your Hub provider may be forced to delete your account and all identities and associated data. With cloning, Hubzilla offers resistance to censorship. If you want, you can have hundreds of clones, each with a different name, scattered across many different hubs on the Internet.
Hubzilla offers interesting new possibilities for privacy. For more information, see the Tips for protecting your privacy page.
Some caveats apply. A full explanation of identity cloning can be found on the Clone page.
Multiple profiles
Any number of profiles can be created with different information that can be made visible to certain of your connections/friends. A ‘standard’ profile can be viewed by anyone and can contain limited information, while more information is accessible to selected groups or individuals. This means that the profile (and site content) that your beer-drinking friends see may be different from what your peers see, and also completely different from what is visible to the general public.
Account backup
Hubzilla offers a simple one-click account backup where you can download a full backup of your profile. The backups can then be used to clone or restore a profile.
Account deletion
Accounts can be deleted instantly by clicking on a link. That's it. All associated content will then be deleted from the network (including posts and any other content created by the deleted profile). Depending on the number of connections you have, the process of deleting removed content may take some time, but it will be done as quickly as possible.
Deletion of content
All content created in Hubzilla remains under the control of the member (or channel) who originally created it. A member can delete a message or a series of messages at any time. The deletion process ensures that the content is deleted regardless of whether it was posted on a channel's primary (home) hub or on another hub where the channel has been remotely authenticated via Nomad (Hubzilla communication and authentication protocol).
Media
Similar to any other modern blogging system, social network or micro-blogging service, Hubzilla supports uploading files, embedding videos and linking to websites.
Preview/editing
Posts and comments can be previewed before sending and edited after sending.
Voting/polls
Posts can be converted into ‘poll’ elements that allow readers to provide feedback summarised in ‘agree’, ‘disagree’ and ‘abstain’ counters. This allows you to gauge interest in ideas and create informal polls.
Extending Hubzilla
Hubzilla can be extended in various ways: website customisation, personalisation, option settings, themes and addons/plugins.
API
An API is available for use by third-party services. A plugin also provides a basic implementation of the Twitter API (for which there are hundreds of third-party tools). Access can be via login/password or OAuth, and client registration of OAuth applications is provided.
Glossary
-
Hub An instance of this software running on a standard web server
-
Grid The global network of hubs that exchange information with each other using the Zot protocol.
-
Channel The basic identity in the grid. A channel can represent a person, a blog or a forum, to name but a few. Channels can connect to other channels to share information with very detailed permissions.
-
Cloning Channels can have clones that are connected to separate and otherwise unconnected accounts on independent hubs. Communication shared with a channel is synchronised between the channel clones, allowing a channel to send and receive messages and access shared content from multiple hubs. This provides resilience in the event of network and hardware failures, which can be a major problem for self-hosted or resource-constrained web servers. Cloning allows you to completely move a channel from one hub to another, taking your data and connections with you. See nomadic identity.
-
nomadic identity The ability to authenticate and easily migrate an identity across independent hubs and web domains. Nomadic identity provides true ownership of an online identity, as the identities of the channels controlled by an account on a hub are not tied to the hub itself. A hub is more of a ‘host’ for channels. With Hubzilla, you don't have an ‘account’ on a server like you do with typical websites, but you own an identity that you can take with you across the web by using clones.
-
Nomad The new JSON-based protocol for implementing secure decentralised communication and services. It differs from many other communication protocols in that it builds communication on a decentralised identity and authentication framework. The authentication component is similar to the OpenID concept, but is isolated from DNS-based identities. As far as possible, remote authentication is silent and invisible. This provides a mechanism for distributed access control on the Internet that is unobtrusive.
The protocol was originally called Zot. In 2021 it was renamed Nomad by Mike Macgirvin. A distinction is now made between the protocol and the implementation (software) of the protocol. The implementation is still called Zot at Hubzilla (more precisely Zot6, because it continues the implementation of the then identically named protocol in version 6).
In general, the protocol is now only referred to as Nomad. When the term Zot or Zot6 (usually in the form ‘Nomad/Zot6’) is used, the Nomad protocol is meant when referring to the protocol. Zot or Zot6 only appear independently in the area of software development at Hubzilla, because the routines and the programme library that implement Nomad in practice bear this name.
User interface / naming
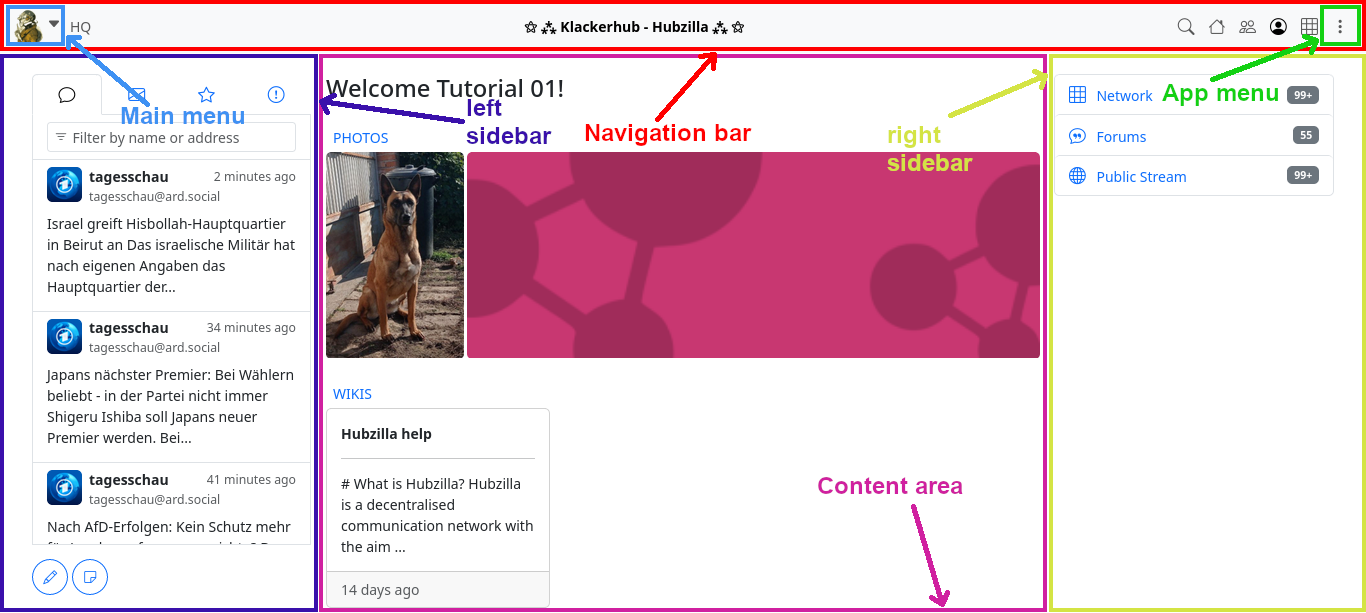
Overview
While many of Hubzilla's features and capabilities will be familiar to those who have used social networking sites and blogging software before, there are also some new concepts and features that most people have not yet encountered. Some of the new ideas are related to the decentralised nature of the grid, others to the advanced permission system needed to protect your data. This guide will help you understand how to create, configure and use your nomadic identity.
Login / Registration
Not all Hubzilla sites allow open registration. If registration is allowed, you will see a ‘Register’ link right next to the login prompt on the site's homepage. Following this link will take you to the site's registration page. On some sites, you may be redirected to another site that lists hubs where registration is allowed. Since all Hubzilla sites are connected, it does not matter where your account is located.
Your e-mail address Please enter a valid e-mail address. Your email address will never be published. This address will be used to activate your account, to send (optional) email notifications for incoming messages or articles and to recover lost passwords.
Password Enter a password of your choice and repeat it in the second field to ensure that it has been entered correctly. As Hubzilla offers a decentralised identity, you can use your account to log in to many other websites.
Terms of Use Click on the link to read the website's terms of use. Once you have read them, confirm them by ticking the box in the registration form.
Log in Once you have entered the required information, click on the ‘Register’ button. Some websites may require administrator approval before registration can be processed, in which case you will be notified. Please check your email (including your spam folder) for approval of your registration.
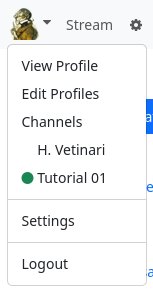
Accounts, Profiles and Channels
Once you have registered an account at the grid you have also created a profile and a channel.
Account You have one account. This consists of your email account and your password. With your account you access your profile and your channel.
Think of your account as the way you authenticate at one $Projectname site. It lets you do things, such as creating profiles and channels with which you can connect to other people.
Profile You have surely registered with some other internet services, such as forums or online communities. For all of them you provided some information about yourself, such as date of birth, country, age and the likes.
If you like you can see your profile here: [baseurl]/profile/[webname] and edit it by clicking on the pencil icon next to your avatar image.
Unlike other services hubzilla offers you the advantage of creating many more profiles. That way you are able to distinguish between profiles targeted specially at everyone (your public profile), your work mates, your family and your partner.
Think of your profile as the basic information about yourself you tell other people.
Channel
During the registration you created your first channel. Yes, besides several profiles you are able to have several channels. This might be a bit confusing in the beginning, but let's clear things up. You already have created one channel. You can use this one for the public, to communicate with people about every day life. But perhaps you are an avid book reader and many people are bored by that. So you open a second channel just for the book lovers, where you all can talk about books as much as you like. Obviously this is a new stream of posts, with a new profile (... or new profiles ...) and completely different contacts. Some connections might exist in both channels, but there will be some that are exclusive to only one of both. You yourself just switch between both of them just like you would in real life switch when talking to people you meet on the street or people you meet specially to talk about books. You can even connect to yourself, or better: to your other channel. :)
Think of a channel as different spaces dedicated to different topics where you meet with different people.
Channels
Channels are simply collections of content that are stored in one place. A channel can stand for anything. It can represent you, a website, a forum, photo albums, anything. For most people, their first channel is ‘Me’. The most important functions for a channel that represents ‘me’ are:
- Secure and private ‘spam-free’ communication
- Identity and ‘single sign-on’ across the entire network
- Privacy controls and authorisations that extend to the entire network
- Directory services (like a phone book)
In short, a channel that represents you is ‘me on the Internet’. With one account at a hub, several different channels can be created and used, each with its own individual configuration.
Create channels
Once you have created your account, you will be presented with the ‘Add Channel’ screen. Normally, your first channel will be one that represents you - so it's a good idea to use your own name (or a pseudonym) as your channel name. The channel name should be considered the title or short description of your channel. The ‘Choose a short nickname’ field is similar to a ‘Username’. With what you enter here, you create a channel address (also known as a ‘handle’ in Fediverse) that other people can use to connect to you and that you can use to log in to other websites. This address looks like an email address and has the form <nickname>@<your_hub>.
Note: In other Fediverse services, the handle is preceded by an ‘@’. With Hubzilla, this character must be omitted if you want to connect to another user or search for a handle, as an example.
You can create additional channels via the ‘Channel manager’ link.
As soon as you have done this, your channel is ready for use. Under <your_hub>/channel/<nickname> you will find your channel ‘Stream’. Your most recent activities are displayed here in reverse chronological order.
Channel roles
When you create a new channel, you will be asked to select an permission role depending on how you want to use this channel. The most popular permission roles are the social network roles. You have many more choices comparable to Facebook groups and pages, collaborative spaces, news feeds and more. These roles automatically configure various system variables, from the permissions granted to friends to the default privacy and visibility settings. Advanced configurations are available to customise each of these parameters to your needs, but our experience has been that most users prefer to set it and forget it. Below are some of the different roles that are currently available and how they affect your privacy and interaction options.
There are four channel roles:
- Public
- Personal
- Community Forum
- Customised
Public
The channel is a very permissive social network profile that is compatible with other federated social networks. Privacy is a lower priority than ease of access and connection with others. Anyone on the network can comment on your public posts and send you private messages. By default, posts and published articles are public, but you can override and restrict this when you create the article. You are listed in the directory. Your online presence and connections are visible to others. This mode can increase your susceptibility to unsolicited messages and spam. The ‘classic’ social media account.
Personal
By default, posts and published items are public, but you can override and restrict this when creating the item. You are listed in the directory. Your online presence and connections are visible to others. Only your direct connections can comment on your public posts and send you private messages.
Community Forum
The channel is a typical forum. By default, posts and published articles are public. Members can post articles via !mention or wall-to-wall. The posting of photos and other published articles is blocked. The channel is visible in the directory. Members are added automatically.
Custom
This is the most precise setting for channel rights. All rights can be set in fine granularity. Caution: If you select the wrong settings here, you can render your channel unusable. Fortunately, the rights can also be changed again so that such malfunctions can be rectified. It makes sense to consider the effects of each individual permission for yourself as the channel owner, but also for other users.
The following settings are possible for each control point:
- Only me
- Only those you explicitly authorise
- Accepted connections
- Any connections
- Everyone on this website
- All Hubzilla members
- Anyone authenticated
- Anyone on the Internet
To edit the custom role, select ‘Privacy settings’ in the settings. At the bottom right you will find the button ‘Custom channel role configuration’. If you click on it, a warning dialogue will appear, drawing your attention to the risks of incorrect configuration. If you confirm that you want to edit the rights, the settings dialogue for the user-defined role rights opens.
Profiles
Hubzilla has unlimited profiles. You can use different profiles to show different ‘sides of yourself’ to different target groups. This is not the same as having different channels. Different channels allow for completely different information. You can have a channel for yourself, a channel for your sports team, a channel for your website or something else. A profile allows for fine-grained ‘’sides‘’ of each channel. Different profiles could be compared to different business cards of a person. Depending on the purpose, different information is given on each business card. For example, your standard public profile could read: ‘Hi, I'm Fred and I like to laugh’. You can show your close friends a profile that says ‘and I also like to throw dwarfs’.
You always have a profile that is referred to as your ‘standard’ or ‘public’ profile. This profile is always accessible to the general public and cannot be hidden (there may be rare exceptions on privately run or unaffiliated sites). You can and should limit the information you make available in your public profile. If you want your friends to be able to find you, it is helpful if you include the following information in your public profile...
- Your real name or at least a nickname that everyone knows
- A photo of you
- Your location on earth, at least at country level.
If you also want to meet people who share general interests with you, please take a moment to add some ‘keywords’ to your profile. For example, ‘music, linux, photography’ or something similar. You can add as many keywords as you like.
Select ‘Edit profiles’ from the menu on your Hubzilla site. You can edit an existing profile, change the profile photo, add things to a profile or create a new profile. You can also create a ‘clone’ of an existing profile if you only want to change a few things but don't want to re-enter all the information. To do this, click on the profile you want to clone and select ‘Clone this profile’.
In the list of your profiles, you can also select the contacts who can see a particular profile. Simply click on ‘Edit visibility’ next to the profile in question (only available for profiles that are not your default profile) and then click on specific connections to add them to or remove them from the group of people who can see this profile.
Once a profile has been selected, the person viewing your profile will see the private profile you have assigned. If the person is not authenticated, they will see your public profile. There is a setting that allows you to publish your profile in a directory and ensure that it can be found by others. You can change this setting on the ‘Settings’ page.
If you do not want others to find you without telling them your channel address, you can leave your profile unpublished.
Settings
Hubzilla allows a wide range of settings for behaviour, appearance, features, channels, etc. You can access most settings via the main menu, where you will find the Settings menu item.
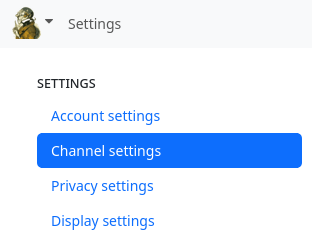
Various categories of settings are provided:
- Account settings
- Channel settings
- Privacy settings
- Display settings
- Manage locations - if clones of your channel exist
If you are in the stream view, you will see a small cogwheel (⚙) next to the main menu, which you can use to access the
- stream settings
There are also hidden settings
- Additional functions
which you cannot access via the menu or an icon.
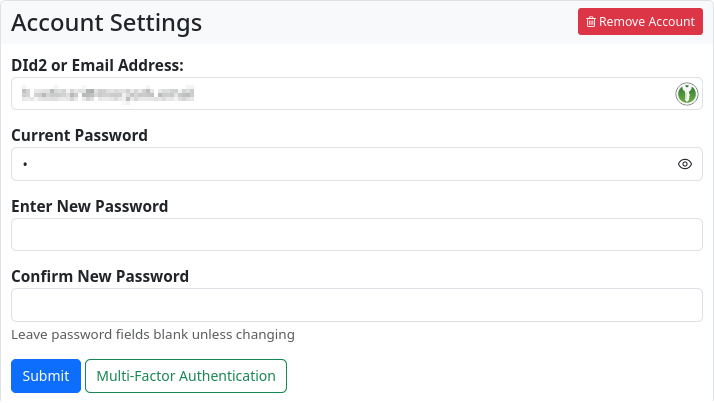
Account settings
You can use the account settings to change your account details.
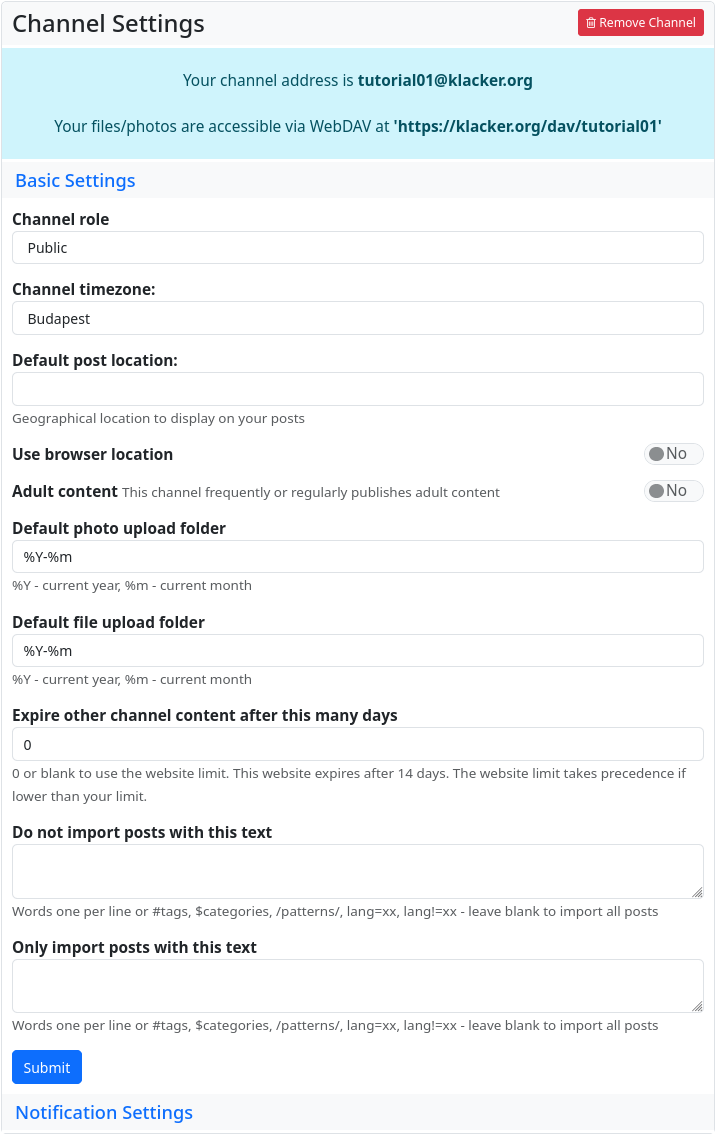
Channel settings
If you access the settings via the menu item, the channel settings are displayed by default. The basic settings are used to set the properties and functions of the currently selected (used) channel. In addition to the channel role, you can also define the standard for automatically created directories in the cloud (these are generated, for example, when you upload an image as an attachment in a post).
It is also possible to delete the channel (red ‘Delete channel’ button).
Important note: It is not possible to create a new channel on this hub under the name of the deleted channel (not even by cloning). This is to protect against ‘identity misuse’. If you still want to reinstall a channel with this name for important reasons, you can contact the admin of the hub, explain the reasons (so that they can be sure that you have a legitimate interest) and ask them to remove the block. Only he can do this with a few simple steps in the database.
You can also set the expiry period for imported content from other channels and control this import using two filters.
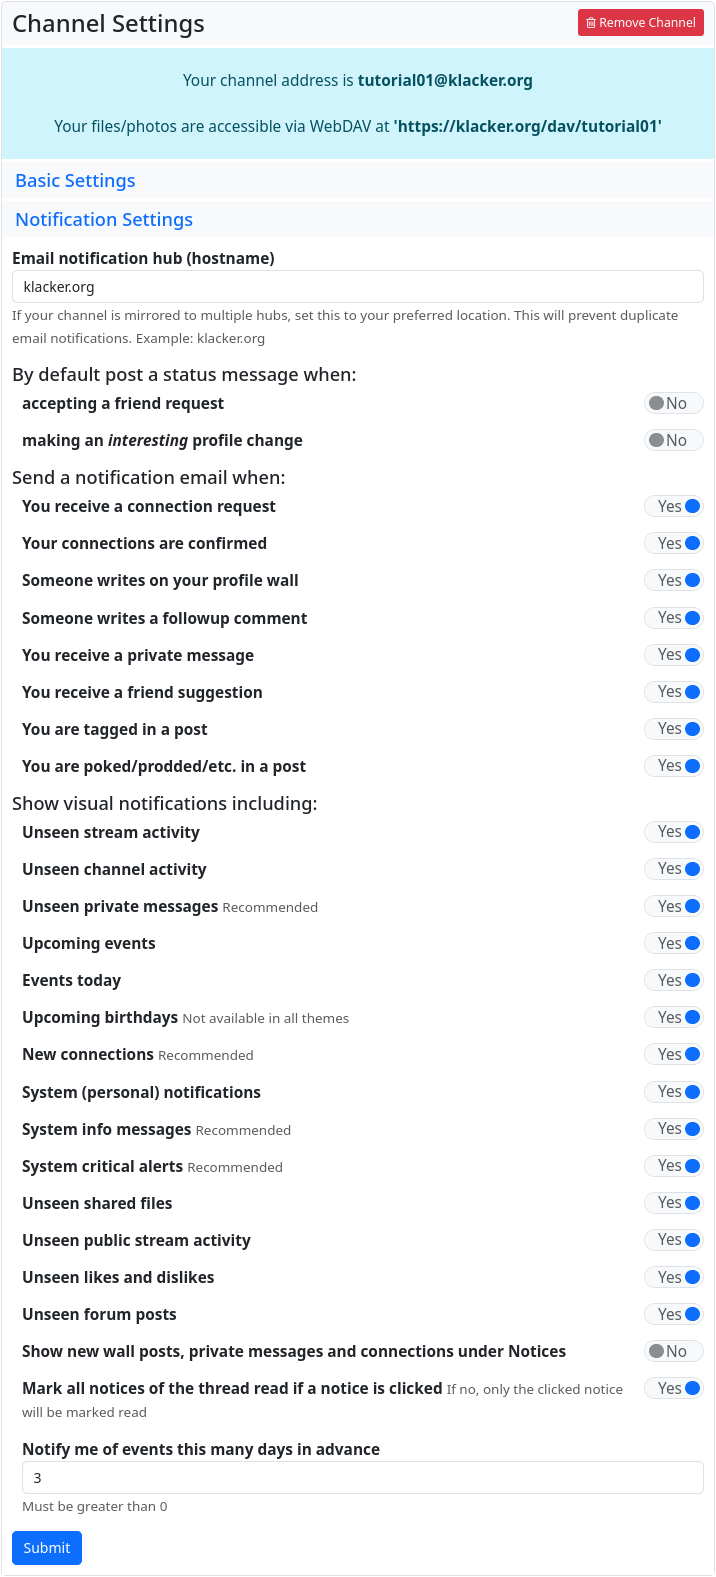
The notification settings allow you to specify exactly whether you want to be notified of certain events and actions. And whether you also want the notification to be sent by email.
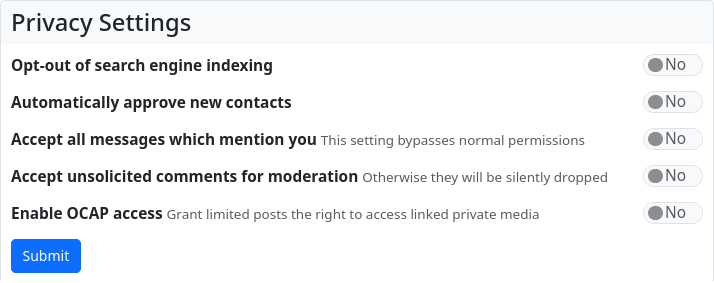
Privacy settings
In the privacy settings, you can determine whether your posts may be indexed by search engines, whether you accept contact requests automatically (without manual approval), whether all messages in which you are mentioned are automatically accepted, whether comments from users who are not among your contacts are submitted for moderation (approved/rejected) or deleted, and whether you allow OCAP access.
Display settings
The display settings can be used to customise the design of the channel. In addition, you can determine which content is displayed, within certain limits. In the design settings, you can select from the installed themes and set your design scheme for the topic.
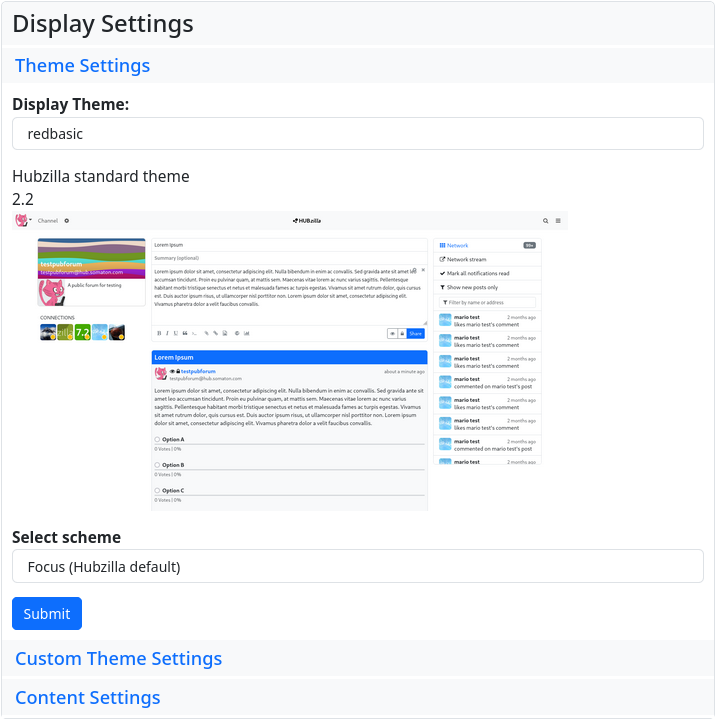
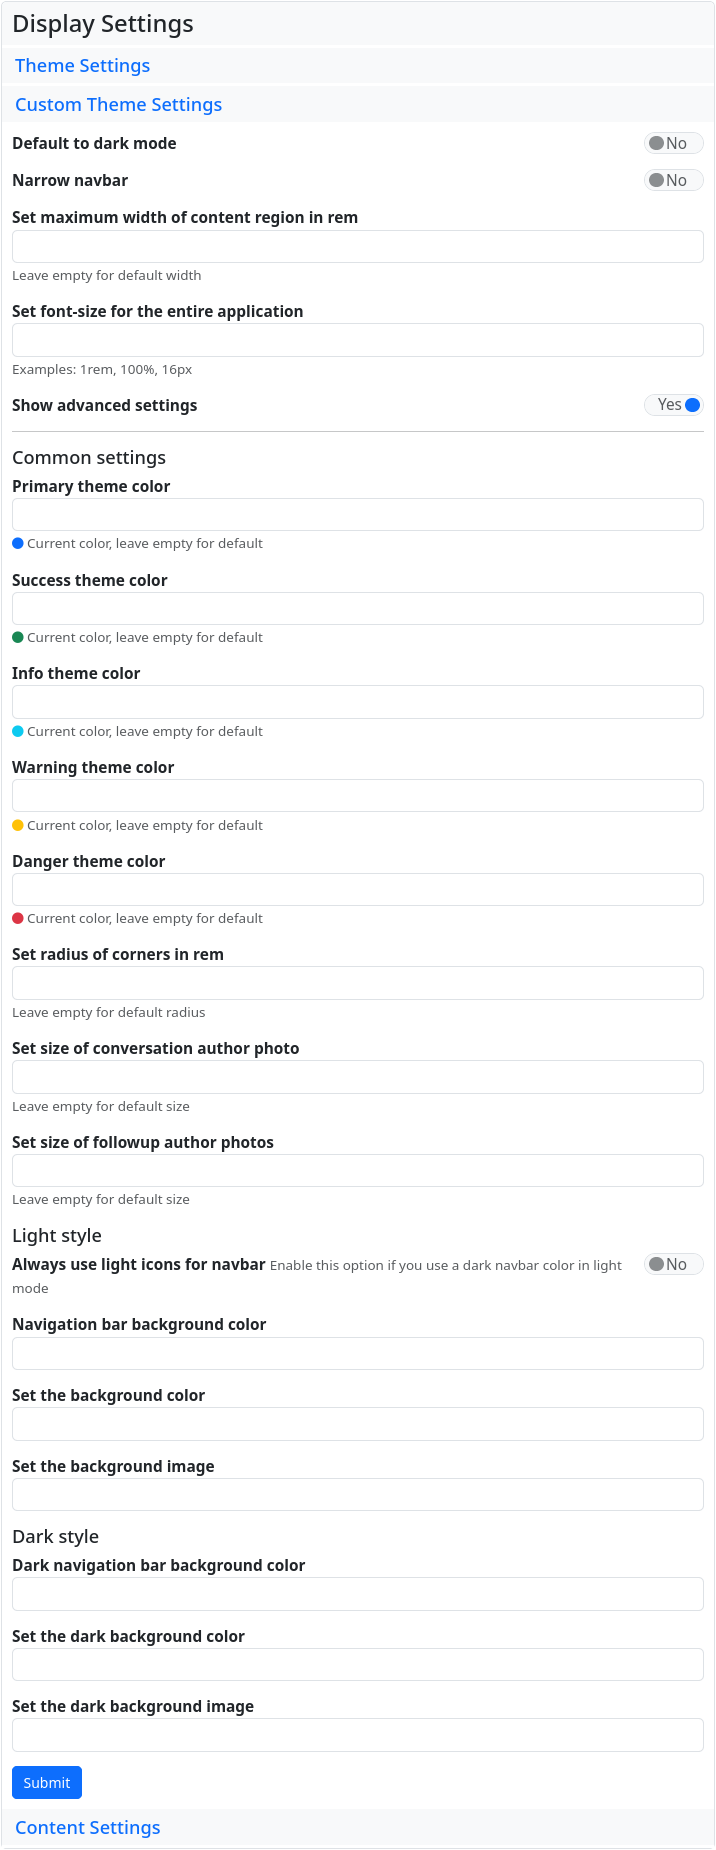
With the custom design settings, it is possible to adjust the colour scheme to your own preferences and to define corner rounding, standard sizes and standard dimensions for avatars. The default settings are initially displayed in simplified form, and only allow you to set the dark mode, choose a narrow navigation bar, set the width of the content area and adjust the font size.

If you set the ‘Show advanced settings’ switch to ‘Yes’ and submit the selection, the advanced settings will be displayed, where you can set colours, avatar dimensions and background images.
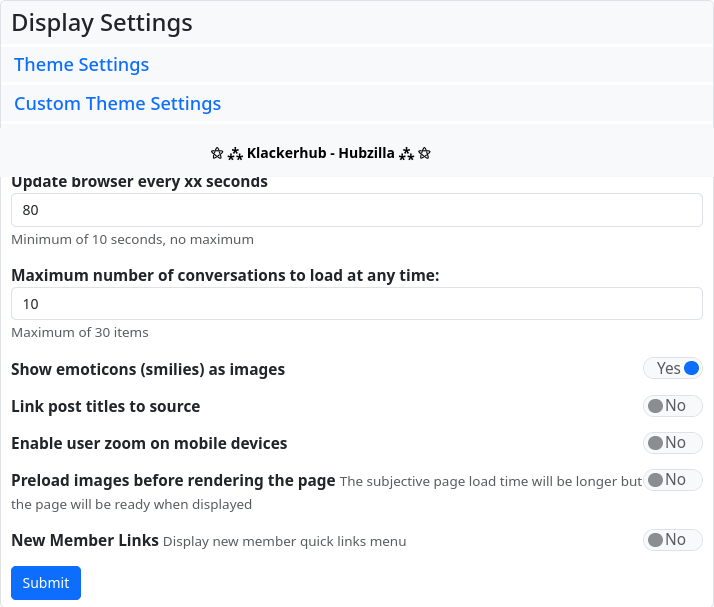
The content settings allow you to select various parameters (e.g. the time until the view is updated) and to switch off the display of the ‘links for new members’ that are displayed when new channels are created.
Manage Channel locations
If the current channel has clones on other hubs, the menu will show an additional entry, ‘Manage Channel locations’. This allows you to specify the hub on which the main channel (primary channel) is located (this also determines the part of the handle after the ‘@’). You can also delete clones from here. However, for channels on third-party servers, it is recommended that you delete the channel on the actual hub. Deleting from the clone management should only be used if the clone's hub no longer exists.

Stream settings
The stream settings are not accessed via Main Menu → Settings, but via the small cogwheel symbol (⚙) next to the main menu, which appears there as soon as you open the stream view.
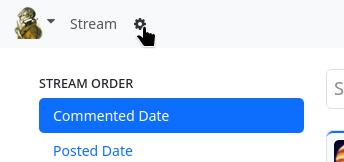
The stream settings can be used to select the display of the stream and the features available there (e.g. stream filters, saving search queries, etc.).

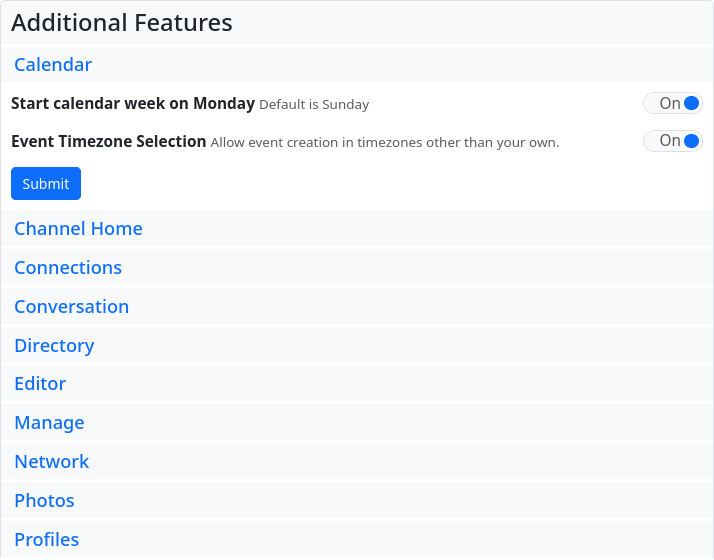
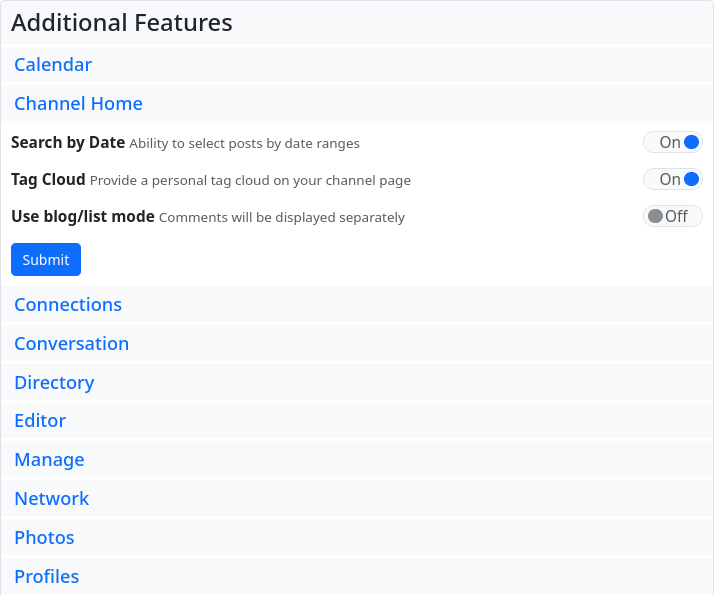
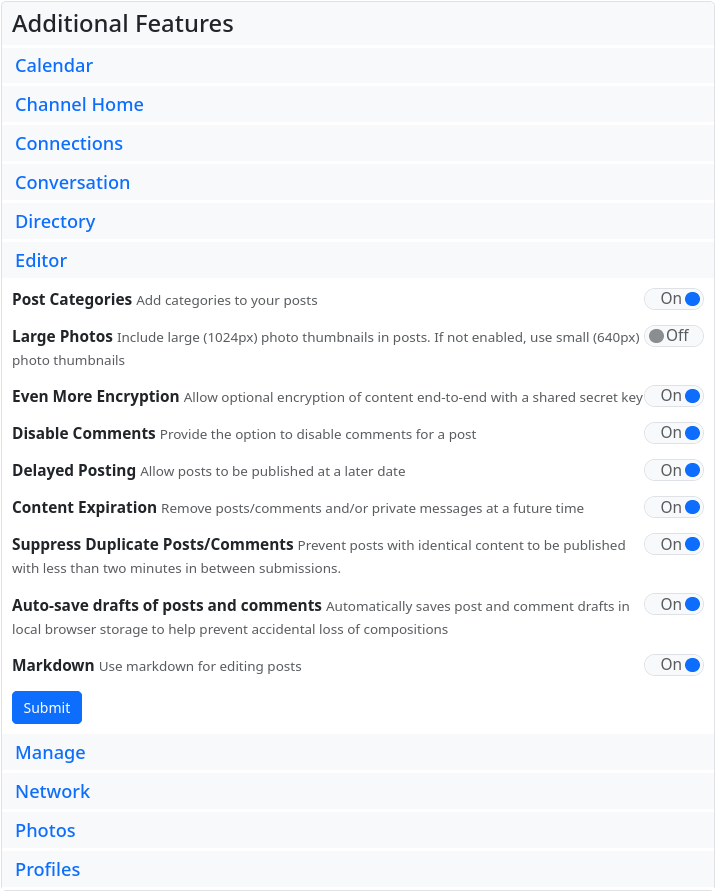
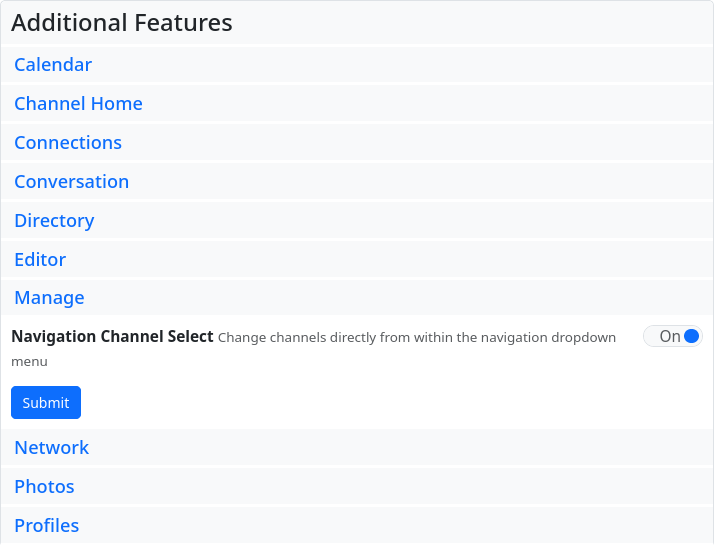
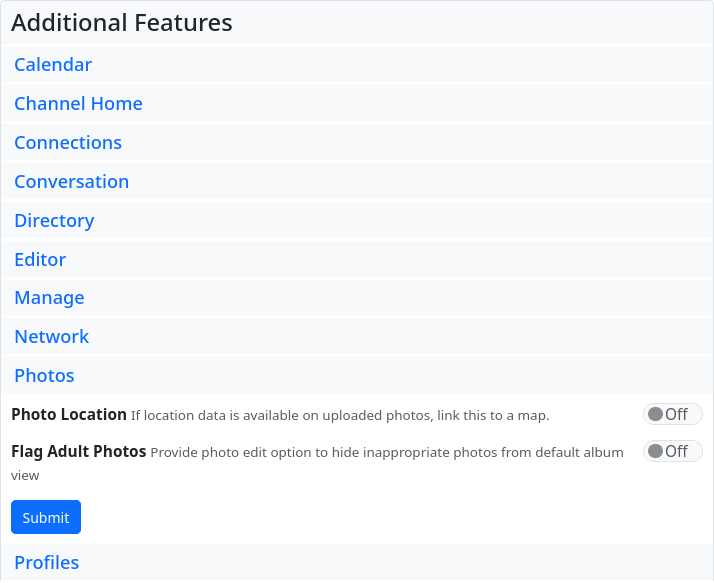
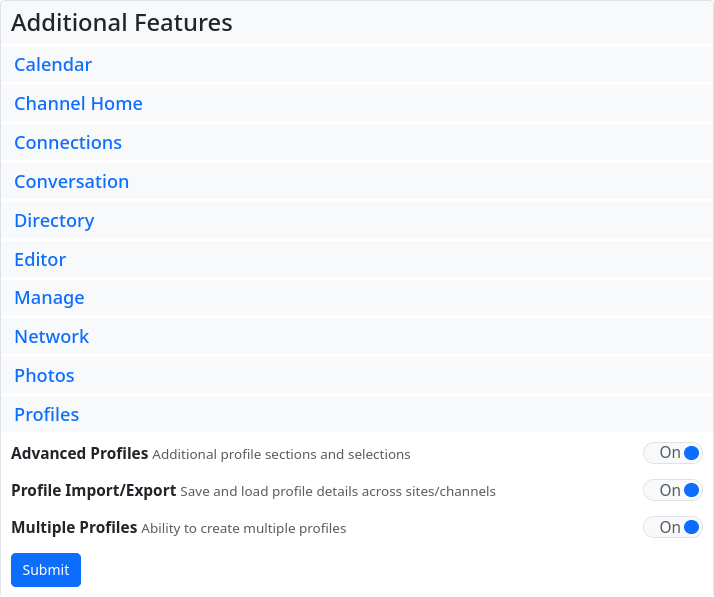
Additional features (hidden settings)
The ‘Additional Features’ settings are not accessible in their entirety either via the menu or via an icon. However, all the individual feature settings can also be accessed in the respective app via the cogwheel next to the main menu (avatar picture).
These are settings for additional functions in all possible areas of Hubzilla. To access the settings, you have to append the URL of the hub /settings/features to the browser, e.g. https://klacker.org/settings/features.
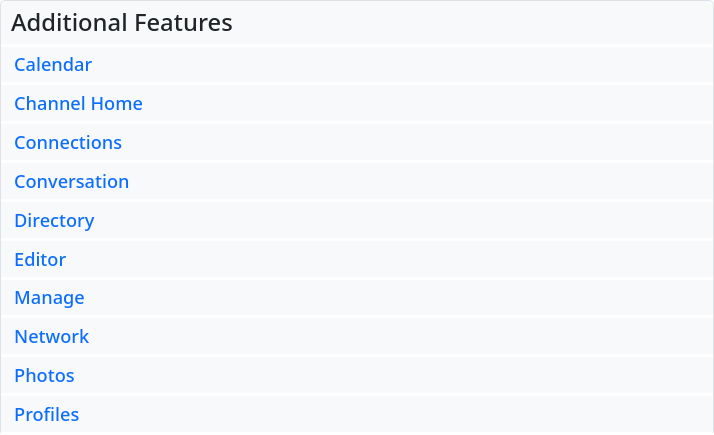
The default settings for all of these options are set by the hub administrator. This default setting can be overridden by the user in the ‘Additional Functions’. For each option, the administrator also has the option of locking the default setting to prevent changes. The user can still flip the switch for the option, but the selection is not saved and the option is reset to the default setting.


Connecting with channels
Connections in Hubzilla can have many different meanings. A connection is more precisely defined as a set of permissions that you have granted to another person. In traditional social networks, all connections are given the same permissions or at most two levels (friends and ‘followers’). In Hubzilla, a separate set of permissions can be set/customised depending on the situation and the relationship you have with the other channel. You can allow someone to see your posts, but not your photos. You can also deny them permission to comment on your posts or send private messages to you. But let's make it simple: you want to be friends with someone you know from social networks. How do you do that?
You can view the directory. The directory is available on all Hubzilla sites, so if you search from your own site, you'll get results from across the network. You can search by name, interest, location and keyword.
If you already know someone's ‘handle’, you can contact them directly. A handle looks just like an email address (e.g. bob@example.com) but refers to a person in the open social network. In order to establish a connection, a compatible network protocol must be used. By default, this software supports the Nomad protocol, but other protocols can be provided via plugins/add-ons. For more information on connecting to channels on other networks, see below.
How to connect to other Hubzilla channels:
Visit the desired channel's profile by clicking on their photo in the directory, stream or comments and it will open their channel homepage in the channel viewer. On the left side of the screen you will normally see a link labelled ‘Connect’. Click on it and you're done. Depending on the settings of the channel you want to connect to, you may have to wait for the channel to approve your connection, but no further action is required on your part. Once you have initiated the connection, you will be redirected to the connection editor. Here you can assign specific authorisations for this channel if you want to make changes.
You can also create a connection to any channel by going to the ‘Connections’ page of your website or directory and entering the ‘Handle’ in the ‘Add new connection’ field. Use this method if someone tells you their handle and you want to connect to them. The process is the same as when connecting via the ‘Connect’ button - you will then be redirected to the connection editor to set the authorisations.
This is how you establish a connection to channels in other networks:
The process for connecting to ‘channels’ on other networks (such as GNU Social, Mastodon, Misskey, Pleroma and Diaspora) is similar - enter their ‘handle’ in the ‘+Add’ field on the ‘Connections’ page. However, before you do this, please visit the App Management in the app menu and make sure that the appropriate protocol (Diaspora, GNU-Social/OStatus or ActivityPub) is deployed in your hub and enabled for your channel. These networks/protocols do not support account migration and location independence. So if you change location or clone your channel elsewhere, communication with these connections may fail. For this reason, these protocols are not enabled by default, but only with your consent. Enabling these protocols is an important decision between communicating with friends on these networks and account resilience in case your server goes down.
Some communication networks offer more than one protocol. For example, you can connect to someone who uses both the ‘ostatus’ and ‘activitypub’ protocols for communication. In general, the ‘activitypub’ protocol provides a better experience than the ‘ostatus’ protocol, but Hubzilla often chooses the first protocol it detects, and that may not be what you want. You can connect to someone using a specific protocol by putting the protocol name in square brackets before their ‘handle’. For example
[activitypub]https://foo.bar/foobar
[ostatus]foobar@foo.bar
[diaspora]foobar@foo.bar[zot]foobar@foo.bar
[feed]https://foo.bar/foobar
How to connect to RSS feeds:
Your hub administrator can allow you to connect to RSS feeds. The procedure for connecting to an RSS feed is the same, except that you enter (or paste) the URL of the feed into the ‘Add new connection’ field. The options may be restricted by your hub administrator because connections to feeds can sometimes cause high system loads.
Posting
If you would like to write and share a post (publish, although the circle of recipients or those who can see the post may be restricted), you can usually do this via the ‘Share’ field located above the stream. Click on this field to open the post editor.
At the top is the field for the post title (optional), below this is the field for the summary (also optional), if the administrator of your hub allows this function. The summary can also be used for the purpose of a content warning. Below the field for the summary is a field for categories (if activated by the admin). Below this is the text field in which you can create the post content. Depending on the Hub settings, you can use plain text, Markdown, bbCode or HTML for formatting the text.
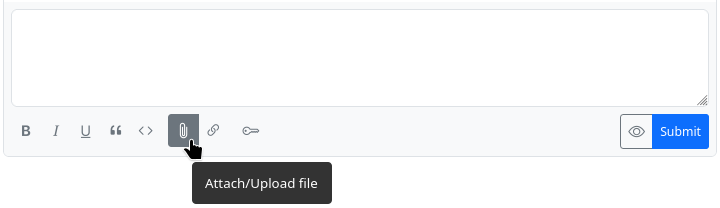
At the bottom of the post editor there are some buttons for easier formatting of the content and for inserting elements and using additional functions: bold, italic, underline, quote, code, attach/upload file, insert link, insert image (an image that already exists under Files), insert location, set expiry date for the post, set publication date, encrypt text, vote (poll) on/off, deactivate comments. To the right of this is another block with buttons. Here you can display a preview of the post, specify whether the post should be published on other networks, make the authorisation settings (who can see the post) and finally publish it using the ‘Share’ button.

You can also access the post editor by selecting the corresponding menu item in the app menu (top right ⋮) or the corresponding icon in the navigation bar (if you have pinned the ‘Write post’ app).
Commenting
If you want to comment on a post, i.e. reply to it, click in the field at the bottom of the post (‘Comment’). This opens the comment editor, which is similar to the post editor. However, there are no fields for a title, a summary or categories. Below the input field for the content of the comment there are again buttons for certain formatting (not all that are available in the post editor, because not everything is possible in a comment) and on the right again a button for a preview, as well as a ‘Submit’ button to publish the comment.

You can also mark up the text in the comment content field with Markdown, bbCode and HTML.
As there is no field for a summary, it is not possible to use this for a content warning regarding the comment. However, this can be achieved using bbCode by inserting the content warning in [summary][/summary]. This initially hides all of the following content, which can then be displayed by clicking on it.
Insert images
There are various ways to insert images into posts and comments.
In the post editor
There are two buttons in the post editor that allow you to insert images: ‘Embed image’ and ‘Attach/upload file’.
With ‘Embed image’, you can insert an image that already exists in the cloud into the post. The image must therefore either be available or you can upload it for precisely this purpose, e.g. using the ‘Files’ app.
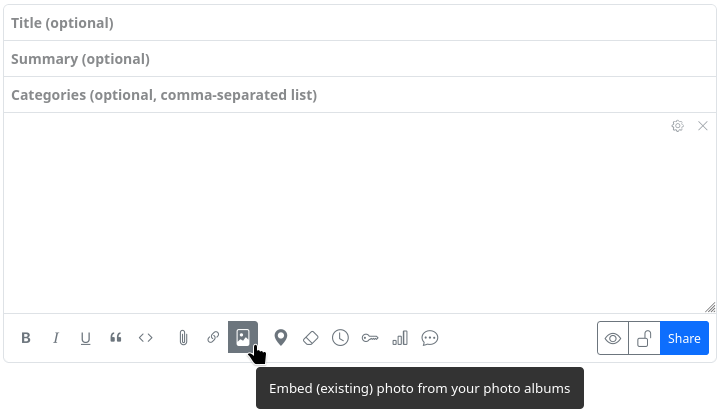
If you select this button, an overview of the available image files opens and you only have to select and click on the appropriate image. Please note: After selecting the image to be inserted, the selection window must be closed again. It does not close automatically after inserting an image so that you have the option of inserting several images in one go.
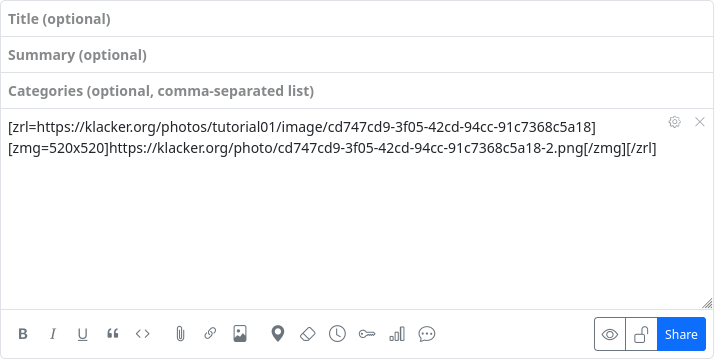
Once selected, the image, scaled to its original size, is inserted as a clickable link to the source file using the bbCode tags [zrl][zmg][/zmg][/zrl] at the end of the previous post (not at the current text cursor position).
With ‘Attach/upload file’ an image can be uploaded directly from your own device and embedded at the end of the post.
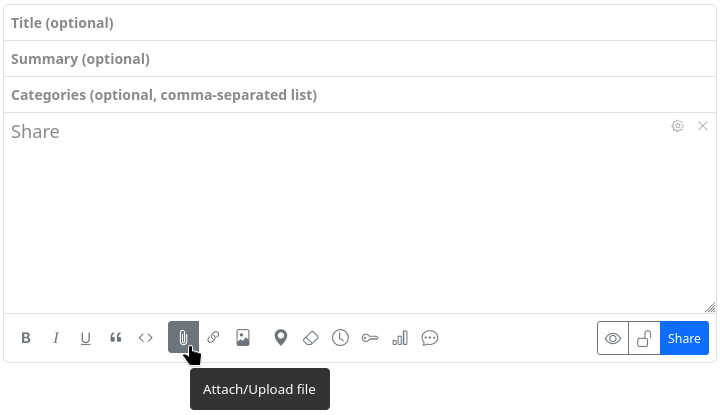
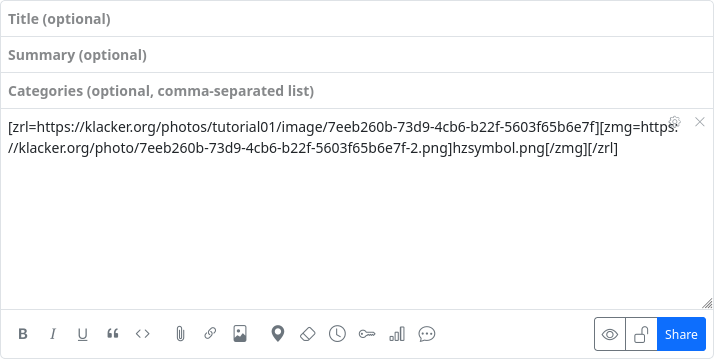
A file selection dialogue opens where you can select and upload the image on your own device. It is uploaded to an automatically created subdirectory in the cloud and inserted at the end of the previous post using the bbCode tags [zrl][zmg][/zmg][/zrl].
Please note: With this method, the image is not scaled to its original size but displayed as a smaller preview image if there is no continuous text. As a result, you may see a chequered background around the image.
In the comment editor
The comment editor only offers the option of uploading and embedding an image. The button for inserting an existing image does not exist there.
If you still want to insert an existing image, you must do this manually using the tags [img][/img] or [img=URL][/img]. To do this, you need to know the URL of the image. In this way, you can also insert images from external sources on the web.
If you use [img=WIDTHxHEIGHT][/img], you can scale the image.
Alt text
If you want an alternative text (alt text) to be displayed when the image cannot be displayed or - as a pop-up - when you move the mouse pointer over the image, you can place it between the two tags [img=URL]ALT_TEXT[/img]. If you have embedded the image in a post using the first method (‘Embed image’), you have to do it yourself. You have to replace the scaling that was inserted in the opening zmg tag with the URL of the image and replace the automatically inserted image URL between the opening and closing zmg tag with the alt text.
Example:
The image was embedded and the code
[zrl=https://klacker.org/photos/tutorial01/image/cd747cd9-3f05-42cd-94cc-91c7368c5a18][zmg=520x520]https://klacker.org/photo/cd747cd9-3f05-42cd-94cc-91c7368c5a18-2.png[/zmg][/zrl]
was created automatically, then it must be changed to insert the alt text ‘Hubzilla icon on red background’, for example:
[zrl=https://klacker.org/photos/tutorial01/image/cd747cd9-3f05-42cd-94cc-91c7368c5a18][zmg=https://klacker.org/photo/cd747cd9-3f05-42cd-94cc-91c7368c5a18-2.png520x520]Hubzilla icon on red background[/zmg][/zrl]

Text Decoration
| BBcode syntax | Rendered text |
|---|---|
[b]bold[/b] | bold |
[i]italic[/i] | italic |
[u]underlined[/u] | underlined |
[s]strike[/s] | |
[color=red]red[/color] |  |
[hl]highlighted[/hl] |  |
[font=courier]some text[/font] |  |
[quote]quote[/quote] |  |
[quote=Author]Author? Me? No, no, no...[/quote] | 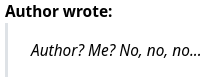 |
[size=small]small text[/size][size=xx-large]xx-large text[/size] [size=20]20px exactly[/size] Size options include: xx-small, small, medium, large, xx-large | 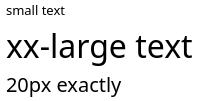 |
Add a horizontal bar [hr] Like this | 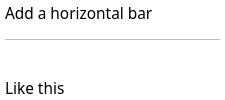 |
This is [center]centered[/center] text | 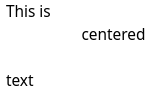 |
Code blocks
Code can be rendered generically in a block or inline format (depending on if there are new line characters in the text), or you can specify a supported language for enhanced syntax highlighting. Syntax highlighting requires a suitable rendering plugin such as hilite. Supported languages with the hilite plugin include php, css, mysql, sql, abap, diff, html, perl, ruby, vbscript, avrc, dtd, java, xml, cpp, python, javascript, js, json, sh .
If a rendering plugin is not installed or an unsupported language is specified, the output for syntax highlighted code blocks is the same as the block format code tag.
| BBcode syntax | Output |
|---|---|
[code]function bbcode() { }[/code] | function bbcode() { } |
[code=php]function bbcode() { $variable = true; if( $variable ) { echo "true"; } }[/code] | 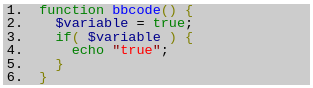 |
[nobb][nobb]This is how [i]you[/i] can [u]show[/u] how to use [hl]BBcode[/hl] syntax[/nobb][/nobb] | This is how [i]you[/i] can [u]show[/u] how to use [hl]BBcode[/hl] syntax |
Lists
| BBcode syntax | Rendered list |
|---|---|
[ul] [*] First list element [*] Second list element [/ul] | - First list element - Second list element |
[ol] [*] First list element [*] Second list element [/ol] | 1. First list element 2. Second list element |
[list=A] [*] First list element [*] Second list element [/list] The list type options are 1, i, I, a, A. | A. First list element B. Second list element |
[dl terms="b"] [*= First element term] First element description [*= Second element term] Second element description [/dl] The terms style options can be any combination of: bbold iitalic uunderline mmonospace llarge hhorizontal — like this defintion list | First element term First element description Second element term Second element description |
Tables
| BBcode syntax | Rendered table |
|---|---|
[table border=0] [tr] [th]Header 1[/th][th]Header 2[/th] [/tr] [tr][td]Content[/td][td]Content[/td][/tr] [tr][td]Content[/td][td]Content[/td][/tr] [/table] | 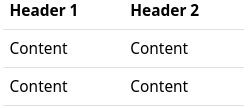 |
[table border=1] [tr] [th]Header 1[/th][th]Header 2[/th] [/tr] [tr][td]Content[/td][td]Content[/td][/tr] [tr][td]Content[/td][td]Content[/td][/tr] [/table] | 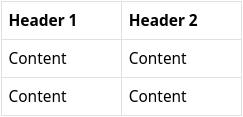 |
[table] [tr] [th]Header 1[/th][th]Header 2[/th] [/tr] [tr][td]Content[/td][td]Content[/td][/tr] [tr][td]Content[/td][td]Content[/td][/tr] [/table] | 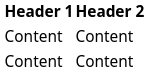 |
Links and Embedded Content
| BBcode syntax | Output |
|---|---|
[video]video URL[/video] [audio]audio URL[/audio] | VIDEO AUDIO |
[video='URL_TO_POSTER']video_link[/video] |  |
[url=https://hubzilla.org]Hubzilla[/url] | Hubzilla |
An image [img]https://example.org/image.jpg[/img] in some text |  |
Hubzilla spezific codes
| BBcode syntax | Output |
|---|---|
Magic-auth version of [url] tag [zrl=https://hubzilla.org]Identity-aware link[/zrl] |  |
Magic-auth version of [img] tag [zmg]https://hubzilla.org/some/photo.jpg[/zmg] | Image is only viewable by those authenticated and with permission. |
Observer-dependent output:[observer=1]Text to display if observer IS authenticated[/observer] | |
[observer=0]Text to display if observer IS NOT authenticated[/observer] | |
[observer.language=en]Text to display if observer language is English[/observer] | |
[observer.language!=de]Text to display if observer language is not German[/observer] | |
[observer.url] | channel URL of observer |
[observer.baseurl] | website of observer |
[observer.name] | name of observer |
[observer.webname] | short name in the url of the observer |
[observer.address] | address (Nomad/Zot-id) of observer |
[observer.photo] | profile photo of observer |
What is a spoiler? [spoiler]Text you want to hide.[/spoiler] | What is a spoiler? Click to open/close |
[toc data-toc='div.page-body' data-toc-headings='h1,h2'] Create a table of content in a webpage or wiki page. Please refer to the original jQuery toc to get more explanations. Optional param: 'data-toc'. If omitted the default is 'body' Optional param: 'data-toc-headings'. If omitted the default is 'h1,h2,h3' | |
[rpost=title]Text to post[/rpost] The observer will be returned to their home hub to enter a post with the specified title and body. Both are optional | [[baseurl]/rpost?f=&title=title&body=Text+to+post](file:///home/daniel/Fediverse/orig doc/member/[baseurl]/rpost?f=&title=title&body=Text+to+post) |
This requires the qrator plugin. [qr]text to post[/qr] |  |
This requires a suitable map plugin such as openstreetmap. [map] | Generate an inline map using the current browser coordinates of the poster, if browser location is enabled |
This requires a suitable map plugin such as openstreetmap. [map=latitude,longitude] | Generate a map using global coordinates. |
This requires a suitable map plugin such as openstreetmap. [map]Place Name[/map] | Generate a map for a given named location. The first matching location is returned. For instance "Sydney" will usually return Sydney, Australia and not Sydney, Nova Scotia, Canada unless the more precise location is specified. It is highly recommended to use the post preview utility to ensure you have the correct location before submitting the post. |
[©] | © |
The grid
The ‘Grid’ is the name given to the network of all Hubzilla hubs that communicate with each other via the Nomad protocol. The grid is effectively a subset of the Fediverse and includes all Hubzilla servers.
The stream
The stream is the list of posts, comments and boosts from users in the Fediverse. It is sorted in reverse chronological order (the most recent posts appear at the top). Exactly which posts are shown here depends largely on your authorisation settings. The stream (also known as the ‘timeline’ in other Fediverse services) can be filtered using various filters: by direct messages, events, polls, privacy groups, forums, flagged posts, your own posts, saved folders and names. The stream in the Fediverse is not created by algorithms that select supposedly interesting content for the user, but is determined exclusively by the user himself. In Fediverse, you, the user, are the algorithm for the stream.
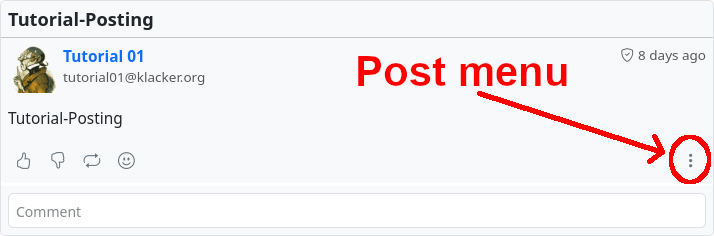
Interact with posts
You can interact with posts that you see in the stream. This is one of the purposes of social networks. You can comment on such a post, but there are also other ways of interacting. The buttons for this can be found at the bottom right of the post.

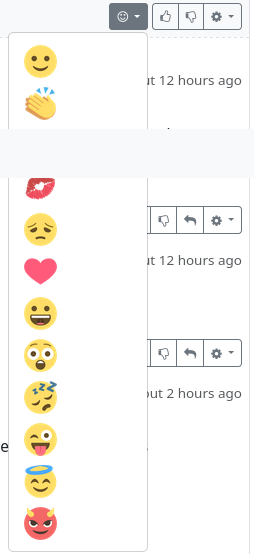
You can ‘like’ 🖒 or ‘dislike’ a post 🖓 or you can react to a post with an emoji:
Further functions can be found in the ⚙ menu.
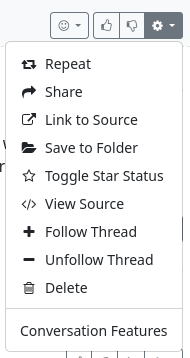
Repeat
By repeating posts, the post is distributed to your own connections. Comments end up in the original post (in contrast to shared posts).
This behaviour corresponds to ‘boosting’, as we know it from Mastodon or other Fediverse services, for example.
Share
When posts are shared (forwarded), a post by another user is posted again on your own channel. A new conversation is created in your own channel. Comments are added to the new conversation and not to the original one. Sharing posts only works from the stream or your own channel, but not from a ‘third-party’ channel.
Link to source
Link to source’ takes you to the actual source of a post. You end up at the original post on the instance of the post creator.
Save to folder
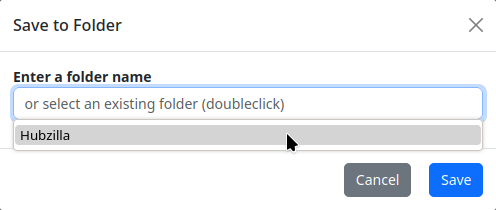
If you want to remember postings for later, you can do this by marking them (star). However, if you have a large number of postings marked in this way, it can easily become confusing. It is more practical to save such posts in different ‘folders’. These are categorised markings. If you select ‘Save in folder’, a dialogue window opens to select the folder.
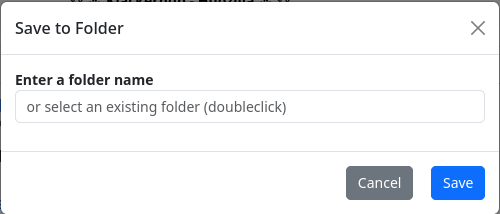
You can enter a folder name in the text field. If folders already exist, a double click in the text field will display a selection list of the existing folders so that you can select one of them.
If you have placed a post in a folder, you can recognise this by the folder symbol (including folder name) at the bottom left of the post.

This icon can also be used to remove a post from a folder by clicking on the ‘X’ in the icon.

In the stream view, you will find the entry ‘Saved folders’ in the left sidebar. If you click on it, all existing folders are displayed. If you now select a folder, all the posts that you have saved in this folder will be displayed in (reverse) chronological order in the stream. This feature is comparable to the ‘clips’ (= categorised bookmarks) as known from Misskey and the Forkeys.
Toggle Star Status
Switching the marking star should not be confused with ‘starring’ (= favouriting) other feed services (e.g. Mastodon). While ‘starring’ in these services represents a positive evaluation of the post, which corresponds most closely to a ‘link’, marking with a star in Hubzilla is comparable to setting a bookmark. By toggling (one click sets the star, another removes it again), the post is set as a kind of bookmark for the user. You can recognise a ‘starred’ post by the star symbol at the bottom left.

In the stream view, you will find the entry ‘Marked posts’ in the left sidebar. If you click on it, all marked posts are displayed in (reverse) chronological order in the stream.
Show source code
You can use this function to display the source code of a post. The content is therefore not rendered in formatted form, but includes the text including all markup tags (Markdown, bbCode, HTML). The function therefore seems to be more for advanced or very curious users.
However, it does contain a feature that can be helpful for everyone.
In addition to the internal post ID, there are two hyperlinks: ‘plink’ and ‘llink’.

‘plink’ means “permalink” and corresponds to the link to the source. ‘llink’ means “local link” and refers to the location of the post on your own instance (hub). Clicking on it does not cause you to leave your own instance, but displays the post in the single view.
Follow / unfollow conversation
With Follow conversation / Unfollow conversation you can switch whether you want to follow a thread, i.e. whether you want to receive notifications about comments/replies, likes, dislikes, emoji reactions or that the post has been shared or re-shared.
Delete
This function can be used to delete posts from the stream. A normal user does not have this option in the global stream. Only an administrator can remove posts from this stream.
Conversation features
You can use this dialogue to define certain conversation features for a post:
- Allow emoji reactions
- Allow dislikes
- Allow local marking (asterisks)
- Allow replies to comments
Public Stream
If the administrator of a hub has activated the public stream, you as a user can install and activate the ‘Public stream’ app.
While all posts and activities from yourself and all your connections appear in the ‘normal’ stream, the public stream is more comprehensive.
There are two options:
- If the administrator has restricted the public stream to their own hub, all public posts and activities from the streams of all users who have an account on this hub will appear there.
- If the administrator has not restricted the public stream to their own hub, all public posts from all channels of their own hub, public content that arrives at their own hub (e.g. comments on posts by hub users that originate from other instances) and randomly collected content from channels that are known to their own hub (i.e. all contacts from all channels on their own hub) will be displayed.
The public stream is not unmoderated. The administrator of a hub has the option of deleting posts from the public stream (‘Admin delete’). These posts are then actually deleted from the public stream of their own hub. They also do not appear in the public stream view of other channels of the hub.
Apps
A freshly installed Hubzilla instance has a number of basic functionalities. However, there are many features that are not part of the basic installation and are not immediately available for a newly created channel.
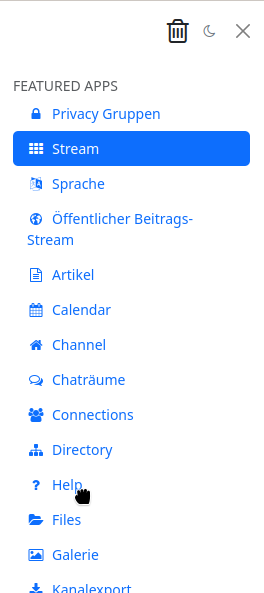
The majority of functions are realised as ‘applications’ (or ‘apps’ for short). You can access the apps using the ‘app menu’, which is symbolised by the ‘⋮’ button (and is located on the far right of the navigation bar on most hubs). You can also pin frequently used apps to the navigation bar so that you don't have to open the app menu every time you call them up.
How many and which apps are available to you depends on how the administrator has configured the hub.
App management
You can manage the apps for your channel using app management. You can also access this in the app menu under the lowest menu item ‘+ Apps’
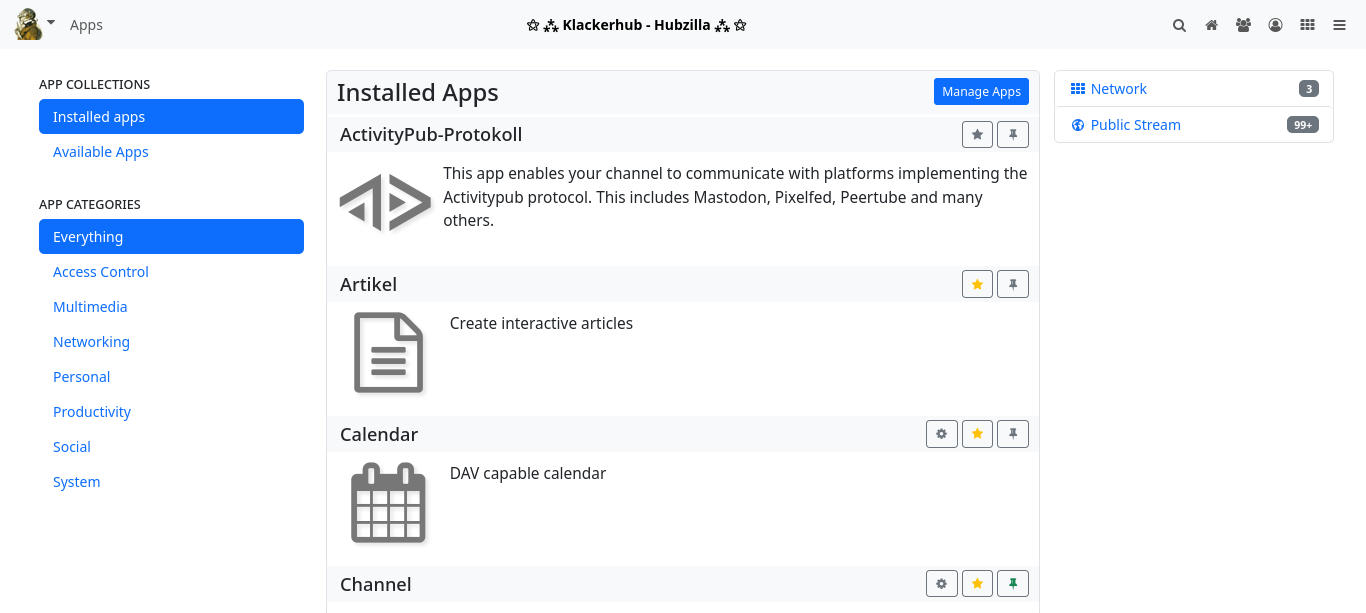
After calling up the app management, the apps already installed are displayed.
You can now switch between ‘Installed apps’ and ‘Available apps’ in the left-hand sidebar.
Available apps
In the available apps, you will find all the apps available on your hub. Some of them are already installed. You can use the button next to the app to install apps or update apps that are already installed.

Installed apps
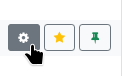
The Installed apps tab contains all the apps that are installed for your channel. To the right of each app there are two or three buttons with icons: a star icon, a pinhead icon and, if applicable, a cogwheel icon.
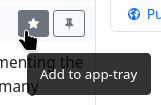
The star symbol is used to make the app accessible as a menu item in the app menu.

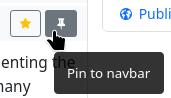
You can pin the app in the navigation bar using the pin symbol.
If there is a dialogue for app-specific settings for an app, you can access this via the button with the cogwheel symbol.
Manage apps
There is also a button labelled ‘Manage apps’ at the top of the installed apps tab. This button takes you to the ‘Manage apps’ page, where you can uninstall apps and also edit installed apps within certain limits.

It is also possible to create your own apps there (only for advanced users!).
Sorting apps in the menu
You can easily sort the apps you have added to the app menu using drag-and-drop and specify your preferred order.
Important apps
If you want to use your channel mainly for social networking, there are some apps that are not installed or activated by default, some of which are essential.
To participate in the entire Fediverse, you need to install the ‘ActivityPub Protocol’ app.
To make it easier to find worthwhile contacts and find out what is happening in the Fediverse, you can install and use the ‘Public stream’ app.
The ‘NSFW’ app, with which you can create and use your own content warning filters, is also useful and recommended.
You should also install the ‘Superblock’ app, which allows you to completely block certain users. The ‘Privacy Groups’ app is also important. This makes it possible to create contact groups and filter them, as well as to communicate with the contacts in the groups.
Please note: The ‘Public stream’ app is only available for installation if the hub administrator has activated this stream.
Connections
You can use the ‘Connections’ app to display all your connections.
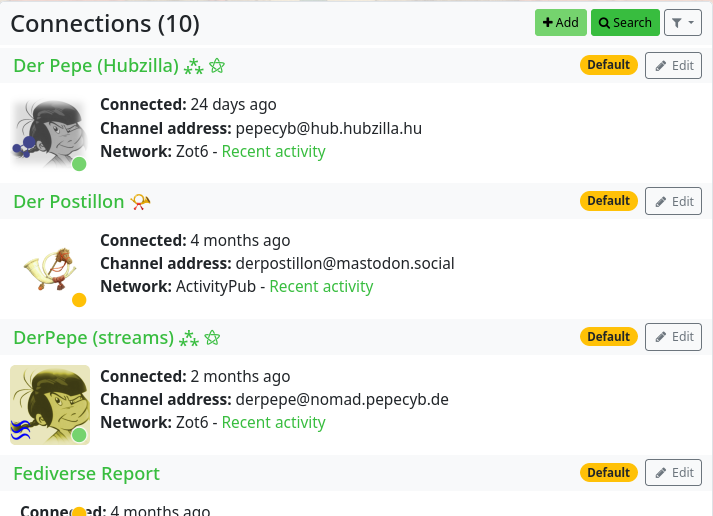
In the overview, for each connection
- the channel name
- the date of the connection
- the channel address (handle)
- the network of the contact (ActivityPub, Zot (Nomad), RSS, Diaspora...)
- you can use a filter next to it to display the channel's recent activities in the stream
- the profile picture
- and a coloured dot (traffic light colours) indicates the rights granted by the contact (if you rest the mouse pointer over the coloured dot, the rights granted are displayed)
can be seen.
A label is also displayed which shows the type of connection or warns that (in the case of clones) there is no connection at this location. There is an ‘Edit’ button on the right of each contact entry, with which you can edit the connection using the connection editor.
Connection editor
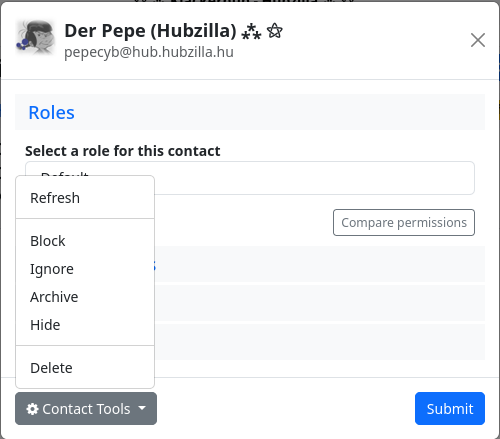
If you click on the ‘Edit’ button for a contact in the ‘Connections’ app, the connection editor opens. You can use the editor to assign a specific contact role to a contact. If required, you can use the ‘Contact Roles’ button to display the existing roles and also create new roles. Another button (Compare authorisations) allows you to compare the assigned authorisations with those of the standard authorisation role.
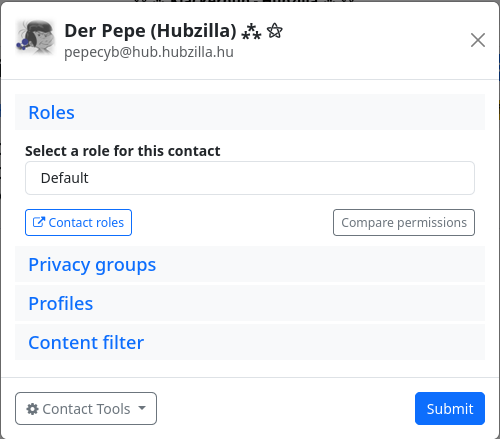
You can use the ‘Privacy groups’ tab to assign a contact to one or more privacy groups.
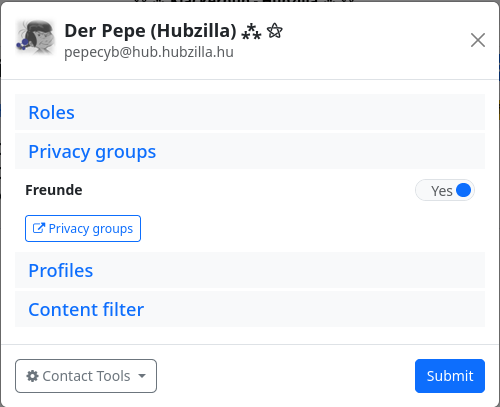
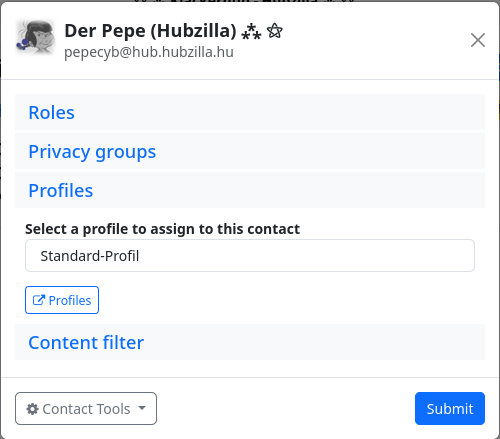
You can use the ‘Profiles’ tab to specify which of your profiles (if you have created several) is displayed to the contact.
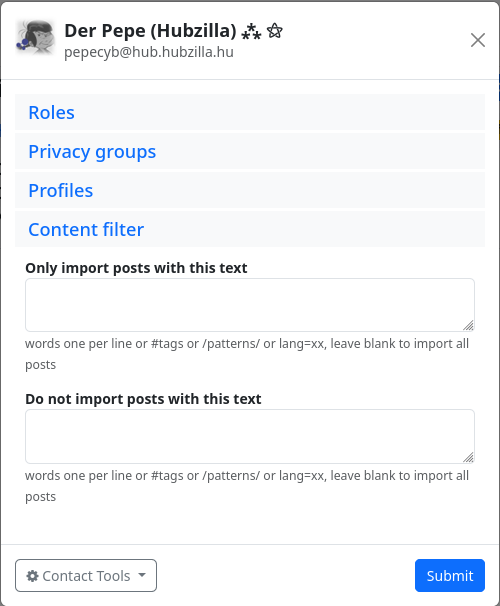
With the content filters, you can filter out posts from a contact with certain content or use filters to specify that only posts with defined content end up in the stream.
You can use the contact tools to
- block the contact,
- ignore,
- archive,
- hide
or
- delete.
Diaspora Compatibility
The Diaspora Protocol addon allows a site to communicate using the Diaspora protocol, which allows communications and connections to be made with Diaspora members (and also Friendica members, since that network also provides the Diaspora Protocol).
This addon is available in the 'basic' and 'standard' server configurations. It is not available with and the plugin is disabled completely when you are using the 'pro' server configuration. The reason for this is that the Diaspora protocol is not very sophisticated and many $projectname features do not work well with it.
Members will have to be aware of limitations of the protocol or limit their own activities to those which are compatible with Diaspora. The 'pro' server configuration is free from these limitations and you may use all of the project features and abilities without regard for how they translate to other networks. Many features are unique to Hubzilla and are supported by the Nomad protocol, which is our native communications language between servers/hubs.
If you are using a configuration which allows direct Diaspora communications you should be aware of the limitations presented here.
- Private mail retraction (unsend) is not possible for Diaspora connections.
- Private posts and their associated comments are sent in plaintext email notifications in Diaspora and Friendica. This is a major privacy issue and affects any private communications you have where any member of the conversation is on another network. Be aware of it.
- Access control only works on posts and comments. Diaspora members will get permission denied trying to access any other access controlled hubzilla objects such as files, photos, webpages, chatrooms, etc. In the case of private photos that are linked to posts, they will see a "prohibited sign" instead of the photo. Diaspora has no concept of private media and provides an illusion of photo privacy by using obscured URLs rather than protecting the photo from snooping by unauthorised viewers.
There is no workaround except to make your media resources public (to everybody on the internet).
- Edited posts will not be delivered. Diaspora members will see the original post/comment without edits. There is no mechanism in the protocol to update an existing post. We cannot delete it and submit another invisibly because the message-id will change and we need to keep the same message-id on our own network. The only workaround is to delete the post/comment and do it over. (If this is a post, this will delete any existing likes/comments). We may eventually provide a way to delete the out of date copy only from Diaspora and keep it intact on networks that can handle edits.
- Nomadic identity ($projectname 'standard' only) will not work with Diaspora. We may eventually provide an option which will allow you to "start sharing" from all of your clones when you make the first connection. The Diaspora person does not have to accept this, but it will allow your communications to continue if they accept this connection. Without this option, if you go to another server from where you made the connection originally or you make the connection before creating the clone, you will need to connect with them again from the new location.
- Post expiration is not supported on Diaspora. We may provide you an option to not send expiring posts to that network. In the future this may be provided with a remote delete request.
- End-to-end encryption is not supported. We will translate these posts into a lock icon, which can never be unlocked from the Diaspora side.
- Message verification will eventually be supported.
- Multiple profiles are not supported. Diaspora members can only see your default profile.
- Birthday events will not appear in Diaspora. Other events will be translated and sent as a post, but all times will either be in the origination channel's timezone or in GMT. We do not know the recipient's timezone because Diaspora doesn't have this concept.
- We currently allow tags to be hijacked by default. An option is provided to allow you to prevent the other end of the network from hijacking your tags and point them at its own resources.
- Community tags will not work. We will send a tagging activity as a comment. It won't do anything.
- Privacy tags (@!somebody) will not be available to Diaspora members. These tags may have to be stripped or obscured to prevent them from being hijacked - which could result in privacy issues.
- Plus-tagged hubzilla forums should work from Diaspora.
- You cannot use Diaspora channels as channel sources.
- Dislikes of posts will be converted to comments and you will have the option to send these as comments or not send them to Diaspora (which does not provide dislike). Currently they are not sent.
- We will do the same for both likes and dislikes of comments. They can either be sent as comments or you will have the ability to prevent them from being transmitted to Diaspora. Currently they are not sent.
- Emojis are currently untranslated.
- "observer tags" will be converted to empty text.
- Embedded apps will be translated into links.
- Embedded page design elements (work in progress) will be either stripped or converted to an error message.
- Diaspora members will not appear in the directory.
- There are differences in oembed compatibility between the networks. Some embedded resources will turn into a link on one side or the other.
Directory
Hubzilla offers a channel directory via the app (in the app menu ⋮). The Hubzilla Grid channels are listed in the directory.
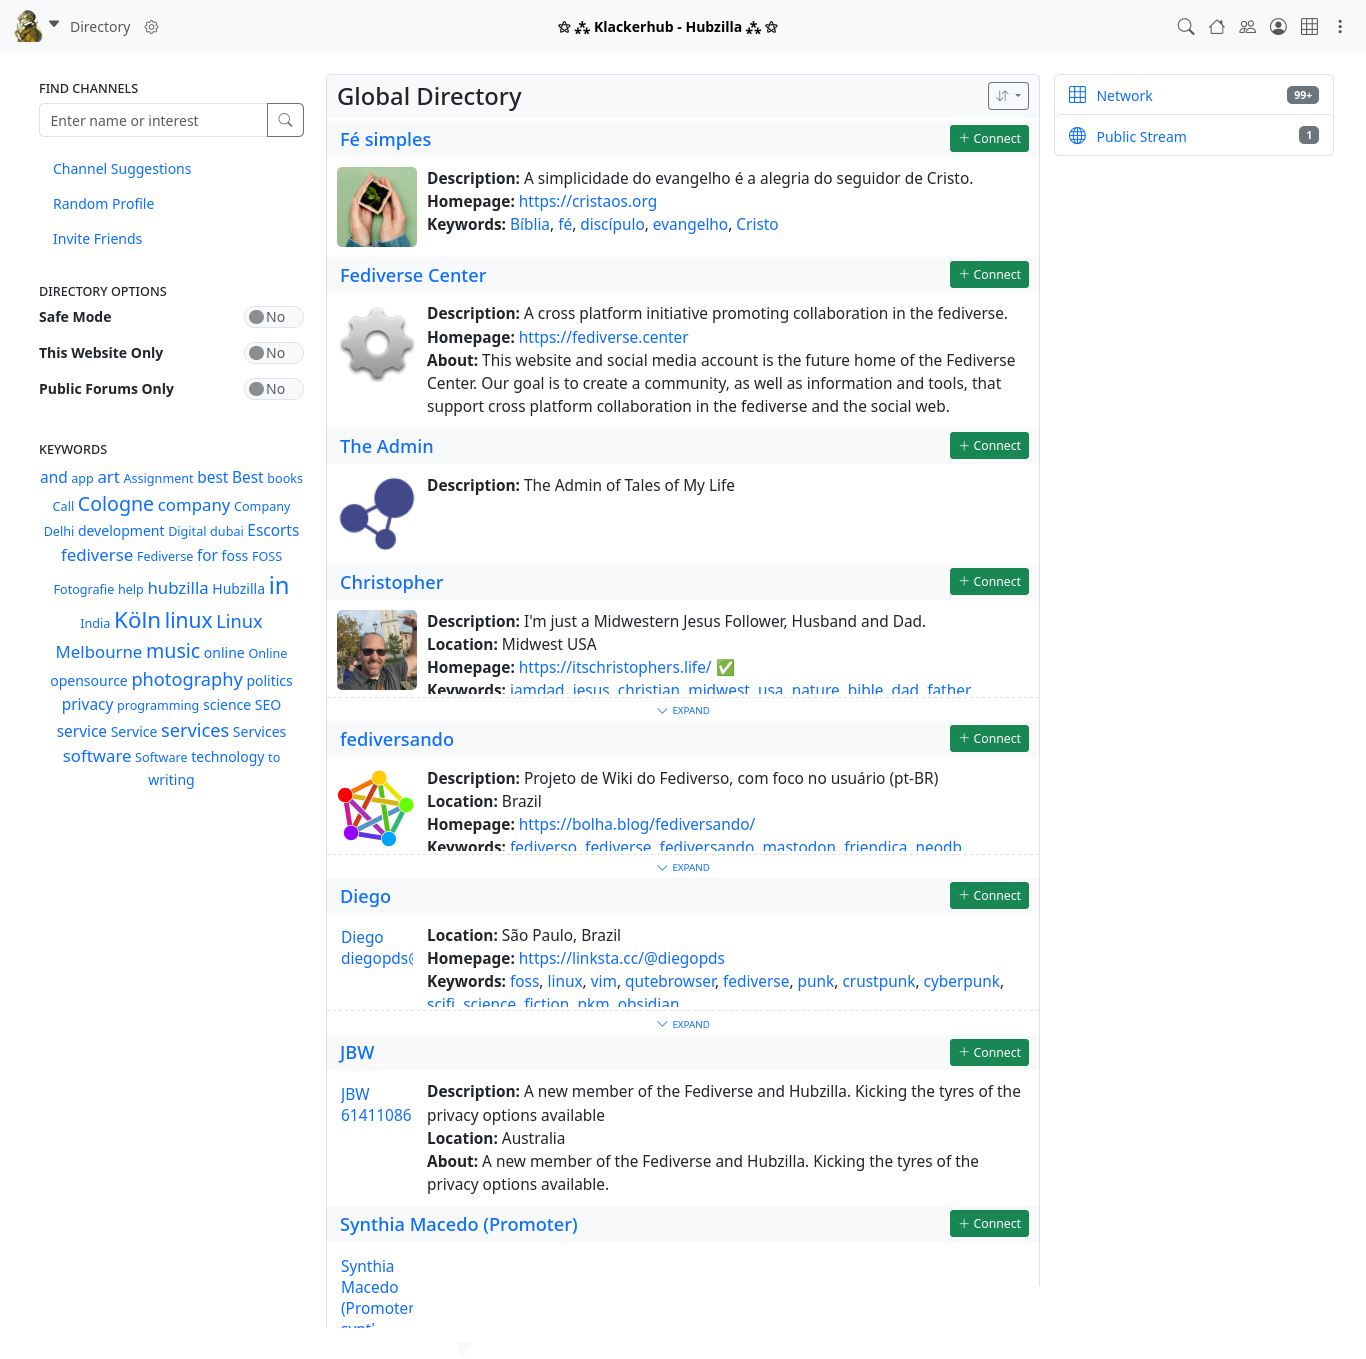
The directory options in the left sidebar can be used to filter the scope of the directory. For example, you can restrict the listing to channels from your own hub.
There is also a keyword cloud in the left sidebar, which you can use to find channels with corresponding interests/focal points.
There is also a search field in the left sidebar to find channels by name / name components or interests (keywords).
You can then connect directly to a channel found by clicking on the corresponding button.
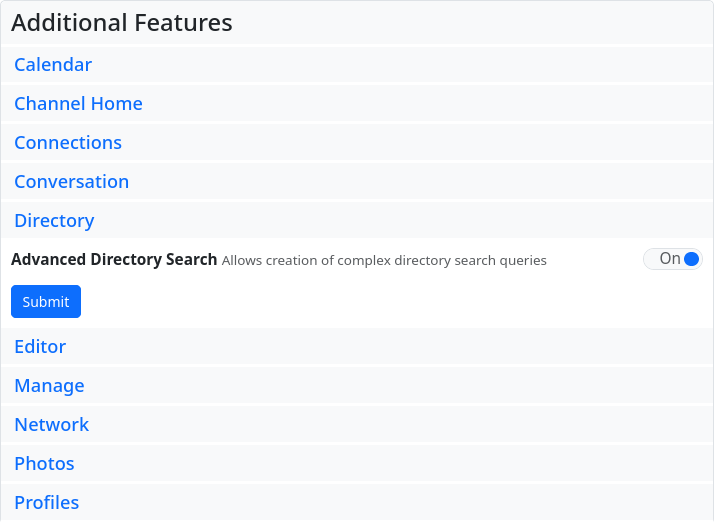
Advanced Directory Search
Advanced Directory Search is enabled in "Expert Mode" from your Settings => Additional features page.
On the Directory page an option named "Advanced" will apear in the "Find Channels" widget (typically in the sidebar). Clicking "Advanced" will open another search box for entering advanced search requests.
Advanced requests include
-
name=xxx [Channel name contains xxx]
-
address=xxx [Channel address (webbie) contains xxx]
-
locale=xxx [Locale (typically 'city') contains xxx]
-
region=xxx [Region (state/territory) contains xxx]
-
postcode=xxx [Postcode or zip code contains xxx]
-
country=xxx [Country name contains xxx]
-
gender=xxx [Gender contains xxx]
-
marital=xxx [Marital status contains xxx]
-
sexual=xxx [Sexual preference contains xxx]
-
keywords=xxx [Keywords contain xxx]
There are many reasons why a match may not return what you're looking for, as many channels do not provide detailed information in their default (public) profile, and many of these fields allow free-text input in several languages - and this may be difficult to match precisely. For instance you may have better results finding somebody in the USA with 'country=u' (along with some odd channels from Deutschland and Bulgaria and Australia) because this could be represented in a profile as US, U.S.A, USA, United States, etc...
Future revisions of this tool may try to smooth over some of these difficulties.
Requests may be joined together with 'and', 'or', and 'and not'.
Terms containing spaces must be quoted.
Example:
name="charlie brown" and country=canada and not gender=female
Blocking/ignoring/archiving/hiding channels
Channels in your address book can have the status ‘ blocked’, ‘ ignored’,‘ archived’ or ‘ hidden’. There is a filter on your connection page that displays the channels with these statuses.
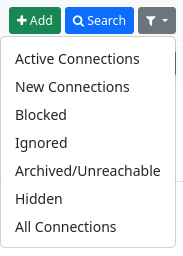
You can change the status of a channel on the pages for editing connections.
The meaning:
Blocked: The channel cannot read your items, regardless of permissions, and it cannot write to your channel.
Ignored: The channel can read your items if it is authorised to do so, but it cannot write to your channel.
Hidden: The channel is not displayed in the connection list of your profile. No one can see that you are connected to it. Note: It is still visible to your other connections, for example in replies to posts.
Archived: If a channel cannot be reached for 30 days, it is automatically marked as archived. This means that all data is retained, but the channel is no longer queried for new information and is removed from the auto-complete. If you find out later that the channel is online again, you can remove it manually from the archive.
Superblock
The ‘Superblock’ app is a moderation method for your own stream. While Hubzilla's normal functionality only allows you to block users you are connected to using the contact tool, Superblock works regardless of whether you are connected to a contact or not.
If you notice a user in the stream with whom you are not connected (because their posts are shared by a contact from your own address book) and - for whatever reason - you do not want to have any posts from this Fediverse user in the stream, you can achieve this with the ‘Superblock’ app.
To do this, click on the small white triangle in the avatar of the user you want to block.
A pull-down menu opens, which contains the menu item ‘Block completely’ at the bottom. Clicking on this menu item places the user in the superblock list. Posts from this user will no longer appear in their own stream. Affected posts are immediately hidden in the stream. In addition, this user will no longer be able to read your posts, regardless of their authorisations, nor will they be able to post to your channel.
If you select the ‘Superblock’ app in the app menu (top right ⋮), a list of all blocked contacts is displayed.
A ‘rubbish bin icon’ is displayed next to each contact. Click on this icon to remove the user from the block list. The user can then follow you again, see your posts and also comment on them and their posts will also appear in the stream again (e.g. by sharing a contact).
Superblock is not installed and activated by default for new channels.
Permissions
Permissions are a core element of Hubzilla. They allow very fine-grained options for making content accessible, hiding it or restricting its use. They are also used to make direct messages possible by using authorisations to determine who can see the post (direct messages are nothing else) and who cannot.
Permissions for content
If you share content on Hubzilla, i.e. publish posts, upload images or texts, enter appointments in the calendar, you can define exactly who has access to this content. You can access the permission settings for content via a button ("Privacy Tool") with a padlock symbol 🔒or 🔓.
For sharing posts: 
For creating folders/directories in the cloud storage: 
For uploading files: 
For sharing dates/events: 
There are also corresponding permission setting options for websites, wiki pages and various other content.
If you click on the icon, the permissions dialogue opens, which you can use to set the permissions for other users (this is usually about the visibility of content).
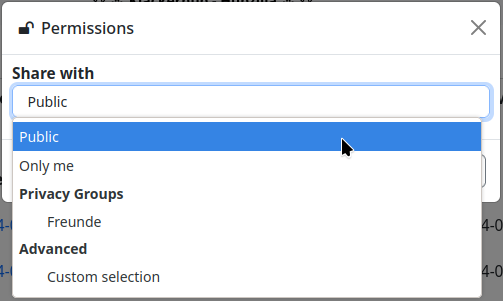
You have the choice between
- Public - As the name suggests, the content is visible to everyone on the Internet. So even for users who do not use a Fediverse service.
- Only me - Here, only the user who created the content can see it. They ‘share’ it with themselves.
- Privacy groups - The content is visible to all users who are in one of your privacy groups.
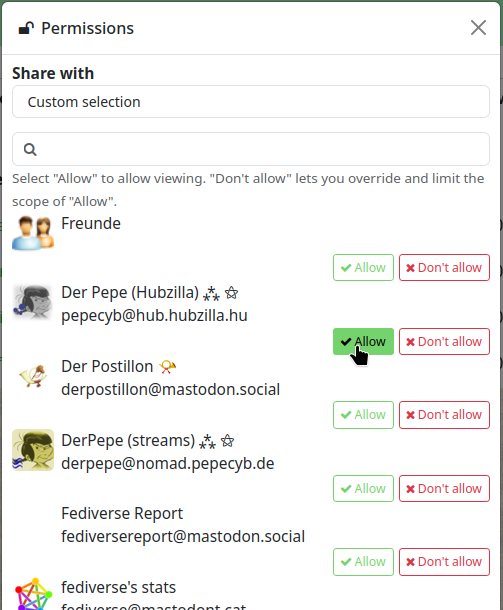
- Customised selection - Here you can specify exactly who can see the content. It is also possible to combine privacy groups and individual contacts by selecting ‘Allow’ or ‘Deny’ for the respective entry.
Important note: Once permissions for postings have been set, they can no longer be changed! A posting is immediately distributed to an indeterminable number of other servers, so that permissions cannot be subsequently granted or withdrawn, whereas permissions for other content such as files, images, etc. can be subsequently edited because this content is only stored on your own instance (hub) and only the reference to the content is passed on when it is shared.
Permissions - User-defined channel roles
Channel roles define which rights are granted when interacting with a channel. They can be accessed under ‘Settings’ → ‘Channel settings’.
The role for a channel can be defined here. Channel roles also have an influence on contact roles because individual rights that are specified and inherited from the channel roles overwrite your own settings there. To truly customise the role permissions of your channel, you must select ‘User-defined’ as the channel role.
The other roles (‘Public’, ‘Personal’, ‘Community Forum’) are predefined authorisation roles (see: Channel roles).
With the customised channel roles, you can define who can perform the following interactions and how:
- Can see my channel stream and my posts
- Can send me the posts from their channel
- Can see my default profile
- Can see my connections
- Can see my file and image folders
- Can upload/modify my file and image folders
- Can see the web pages of my channel
- Can see my wiki pages
- Can create/edit web pages in my channel
- Can edit my wiki pages
- Can publish posts on my channel page (‘wall’)
- Can send me direct messages
- Can like/dislike profiles and profile stuff
- Can chat with me
- Can quote/mirror my public posts in other channels
- Can administer my channel
The following authorisations are then available for these interactions:
- Only me
- Only those you explicitly allow
- Accepted connections
- Any connections
- Everyone on this website
- All Hubzilla members
- Anyone authenticated
- Anyone on the Internet
To edit the custom role, select ‘Privacy settings’ in the settings. At the bottom right you will find the button ‘Custom channel role configuration’. If you click on it, a warning dialogue appears, which draws your attention to the risks of incorrect configuration. If you confirm that you want to edit the rights, the settings dialogue for the user-defined role rights opens.
Important note: The user-defined roles should be set with caution and harbour the risk that the channel will no longer behave as desired with certain configurations.
Permissions - Contact roles
Contact roles are used to create roles (i.e. a collection of rights and options) for contacts. These roles can then be assigned to a contact or all contacts in a privacy group (not the group itself). This restricts or extends the possibilities of contacts.
The ‘Contact roles’ app can be used to create roles that correspond to the channel roles. This permission role can then be assigned to individual contacts or all contacts in a privacy group in the contact editor or privacy group editor.
Direct messages
Direct messages are messages that are addressed to one or more individual connections. They are accessible via the network stream. A filter for direct messages has been added to the stream filter widget for quick access.
If you want to send a direct message to one (or more) other users (direct messages can only be read by the recipients and the sender), you write a normal post and address it exclusively to the recipient(s) using a special mention. This is done with the private mention (privacy tag). A privacy tag is a name that is preceded by the two characters @! and which, in addition to marking these channels, also changes the data protection authorisations of the post so that only these are taken into account.
You do not need to use a privacy tag to reply to a DN ‘privately’, i.e. as a DN. You simply reply directly to the incoming DN, which distributes the reply to all original recipients.
As an alternative to the privacy tag, you can also select channels or privacy groups from the privacy tool (🔒). This is the more complicated way, but it also works. However, the use of a privacy tag overwrites any selection made in the privacy tool. So if you write a post that is to be sent as a direct message, you can omit the privacy tag and instead click on the padlock symbol next to the ‘Share’ button to access the authorisation settings.
Mentions
Channels (users) are labelled by simply prefixing their name (handle) with the @ sign. @Jack
When you mention someone, an autocomplete field is created from which you can select your immediate connections. Select accordingly.
If the contact is authorised to receive your posting, they will receive a tag notification.
If the addressee is not in your contact list, you must write out the handle after the ‘@’ sign. If the recipient also authorises mentions of third parties, they will also be notified of the mention.
Tags
Tags (also called thematic tags, hashtags or topical tags) Tags are displayed by prefixing the tag name with the ‘#’ character. This creates a link in the post to a generalised website search for the specified term. For example, #cars will provide a search link for all posts that mention ‘cars’ on your website. Topical tags are usually at least three characters long. Shorter search terms are unlikely to return search results, but this depends on the database configuration.
Thematic tags are also usually not linked if they are purely numeric, e.g. #1. If you wish to use a numeric hashtag, please include descriptive text such as #2012-elections or enclose the entire tag in double quotes (e.g. #"2012″). Double quotes are also required if the tag contains spaces (#"My Tag") and may be required if the tag contains punctuation (#"EndsWithPeriod." Or #"Exciting !!!").
Bookmarks
Bookmarks specify a link that can be saved in your bookmarks folder. They use the character string #^ followed by the link. These are often generated automatically. If the administrator of the Hub has installed the ‘bookmarker’ add-on, this sequence is converted into a bookmark symbol when the post or comment is viewed online.


If you click on the icon, the bookmark is saved. If the bookmark add-in is not installed, the post drop-down menu contains a link to save the bookmark or bookmarks.
To use bookmarks, you must install the ‘Bookmarks’ app.
The app will then list all the bookmarks you have set.
Search
To quickly find information, you can use the search function. To do so, click on the icon in the navigation bar.


This searches the entire hub. You can search for hashtags, handles and text.
In the channel view, there is also a search field in the left sidebar. It only searches the stream of your own channel. Searches that have been performed in this widget can also be saved by clicking on the floppy disc symbol next to the search field. The saved search is then displayed in a list of search terms below the search field and can be repeated at any time with a single click.
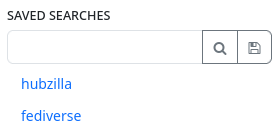
Article
The article is a macroblogging post type at Hubzilla and is suitable for real blog posts, for example. Unlike normal posts, which are distributed throughout the entire network (including the Fediverse), articles remain on your own hub. They are only accessible to users of other instances and users who do not have an account in the Fediverse via their URL. Of course, the URL can be shared so that the article will still be known in the Fediverse and can be accessed. You can create an article using the app (app menu ⋮) ‘Article’. When you open it, all created articles are displayed and you have the option to create a new article (‘Add article’).
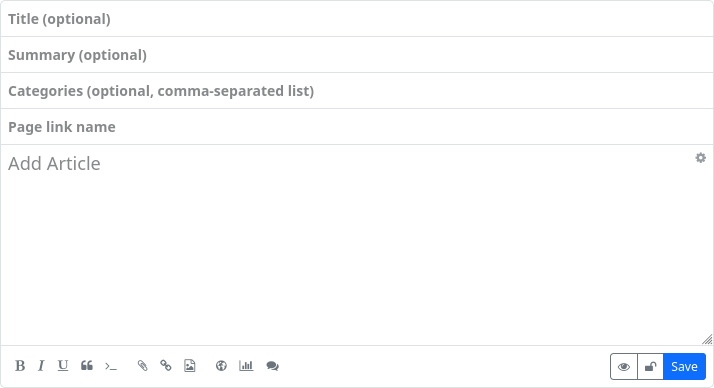
Creating an article is similar to creating a normal post. However, the input form has an additional field: ‘Link to page’.
Here you can enter an easy-to-read link name. If you leave this field empty, a name will be assigned automatically (longer and more ‘cryptic’).
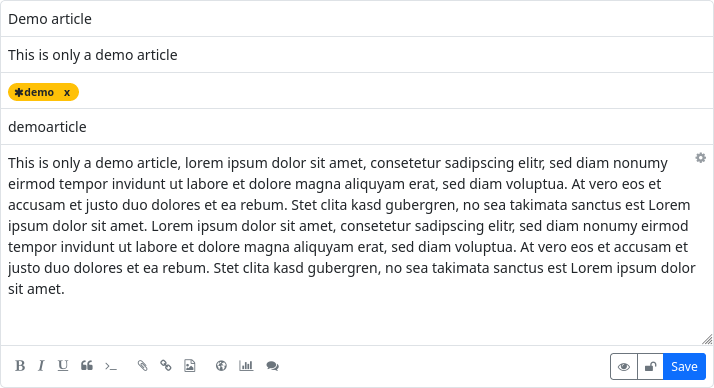
If you have filled in the optional ‘Summary’ field, only the summary of an article will initially be displayed, just like a normal post.
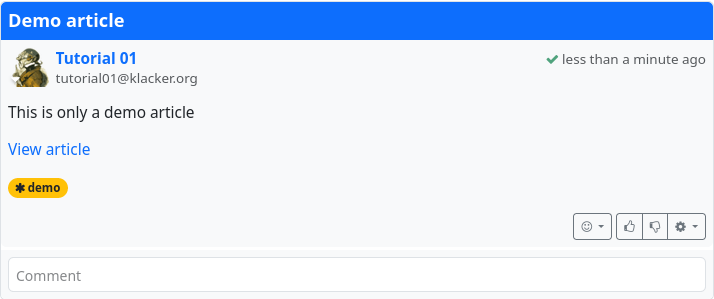
If you click on ‘View article’, the article itself will be displayed.

The direct link to the article is composed as follows:
URL-of-your-hub/articles/channel-name/link-to-page

Files
Hubzilla provides cloud functionality. This means that you have a directory for each channel in which you can create further subdirectories and store files. You can define precise access rights for each directory, and even for each individual file. These can range from visibility for the general public, to visibility for members of certain groups, to individual approval for individual members of your own connections. It is even possible to share files with people who do not have a Hubzilla identity. This is done using guest access tokens.
Creating and deleting directories and creating and deleting files is really easy. You can access your cloud storage via the ‘app menu’ (⋮) → Files. You can also upload images via the files section, which is also possible via the ‘Photos’ section.
The files can be displayed in a list view
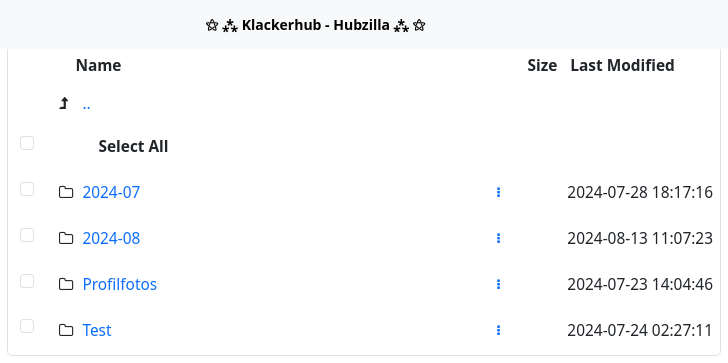
or in a tile view
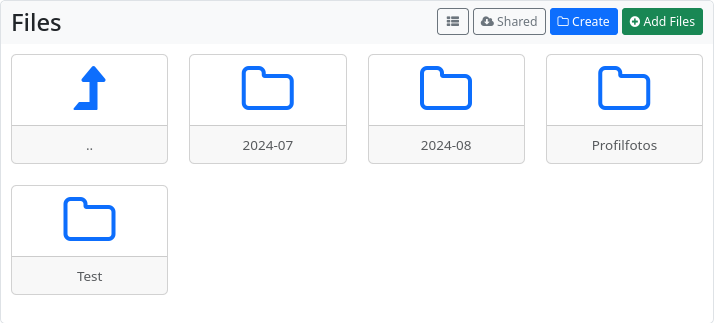
You can create new directories/folders with the ‘Create’ button. When creating a folder, you can also immediately define the permissions for the new folder (🔓).
With the ‘+ Add files’ button, you can upload files to your cloud. Here, too, you can set the access permissions directly.
To set or change access rights (permissions) for directories or files at a later time, click on the context menu (︙) of the file or directory. You can also perform various file operations here.
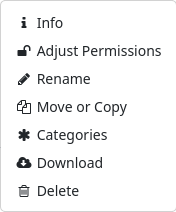
If you attach a file using the ‘📎’ button when creating a post or comment, this file will be stored in a new directory (sample: year-month) in the cloud, if one is created.
Photos
The Photos app is a special management/viewing tool for images uploaded to your own cloud. It displays thumbnails instead of tiles or file names, which makes it easier to find specific images.
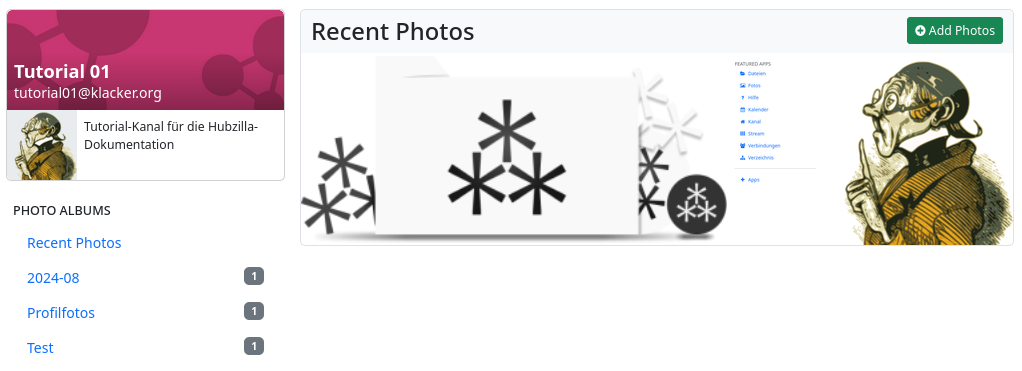
Clicking on the image will take you to the image view. There are two control icons here to switch to the next or previous photo.

There is also a ‘Photo tools’ button that allows you to set the image as a profile picture or banner and to edit the image using a menu.
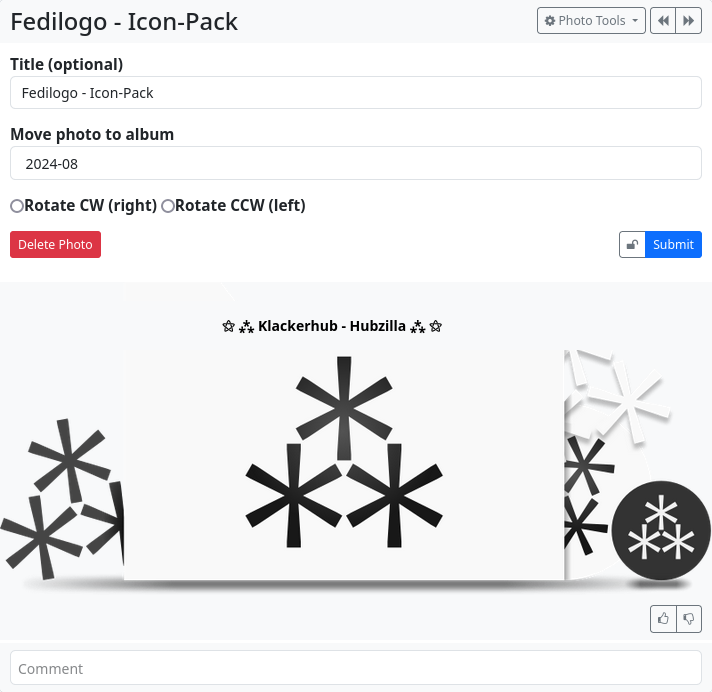
Clicking on the image again will open a full-size view.
Cloud storage
Your files are visible to everyone who is allowed to view them on the internet at <URL-of-your-hub>/cloud/<your-channel-name>. If the viewer has sufficient rights, they can also create new files and folders/directories. This option should only be used for smaller files and photos (up to a few megabytes), as it uses the internal memory. Please use WebDAV to upload larger files (videos, music, etc.). These files can still be accessed via the web access.
With WebDAV, you can copy files directly into or out of your computer's operating system, with your cloud files appearing like a virtual drive. This should be used to upload large files such as video and audio files.
The URL for the cloud directory is <URL-of-your-hub>/dav/.
If, depending on the DAV file system integration (depending on the operating system used and possibly the application), a username is required, this is the channel short name (i.e. without the leading ‘@’ and without the following ‘@hub address’). A possibly required password corresponds to your login password.
Gallery
The ‘Gallery’ app is a simple photo gallery that displays all your images from the cloud storage. The displayed images are scaled appropriately, which can lead to a slightly blurred display for smaller images. It is more practical to use the ‘Photos’ app.
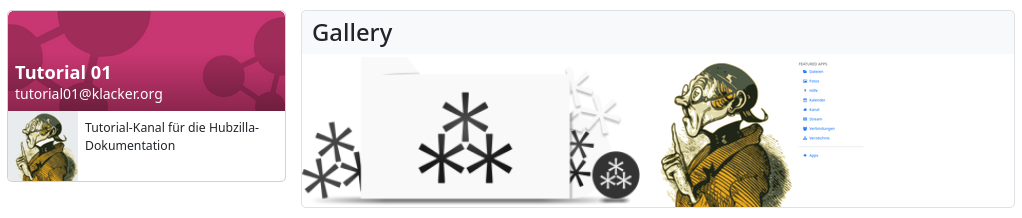
Chat Rooms
The ‘Chat Rooms’ app allows you to set up chat rooms for instant messaging within a hub and to chat with other channels within the hub.
If you access the app from the app menu, your own chat rooms will be displayed. To create a new chat room, click on the ‘Add Room’ button.
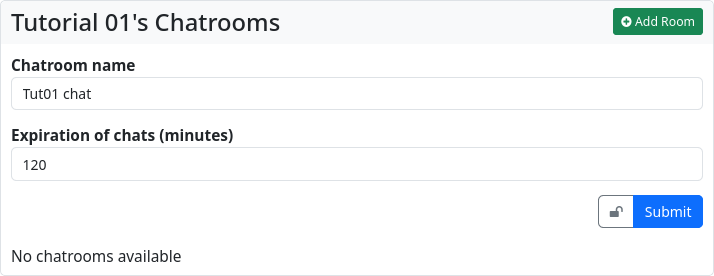
Here you have to give the chat a name and you can choose how many minutes the chat content will expire after. It is also possible to use the privacy tool (🔒) to determine who is authorised to see and use the chat room. The URL to the chat room is displayed in the browser and is also available via the link to the chat room in the left sidebar. Now you can share the URL with another user in your hub and start a chat with them.
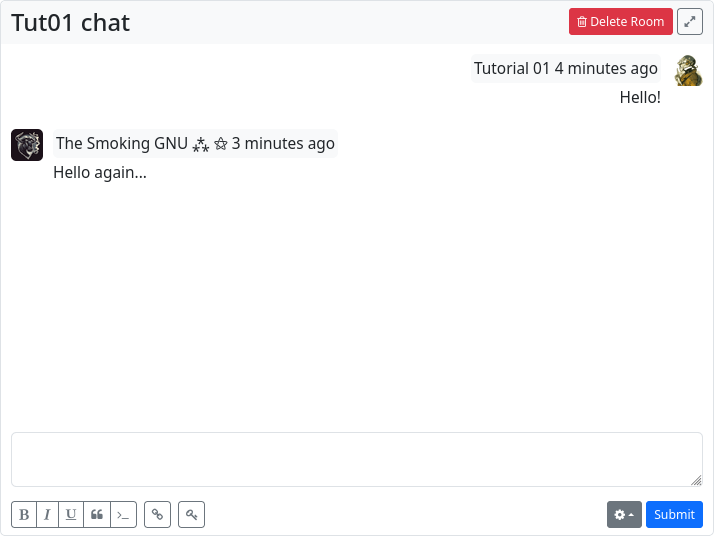
Guest access
If you would like to share private content (i.e. content that is not accessible to the public) with people who do not have a Hubzilla account, you have the option of realising this using guest access.
With guest access, you create a (possibly temporary) access that enables the user who logs in with this data to access your publicly accessible content, but also non-public content that you specifically release for guest access.
If you call up the ‘Guest access’ app, a web form is displayed with which you can set up such guest access. You enter a login name of your choice. Hubzilla has already automatically generated a password for the guest access. You can now give these two pieces of information to the person you want to give access to content.
In the ‘Expires’ field, you can also enter an expiry date after which the guest access will be automatically deleted. If you leave this field empty, the guest access will be created without a time limit. It will then never expire automatically and may have to be deleted manually.
You can also define a contact role for the guest access.
All guest accounts are listed in the left-hand sidebar. If you select a guest account there, you can edit or delete it again (even before the deadline expires).
As soon as a guest account has been created, it also appears in the ‘Authorisation settings’ (privacy tool) under ‘User-defined selection’. You can use this to explicitly authorise individual private content for the guest account (but of course also for other contacts) so that the guest can access the content.
Privacy Groups
The ‘Privacy Groups’ app allows you to create groups to which you can assign contacts. On the one hand, they serve to filter the stream (so you can only display posts from users who are in a privacy group) and, on the other hand, they allow you to grant certain groups rights to content with regard to permissions.
The first function is easy to understand. If you have contacts (a contact can be in several groups) in a group and you select a specific group in the left sidebar in the stream view, only posts from contacts in that group will be displayed. This function thus acts as a stream filter.
The second function is also easy to grasp, but rather unusual for many Fediverse users, since it only exists in this form in Hubzilla and related services (Streams, Friendica etc.). As the name ‘Privacy Groups’ suggests, this is also about restricted communication. If you select a group as the authorisation when composing a post, the post is only distributed to the contacts contained in that group and only they can see it. It is also not possible for the recipients (group members) to share such a post publicly. This allows for closed group communication.
When you open the app, existing groups are displayed in the left sidebar and the input form for creating a new group is displayed in the main view.
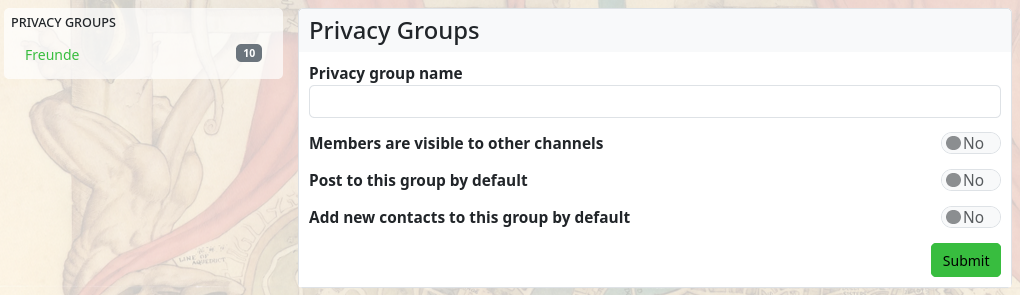
If you select one of the groups in the sidebar, you can edit it.
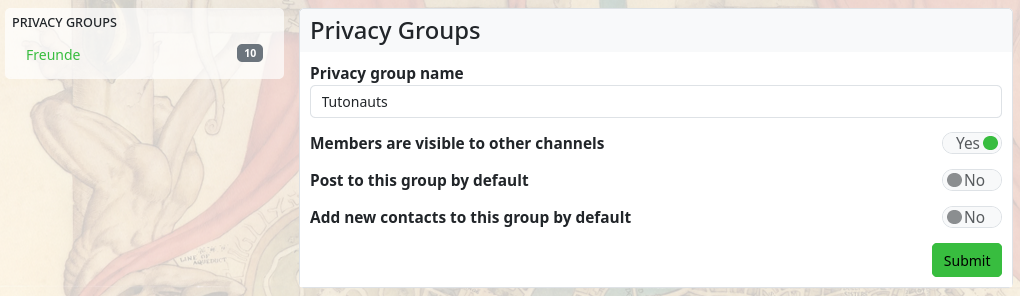
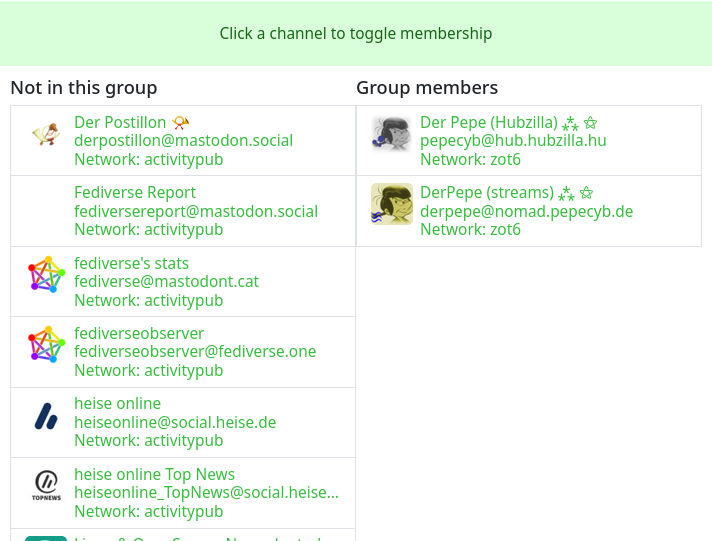
Membership for contacts can also be set here. Clicking on an entry toggles the membership between ‘Not in group’ and ‘Group membership’. This way, you can remove members from a group or add users as group members. Adding a contact to a group can also be done in the ‘Connections’ app using the contacts tool:
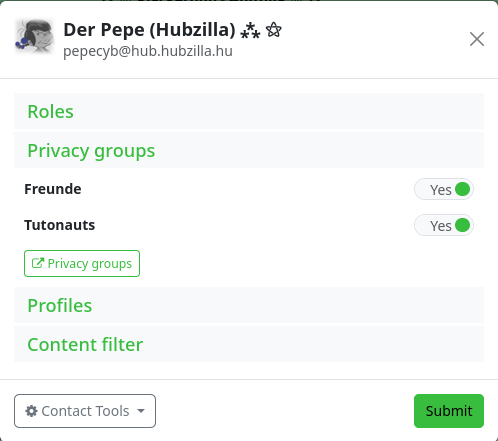
To add a new group, click on the ‘+ Add new group’ entry in the sidebar.
Calendar
The ‘Calendar’ app can be used to manage appointments. After opening the app, a calendar overview (one month) is displayed.
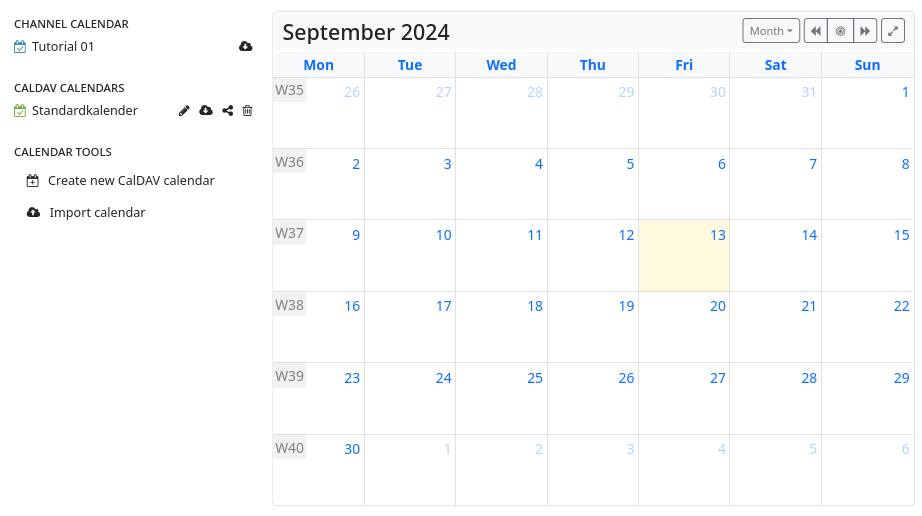
Clicking on a day allows you to create an event. In the input mask (shortened view, can be expanded by clicking on ‘more’ ) you can now enter the essential contents.

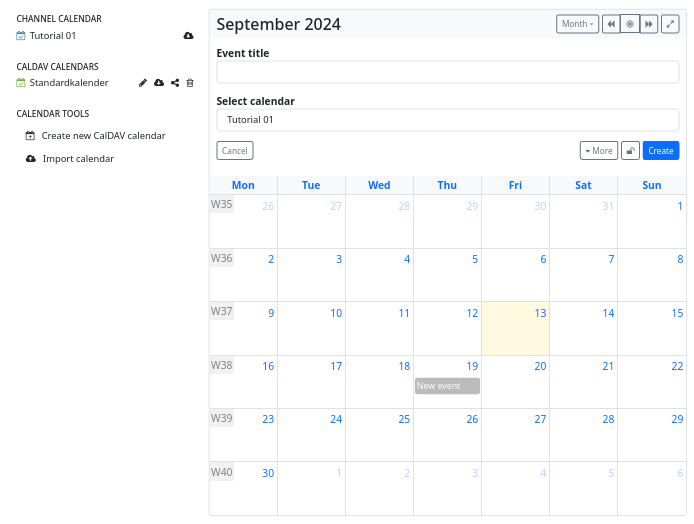
You may also define detailed permissions for these entries, so that you can record private appointments and public/shared appointments in one and the same calendar.
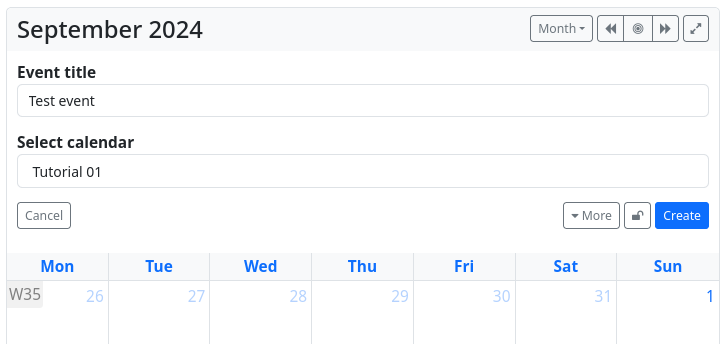
CalDAV access with Android
You can synchronise your Android calendar with your hub.
Use the ‘URL’ and ‘Username’ to log in. The base URL is <your-hub-URL>/cdav, and the username is your channel name (without the leading ‘@’ and without the hub address ‘@<your-hub>’).
To share your calendar, visit <your-hub-URL>/cdav/calendar.
Address book (CardDAV)
Hubzilla offers you address management with the ‘CardDAV’ app. You can create as many address books as you like.
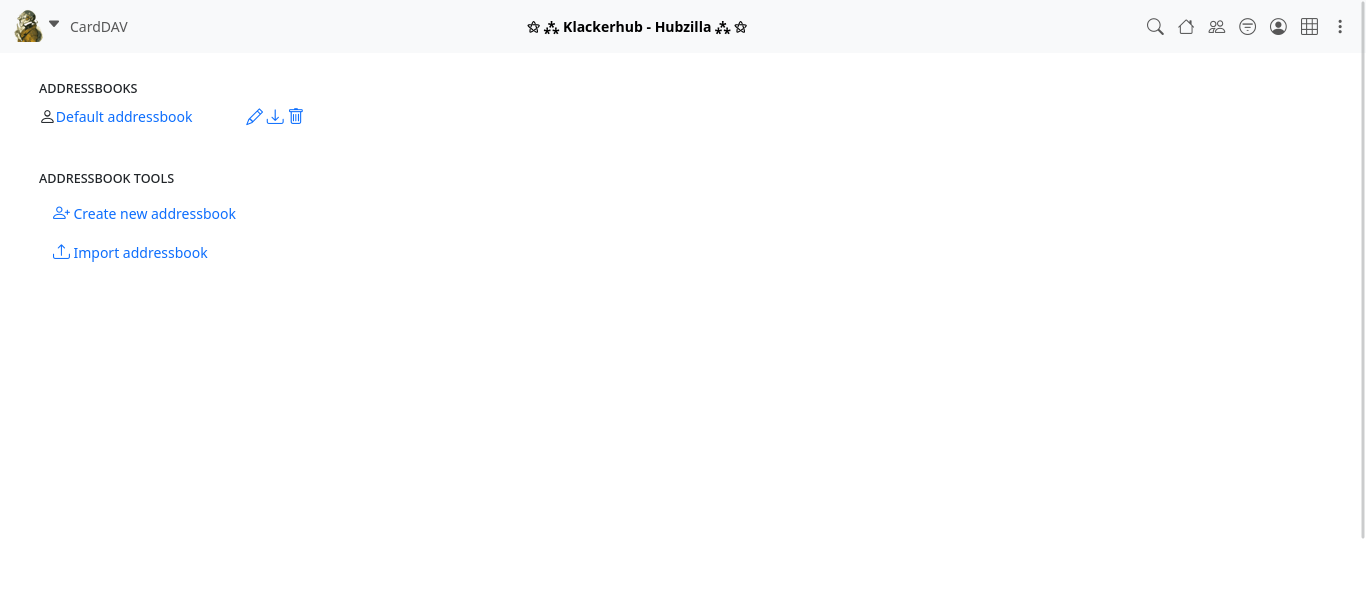
The entries are stored in vCards format.
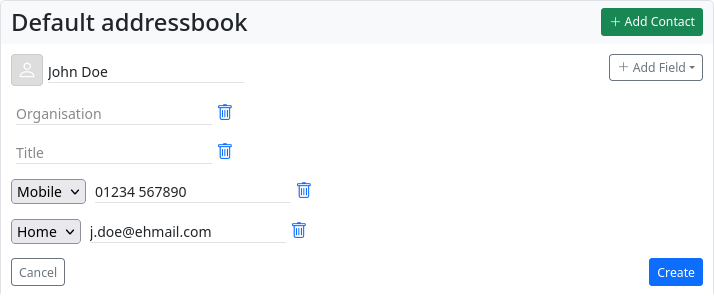
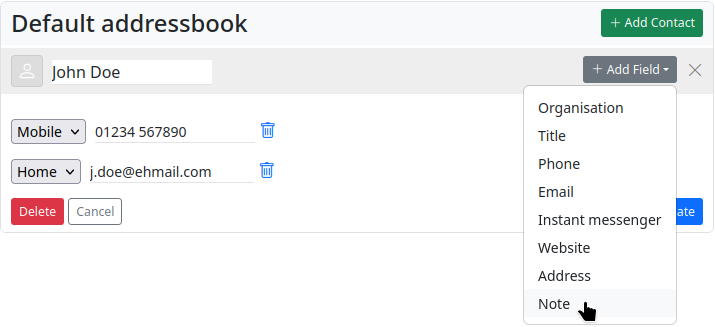

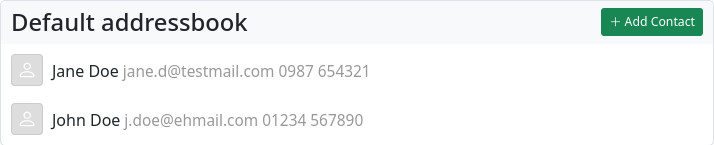
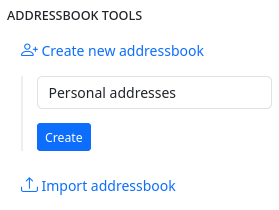
The app also allows you to import address books or individual vCards from a file.
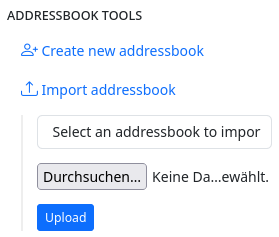
Address books are generally private and cannot be shared - not even via remote authorisation.
Wikis
The ‘Wiki’ app makes it possible to create wikis in your own channel. Wiki pages are not federated and remain on your own hub.
The wiki app offers simple, classic wiki functionality. Wiki posts can be created as plain text, Markdown text or BBcode text.

To view (or edit) a wiki, select the corresponding wiki from the list on this page. If you want to create a new wiki, click on the button ‘+ Create new’. An input form will open in which you enter the name of the wiki and define the content type (as standard). You can use a switch to determine that only the selected content type (text, Markdown, BBcode) must be used for all wiki entries. You can also use a switch to turn the creation of a status post about wiki creation on or off.
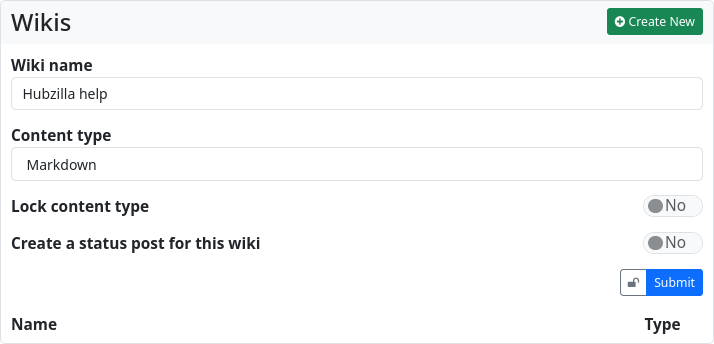
You can also set up detailed permission rights for a wiki. Click on ‘Submit’ to create the wiki and open the home page. The default view of a wiki page is always ‘View’, in which the text is rendered according to the source code. You can switch to the ‘Edit’ view using the tabs at the top to access the editor mode. If you have edited the page and then switch back to View, the changes will be displayed immediately. If you want to save the page, enter a suitable comment in the input field below the text and click on ‘Save’. The wiki page has been created. Using the third tab, labelled ‘History’, you can view the changes made to the wiki page and, if you wish, undo changes. This is a wiki-typical form of version control.
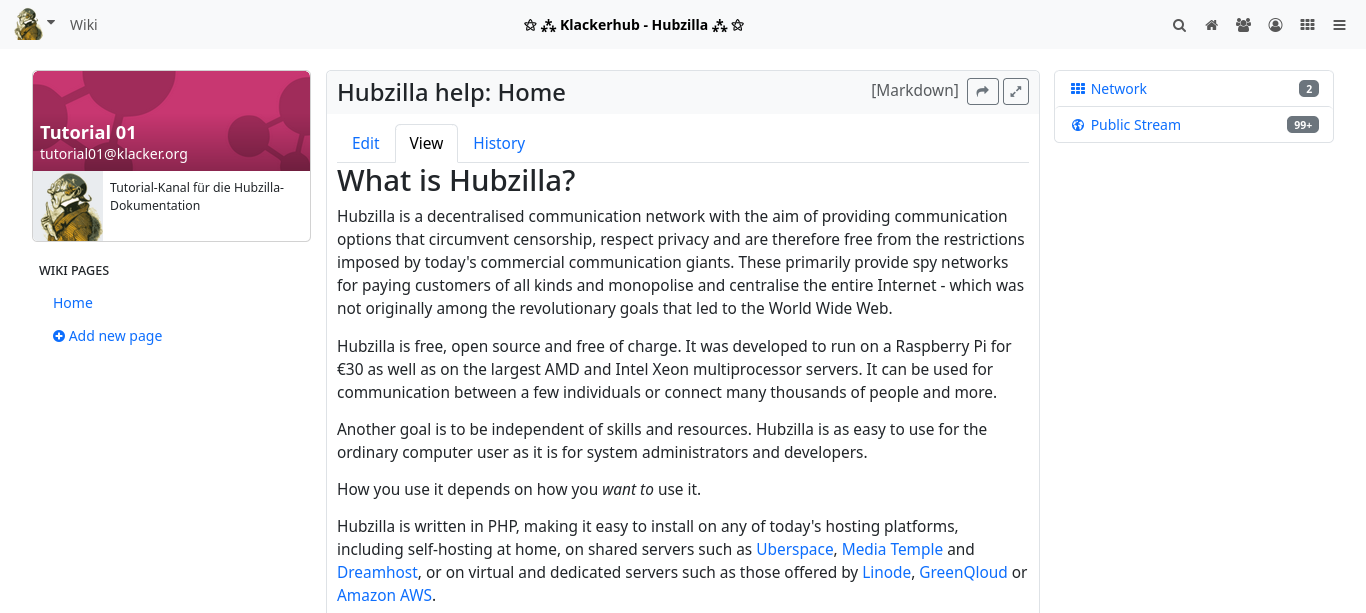
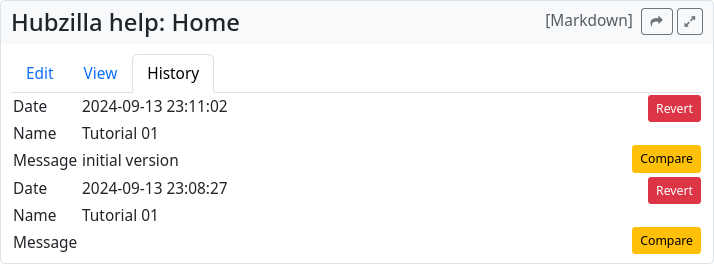
As you create more wiki pages, they will be listed in the left sidebar, from where they can also be accessed.
For collaborative editing of a wiki, it is necessary to grant the users who are allowed to work on the wiki appropriate rights. In the case of a Public, Personal or Community Forum channel, this is done by means of a corresponding contact role in which the editing of the wiki pages is authorised. This permission is not granted by default for the channel roles mentioned (permission can be granted for a user-defined channel role, but it then applies generally and cannot be withdrawn again using a contact role).
If you want to exclude individual wikis from this, you must restrict their visibility via the permission settings of the wiki (padlock).
Content warning/NSFW
Content warnings and hiding certain content is done with Hubzilla using the ‘NSFW’ app. While with other services in the Fediverse you have to rely on the authors of posts possibly hiding ‘sensitive’ content behind a content warning (a content or trigger warning), with Hubzilla you have this functionality in your own hands as a recipient. With the NSFW app, you can create filters that ensure that posts that match the filter rules are collapsed. The content of the post is only displayed when you click on the button.
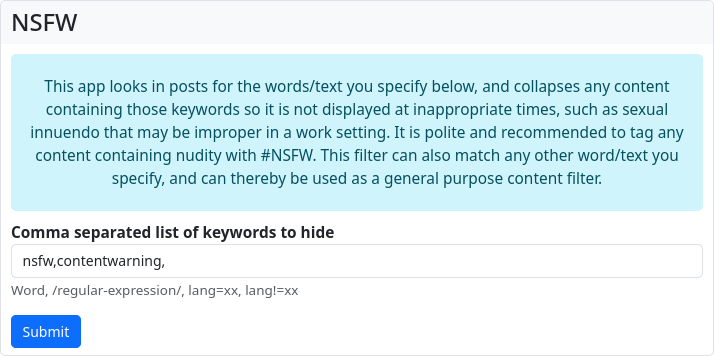
Here you can enter keywords and even regular expressions that the posting will be searched for. If one of the words or a text pattern is found, the content in the stream will be collapsed. It is also possible to filter by language (lang=xx or lang!=xx). If a phrase that matches one of the filters entered is found in a posting, the posting will initially be hidden from you behind a content warning.
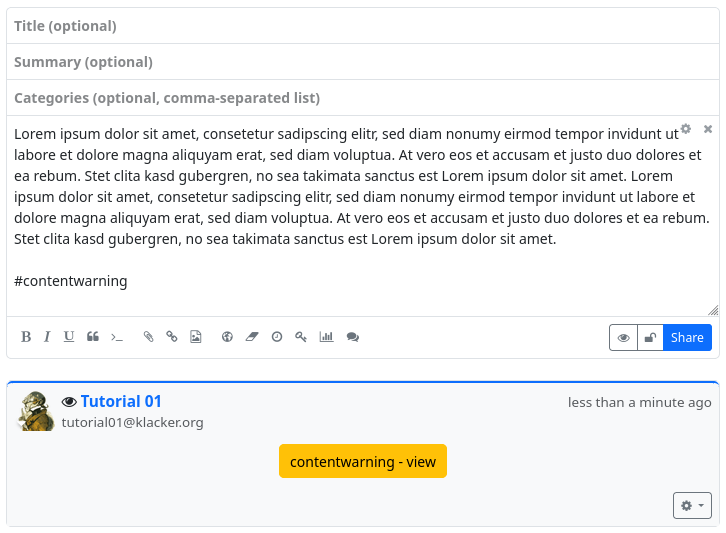
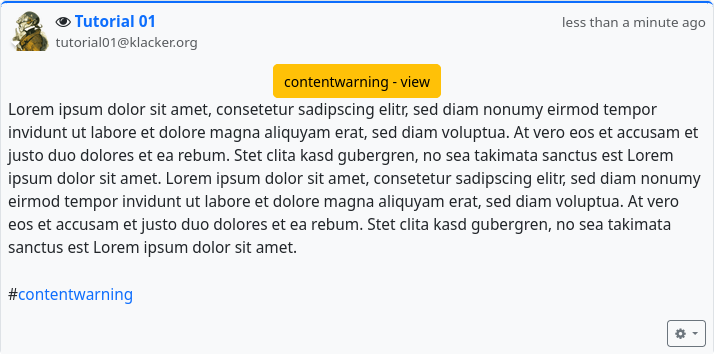
Clone
Hubzilla channels have a so-called ‘nomadic identity’. This is a speciality of the Nomad protocol, on which Hubzilla is based and with which Hubzilla hubs communicate with each other.
The nomadic identity makes it possible to create clones of your own channel, which greatly increases your resistance to censorship and outages.
If you have cloned your channel, it is no problem if your ‘home hub’ fails or does not work correctly. You can seamlessly continue to participate in the Fediverse with a channel clone located on another hub. All channel clones are automatically synchronised in the background.
To create a clone of your channel, you need an account on another Hubzilla hub. There are now several ways to create a clone of your channel on this other hub.
You can use the ‘Channel Export’ app to export the channel on your ‘home hub’.
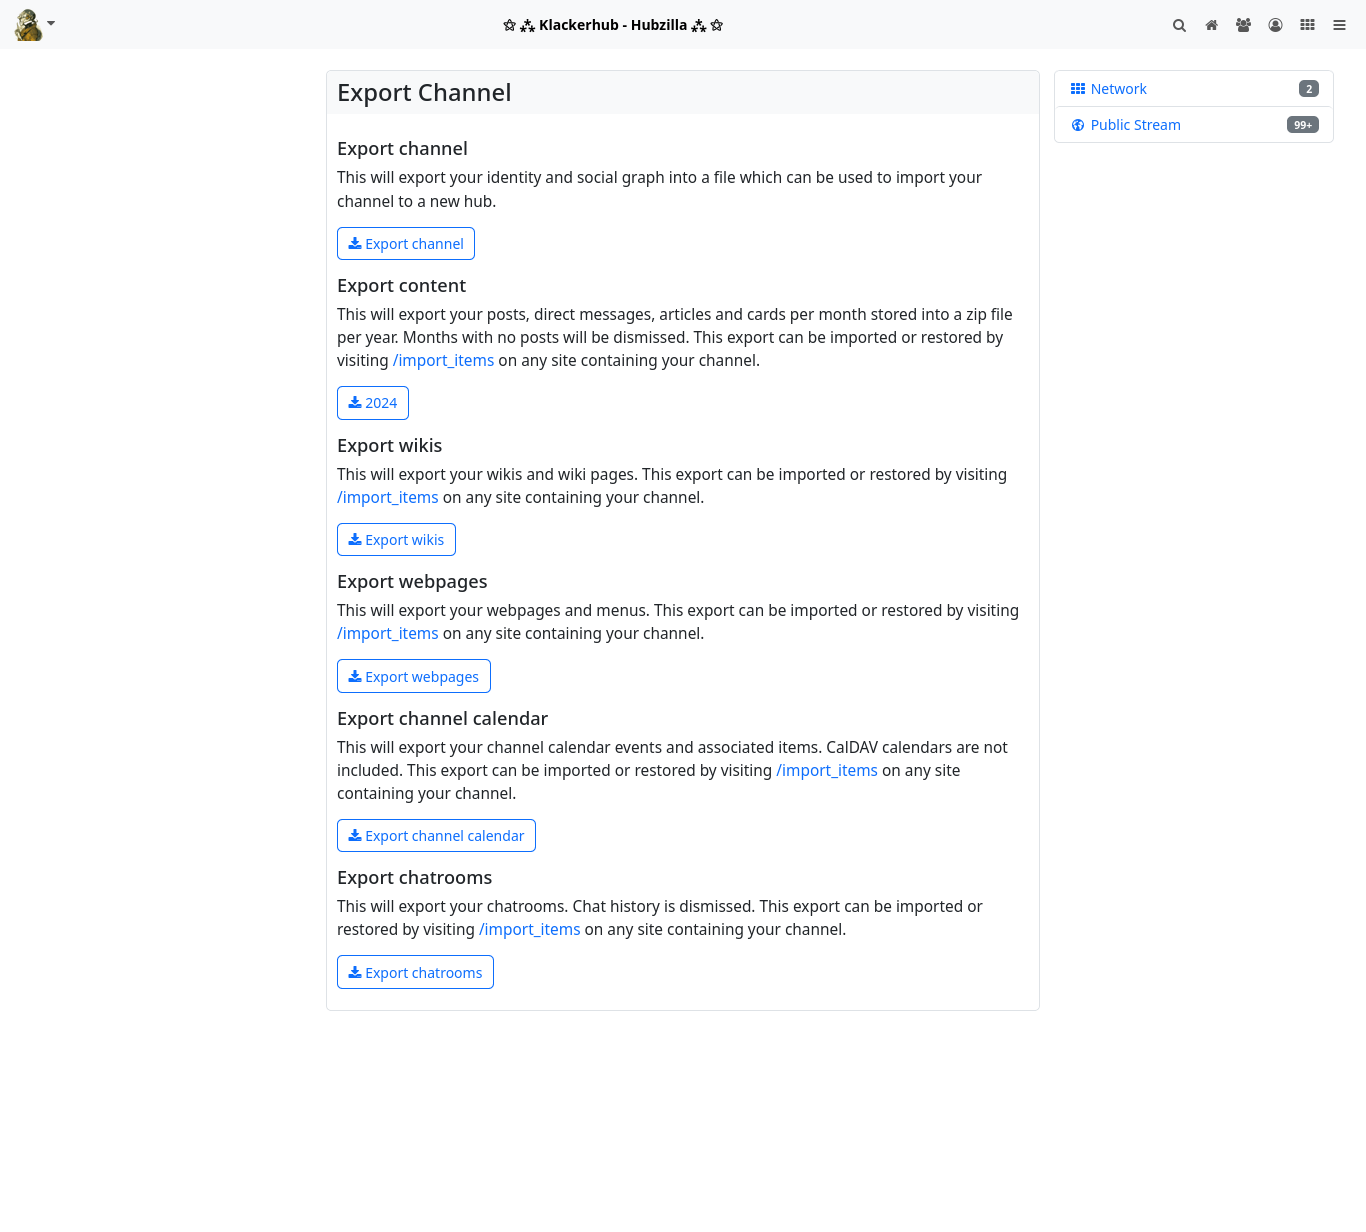
By clicking on the ‘Export channel’ button, you can export your identity and your social graph to a file that you can download.
Since files, websites, wikis, calendars and chat rooms are always restricted to your own hub (i.e. the respective server), you can also use the ‘Channel export’ app to download archives of this data locally.
Now log in to the new hub and either select the ‘Channels’ menu item in the main menu (your profile picture; top left) and then the ‘+ Create new’ button on the channel selection page that appears, or go directly to the channel creation page at <URL-of-your-hub>/new_channel.
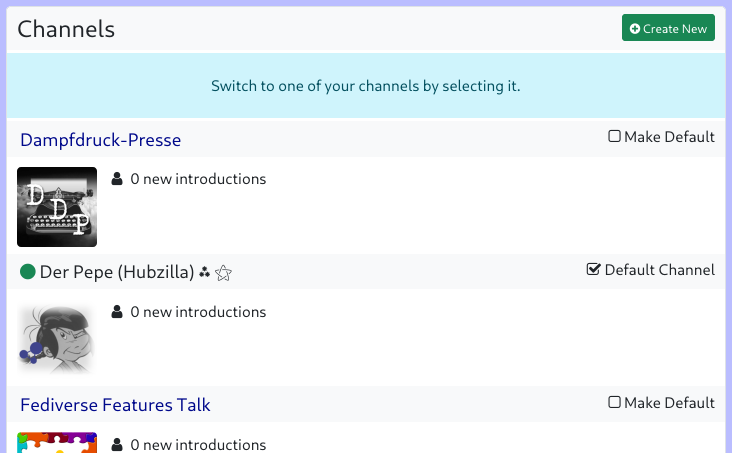
On this page, however, you do not enter any information for creating a new channel, but instead select the link ‘import an existing channel from another server’ at the bottom of the dialogue.
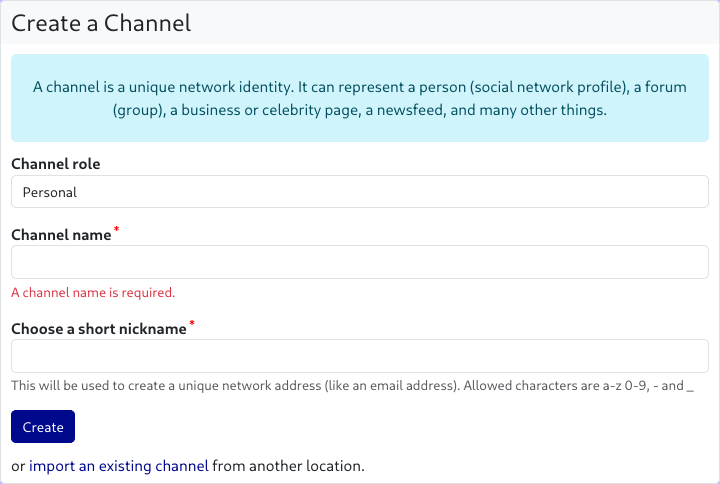
The dialogue for importing the channel now opens.
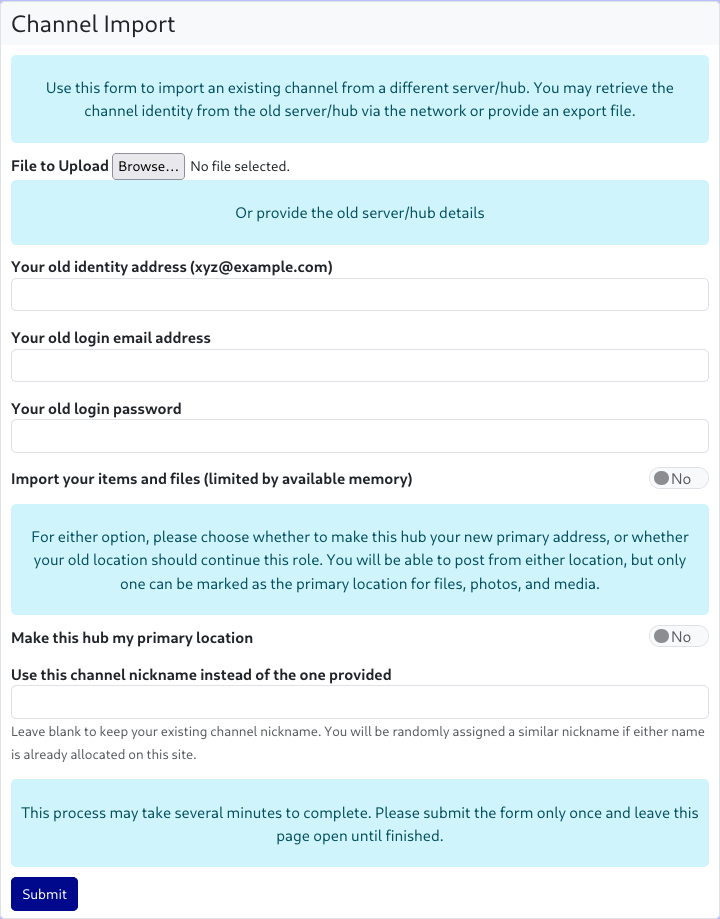
Click on the ‘File to upload: Browse...’ button to open a file dialogue where you can select the previously saved channel file.
As an alternative to this method, you can also clone your channel directly from the source, i.e. the originating hub. To do this, you must enter the handle of the channel to be cloned, the e-mail address for logging in to the source hub, and the corresponding password in the channel import dialogue. In addition, you can use a switch to select whether files and objects from the source hub should also be imported (provided that your new hub allows this and the storage limit is sufficient).
In the dialogue, you can also specify whether the new hub should be your ‘primary hub’. This means that the new channel (the one you are now creating) will be your primary channel. This affects the handle of your channel, which will now end with the URL of the new hub.
As a rule, unless you want to move completely to a different hub, you leave the switch at ‘No’ and the primary hub remains the one it currently is (the handle remains unchanged).
If you would like a different channel name (short name), you can enter it in an additional input field. If you leave the field empty, the channel short name remains unchanged.
Note: If the channel short name is already in use on the new hub (or has been blocked because an identical channel already existed there but was deleted), the system will automatically modify the short name.
Finally, click on ‘Submit’ and do NOT leave the page until the import is complete. Depending on the size of the source channel, this may take some time.
You can manage your clones at any time via Settings → Manage clone addresses. You can define which is the ‘primary hub’ and you can delete clones, although it is recommended that you delete cloned channels directly on the respective hub.
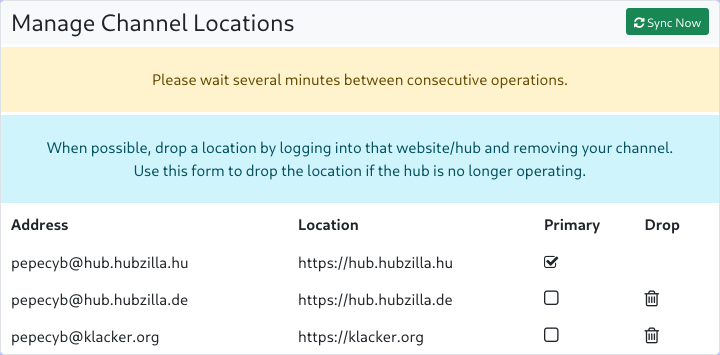
Websites
The Websites app allows you to create static websites in your channel. Websites remain on your hub and are not federated. However, you can share the link to the website and enable all users in the Fediverse to visit your website.
When you open the app, you will be taken to the website overview. The pages will be accessible at <your-instance-URL>/page/<your-channel-name>/<page-link-title>.
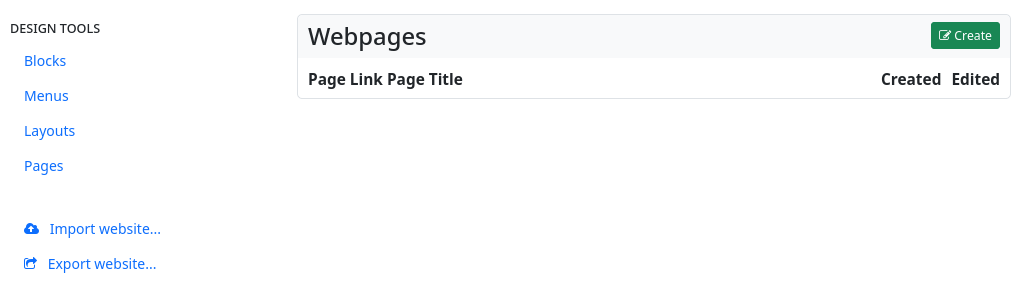
In the left sidebar, there is a widget with the design tools for ‘blocks’, ‘menus’, ‘layouts’ and ‘pages’. Below that, there is another widget that allows you to export and import web pages.
The centre section lists the existing web pages. You can edit, share and delete them. There is also a button to create a new web page: ‘Create’.
When you click on this button, the web page editor opens.
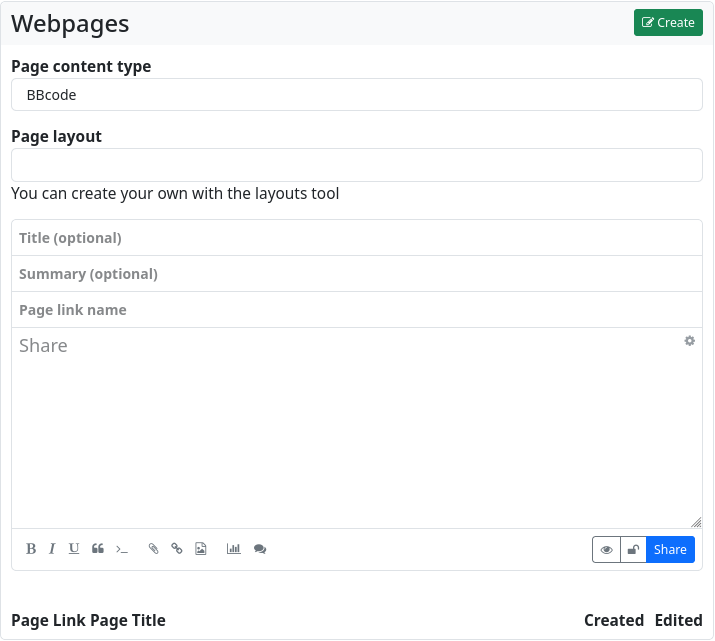
You now have the choice of how you want to design the website: with bbCode, with HTML, with Markdown, with plain text or with the Comanche layout language.
You can also specify which layout (if you have created one or more using the layout design tool) should be used to display the web page.
Next is the input field for the optional page title, as well as (also optional) a summary, and (mandatory) the page URL.
Below that is the text editor for the content of the website.
If you just want to create a very simple website with formatting and other markup elements, it is sufficient to create it in the website editor using plain text, HTML, bbCode or Markdown. This way you get a website without a special layout (without sidebars, without menus etc.).
For more sophisticated websites, it is recommended that you work with blocks, layouts and menus.
Blocks
Blocks can be parts of web pages. The basic HTML code of a block looks like this
  <div>
    block content
  </div>
If a block has the content type text/html, it can also contain menu items. The example content of
  <p>HTML block content</p>
  [menu]menuname[/menu]
will produce HTML like this
  <div>
        <p>HTML block content</p>
<div>
<ul>
<li><a href=‘#’>Link 1</a></li>
<li><a href=‘#’>Link 2</a></li>
<li><a href=‘#’>Link 3</a></li>
</ul>
</div>
</p>
A block can also contain the actual content of the website via the $content macro.
To do this, create a block with only
$content
as content. For a block to appear on the website, it must be defined within a region in the page layout.
  [region=aside]
    [block]blockname[/block]
  [/region]
The appearance of the block can be manipulated in the page layout. You can assign your own classes
    [region=aside]
   [block=myclass]blockname[/block]
  [/region]
will produce the following HTML
  <div class=‘myclass’>
    Block Content
  </div>
The wrap variable can be used to free a block from its enclosing <div></div>tag
  [region=aside]
   [block][var=wrap]none[/var]blockname[/block]
    [/region]
This HTML is generated
Block content
With the block editor, blocks can be created just as easily as web pages.
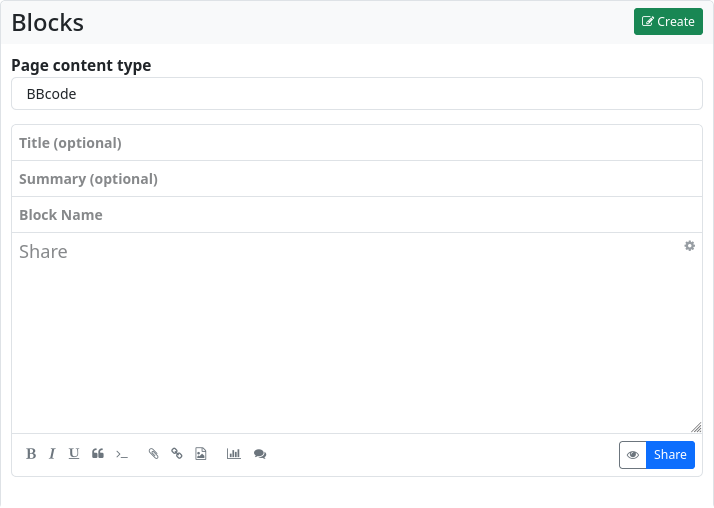
Menus
The menu editor is used to easily create navigation menus.
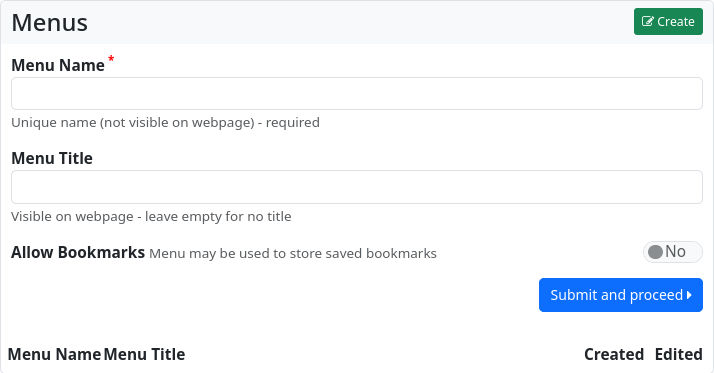
The menu must be assigned a unique name (this name can be used to reference it later in the website and in blocks). Entering a title is optional. You can also choose whether the menu is available for adding bookmarks. This feature makes it possible to add links marked as bookmarks from the stream to the menu with a single click.
Click ‘Submit and continue’ to create the menu.
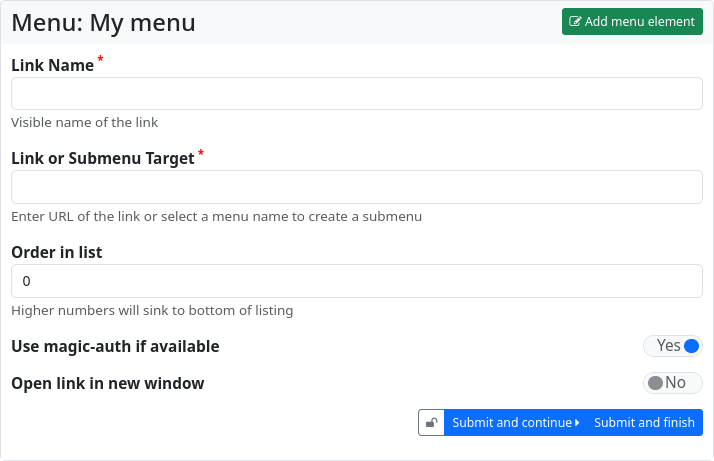
The dialogue for adding a menu entry will now open. You must enter a name for the menu entry (‘Name of the link’) and the destination of the link. This can be a URL or the name of another menu (which is then integrated as a submenu).
You can influence the sorting of the menu entries by entering a number at ‘Order in list’.
If the URL is an external link to a source on another hub, you can ensure that you are authenticated at the target and that restricted content is available if necessary by setting the ‘Use Magic-Auth if available’ switch.
You can also specify whether links should open in a new window or tab.
Click on ‘Submit and proceed’ to create further entries. ‘Submit and finish’ ends the entry of menu items. Menus can, however, be edited and added to at any time.
Layouts
Layouts are used to define the general structure of web pages. They are designed using the Comanche page description language, a variant of bbCode. You have to give the layout a name. The definition of the layout is then entered in the text field. This is also where you can define the contents of the various regions.

Comanche page description language
Comanche is a BBCode-like markup language that can be used to create elaborate and complex web pages by assembling them from a series of components, some of which are pre-built and others that can be defined on the fly. Comanche uses a page description language to create these pages. Comanche primarily selects which content should appear in the various areas of the page. The various areas have names, and these names may change depending on the layout template selected.
Page templates
There are currently five layout templates, unless your website offers additional layouts.
Standard template
The default template defines a ‘nav’ area at the top, ‘aside’ as a sidebar with a fixed width, ‘content’ for the main content area and ‘footer’ for a page footer.
Full template
The full template corresponds to the default template except that there is no ‘aside’ area.
Choklet
The Choklet template offers a range of fluid layout styles that can be set to taste:
- (default flavour) - a two-column layout similar to the default template, but more flexible
- bannertwo - a two-column layout with a banner area, compatible with the default template on small displays
- three - three-column layout (adds a ‘right_aside’ area to the standard template)
- edgestwo - two-column layout with fixed margins
- edgesthree - three-column layout with fixed margins
- full - three-column layout with fixed margins and the addition of a ‘header’ area below the navigation bar
Redable
A template for reading longer texts in full screen mode (i.e. without a navigation bar). Three columns: aside, content and right_aside. For maximum readability, it is advisable to use only the middle content column.
Zen
Gives you the freedom to do everything yourself. Just a blank page with a content area. To select a layout template, use the ‘template’ tag.
[template]full[/template]
To select the template ‘choklet’ with the flavour ‘three’:
[template=three]choklet[/template]
The default template is used if no other template is specified. The template can use arbitrary names for the content regions. You will use ‘region’ tags to decide what content should be placed in which regions. Three ‘macros’ have been defined for your use.
$htmlhead - replaced with the site head content.
$nav - replaced with the site navigation bar content.
$content - replaced with the main page content.
By default, $nav is inserted into the ‘nav’ page area and $content into the ‘content’ area. You only need to use these macros if you want to change the order of the elements or move them to other areas.
To select a theme for your page, use the ‘theme’ tag.
[theme]suckerberg[/theme]
This selects the theme ‘suckerberg’. By default, the theme preferred by your channel is used.
[theme=passion]suckerberg[/theme]
This selects the theme named ‘suckerberg’ and chooses the ‘passion’ scheme (theme variant). Alternatively, it is also possible to use compressed theme notation.
[theme]suckerberg:passion[/theme]
The compressed notation is not part of Comanche itself, but it is recognised by the Hubzilla platform as a theme specifier.
Navbar
[navbar]tucson[/navbar]
Use the ‘tucson’ template for the navigation bar and CSS rules. By default, the ‘default’ template is used for the navigation bar.
Regions
Each region has a name, as mentioned above. You specify the region you are interested in with a ‘region’ tag containing the name. Any content you want to place in that region should be placed between the opening region tag and the closing tag.
[region=htmlhead]....content goes here....[/region]
[region=aside]....content goes here....[/region]
[region=nav]....content goes here....[/region]
[region=content]....content goes here....[/region]
CSS and Javascript
We have the option of including Javascript and CSS libraries in the htmlhead section. Currently we use jquery (js), bootstrap (css/js) and foundation (css/js). This overwrites the htmlhead of the selected theme.
[region=htmlhead]
   [css]bootstrap[/css]
   [js]jquery[/js]
   [js]bootstrap[/js]
[/region]
Menus and blocks
The website creation tools allow you to create menus and blocks in addition to page content. These provide a set of existing content that can be placed in the areas and order you specify. Each of these elements has a name that you set when you create the menu or block.
[menu]mymenu[/menu]
This places the menu ‘mymenu’ at this point on the page, which must be within an area.
[menu=horizontal]mymenu[/menu]
This places the menu named ‘mymenu’ at this point on the page, which must be within an area. It also assigns the class ‘horizontal’ to the menu. The class ‘horizontal’ is defined in the redbasic theme. It may or may not be available in other themes.
[menu][var=wrap]none[/var]mymenu[/menu]
The [var=wrap]none[/var] variable in a block removes the enclosing div element from the menu.
[block]contributors[/block]
This places a block named ‘contributors’ in this region.
[block=someclass]contributors[/block]
This places a block named ‘contributors’ in this region. In addition, the class ‘someclass’ is applied to the block. This replaces the default block classes ‘bblock widget’.
[block][var=wrap]none[/var]contributors[/block]
The variable [var=wrap]none[/var] in a block removes the enclosing div element from the block.
Widgets
Widgets are executable applications provided by the system that you can place on your page. Some widgets require arguments that you can use to customise the widget to your purpose. System widgets are listed here. Widgets can also be created by plugins, themes or your website administrator to provide additional functions. Widgets and arguments are specified with the tags ‘widget’ and ‘var’.
[widget=recent_visitors][var=count]24[/var][/widget]
This loads the ‘recent_visitors’ widget and sets the ‘count’ argument to ‘24’.
Comments
The ‘comment’ tag is used to delimit comments. These comments are not displayed on the rendered page.
[comment]This is a comment[/comment]
Conditional execution
You can use an ‘if’ construct to make decisions. These are currently based on the system configuration variable or the current observer.
[if $config.system.foo]
  ... the configuration variable system.foo evaluates to ‘true’.
[else]
  ... the configuration variable system.foo evaluates to ‘false’.
[/if]

[if $observer]
  ... this content will only be show to authenticated viewers
[/if]
The ‘else’ clause is optional. In addition to the Boolean evaluation, several tests are supported.
[if $config.system.foo == bar]
  ... the configuration variable system.foo is equal to the string ‘bar’
[/if]
[if $config.system.foo != bar]
  ... the configuration variable system.foo is not equal to the string ‘bar’
[/if]
[if $config.system.foo {} bar ]...
 the configuration variable system.foo is a simple array containing a value ‘bar’
[/if]
[if $config.system.foo {*} bar]...
 the configuration variable system.foo is a simple array containing a key named ‘bar’
[/if]
Complex example
[comment]use an existing page template which provides a banner region plus 3 columns beneath it[/comment]

[template]3-column-with-header[/template]

[comment]Use the "darknight" theme[/comment]

[theme]darkknight[/theme]

[comment]Use the existing site navigation menu[/comment]

[region=nav]$nav[/region]

[region=side]

    [comment]Use my chosen menu and a couple of widgets[/comment]

    [menu]myfavouritemenu[/menu]

    [widget=recent_visitors]
        [var=count]24[/var]
        [var=names_only]1[/var]
    [/widget]

    [widget=tagcloud][/widget]
    [block]donate[/block]

[/region]


[region=middle]

    [comment]Show the normal page content[/comment]

    $content

[/region]


[region=right]

   [comment]Show my condensed channel "wall" feed and allow interaction if the observer is allowed to interact[/comment]

    [widget]channel[/widget]

[/region]
Builtin Automatic Encryption
Full disclosure: The encryption hubzilla uses per default is not absolutely waterproof. There are known procedures to circumvent it. But this takes a lot of effort and needs to be done individually for each channel. And to make this clear: Other services store your messages in plaintext, therefore we regard this approach as a significant improvement for your privacy. Plus you are always free to use further encryption and password protection if you so desire.
To explain this in more detail:
- each channel has its key pair
- every non-public post is automatically encrypted
- optional password protect content via crypto-javascript browser-to-browser encryption (needs to be enabled in settings) Full disclosure: A rogue hub admin could injects malicious javascript-code (e.g. keylogging-abilities) into the code. Encrypt our stuff out of band with GPG, become a hub administrator yourself or use other means of communication if this worries you.
So what is the scope of security? Full disclosure: This might be great, but it is not perfect.
- every non-public post is automatically encrypted but persons who have access to the site's database and files may be able to decrypt everything by using these keys which obviously need to be stored on the server. To be clear: The encrypion keys are different for every channel and it is quite an effort to do this. And again: Other services store your messages in plain text unencrypted. So this is quite a significant win for your privacy.
We believe that the NSA-level dragnet plaintext extracting mass surveillance is probably not possible due to the design of the Nomad protocol. Dedicated attacks including hacking into one hub to obtain the server logs and database only partly reveal what is going on between people communication between different hubs. We believe that this makes it much more expensive for state-level attackers to access your content in hubzilla.
We gladly accept help improving the security of the system and auditing it as well.
Tips for protecting your privacy
If you attach great importance to your privacy and still want to participate in Fediverse, you need to think carefully about what you want to reveal about yourself before and during the creation of a personal channel. This is the case with every Fediverse service. With Hubzilla, however, there is another important aspect. You not only have to ask yourself the question ‘What?’, but also ‘To whom?’ and ‘Which?’.
With Hubzilla, you not only determine what you disclose about yourself, but also who you allow to see the information and content. And who you allow to interact with what.
The advantage is that you are not dependent on a ‘rule set’, but can define different rules for different applications and different contacts.
A typical use case would be that you want to participate in Fediverse in the normal way that you are familiar with from other social networks.
When creating a channel, you must make the first relevant decision: the channel role.
Here you can choose between ‘Public’, ‘Personal’, ‘Community Forum’ and ‘ Customised’.
Apart from the ‘Community Forum’, which is intended for other applications, you have the choice between three roles.
- With the ‘Public’ role, you allow others to
- see your channel stream (i.e. the posts that you share publicly) and your posts in general,
- see your standard profile,
- see your connections,
- see your file and image folders,
- see the web pages of your channel,
- see the wiki pages of your channel,
- comment on, like or dislike your posts,
- send you direct messages,
- like or dislike your profiles and profile content and
- chat with you.
These role-based rules reflect the ‘normal’ use of a social network quite well.
- The ‘Personal’ role is similar and only denies some of the permissions of the ‘Public’ role. It allows others to
- see your channel stream (i.e. the posts that you share publicly) and your posts in general,
- see your default profile,
- ./.
- see your file and image folders,
- see the web pages of your channel,
- see the wiki pages of your channel,
- ./.
- ./.
- ./.
- ./.
Interaction by other users is restricted with this profile, as they are not allowed to comment on, like or dislike your posts (the latter also not in relation to your profile/profile content). They are also not allowed to send you direct messages or chat with you.
The ‘User-defined’ role allows you to define all authorisations individually. Caution is advised here, as inappropriate rules can make a channel halfway ‘unusable’.
For the intended use as a ‘typical social network account’, we recommend selecting the ‘Public’ or ‘Personal’ role.
If you would rather opt for the ‘Personal’ role, but would still like to allow further interaction with certain users (friends, family, colleagues, etc.), you do not have to use the ‘Public’ role.
Hubzilla works with whitelists (permission lists) for authorisations. The channel role therefore defines the basic authorisations. You cannot subsequently revoke these (apart from defining access rights in the specific individual case of a content) using other mechanisms.
However, you can add various authorisations to the whitelist using different contact roles. For example, you could create a ‘Family’ contact role in which - in addition to the authorisations granted by the ‘Personal’ role - further authorisations (e.g. commenting, linking, disliking and sending direct messages) are granted. If you now assign this contact role to your contacts that you define as ‘Family’ in this example, your family members - unlike everyone else - can write comments, give you a thumbs up or thumbs down and communicate with you non-publicly (direct message).
You can create as many contact roles as you like for different purposes and contacts and grant additional authorisations in addition to those of the channel role. But(!): You cannot revoke any authorisation from the channel role there.
It is therefore advisable not to be too generous with the channel role and to select it accordingly, depending on the purpose of the channel. By selecting ‘User-defined’, for example, you could define an even more restrictive channel role than ‘Personal’ and then define further authorisations for certain users with the contact roles (only recommended if you are really familiar with the authorisation system).
Another aspect of privacy is the profile information. For ‘typical’ use as a social network account, some information should be disclosed in the profile. Otherwise, other users will not have the idea of connecting with you. Or they want to connect with another user, but the other user refuses because they have no information about you (unless they know you and your channel name). So some information should go in there.
As much as necessary, as little as possible.
You should fill your standard profile, which every channel has, with information according to exactly this principle.
However, Hubzilla allows you to create multiple profiles. In such profiles, you can then enter further information that may be of interest for certain connections. You then have the option of releasing such special profiles for certain connections. The information is therefore not visible and public to everyone, but is only available to the selected users.
Deleting a channel
If you want to delete your channel, use the settings in the main menu (top left; profile picture): Settings → Channel settings. At the top of the page, you will see a button labelled ‘Remove channel’. Click on it and your channel, including all content, will be deleted after you enter your account password (for security purposes).

Note: It is no longer possible to create a new channel with the same name on this hub. This is because the channel nickname is locked in the database to prevent impersonation. However, if you need to restore the old channel (by cloning) on the hub, please ask the administrator to delete the locked nickname from the Hubzilla database.
Deleting your account
If you wish to delete your account, i.e. all access to the hub, use the settings in the main menu (top left; profile picture): Settings → Account settings.
At the top of the page, you will see a button labelled ‘Remove account’. Click on it and your account (account) will be deleted, including all content, after you enter your account password (for security purposes).

Tutorials
Step by step into the Fediverse with Hubzilla
Customise the look of Hubzilla
Step by step into the Fediverse with Hubzilla
Getting started
As with any other Fediverse service, the first step is to choose a server (hub). This is the case in Fediverse and an essential part of the freedom it offers.
You can find hubs in the usual ways: by using appropriate databases or lists.
e.g.
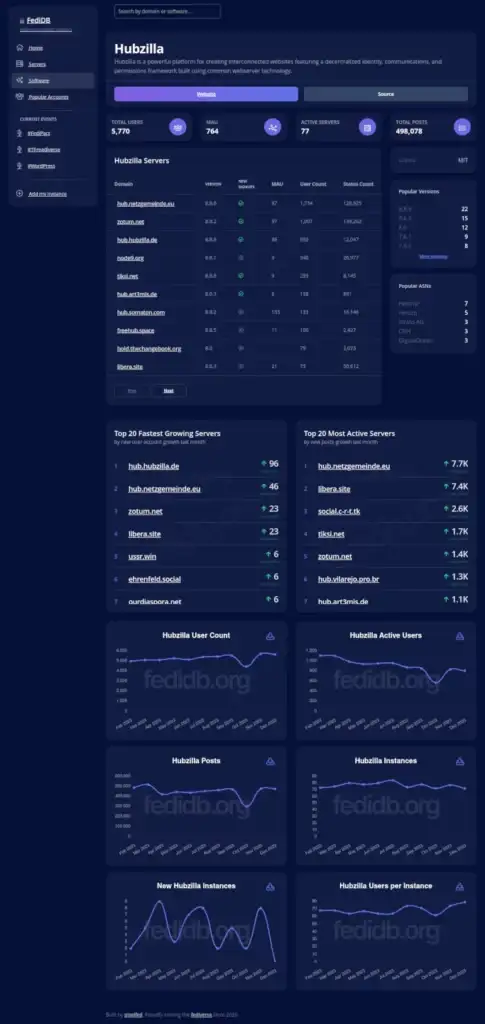
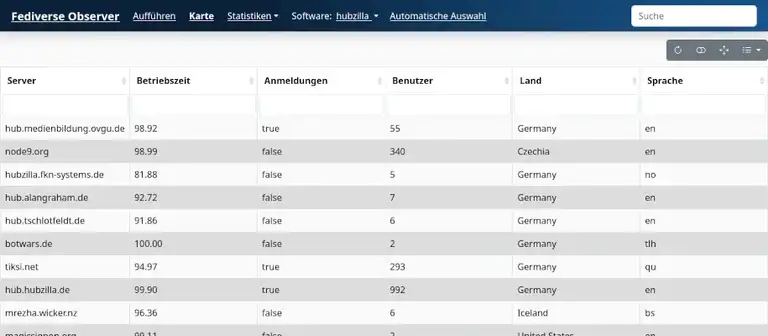
List of public hubs on a Hubzilla server
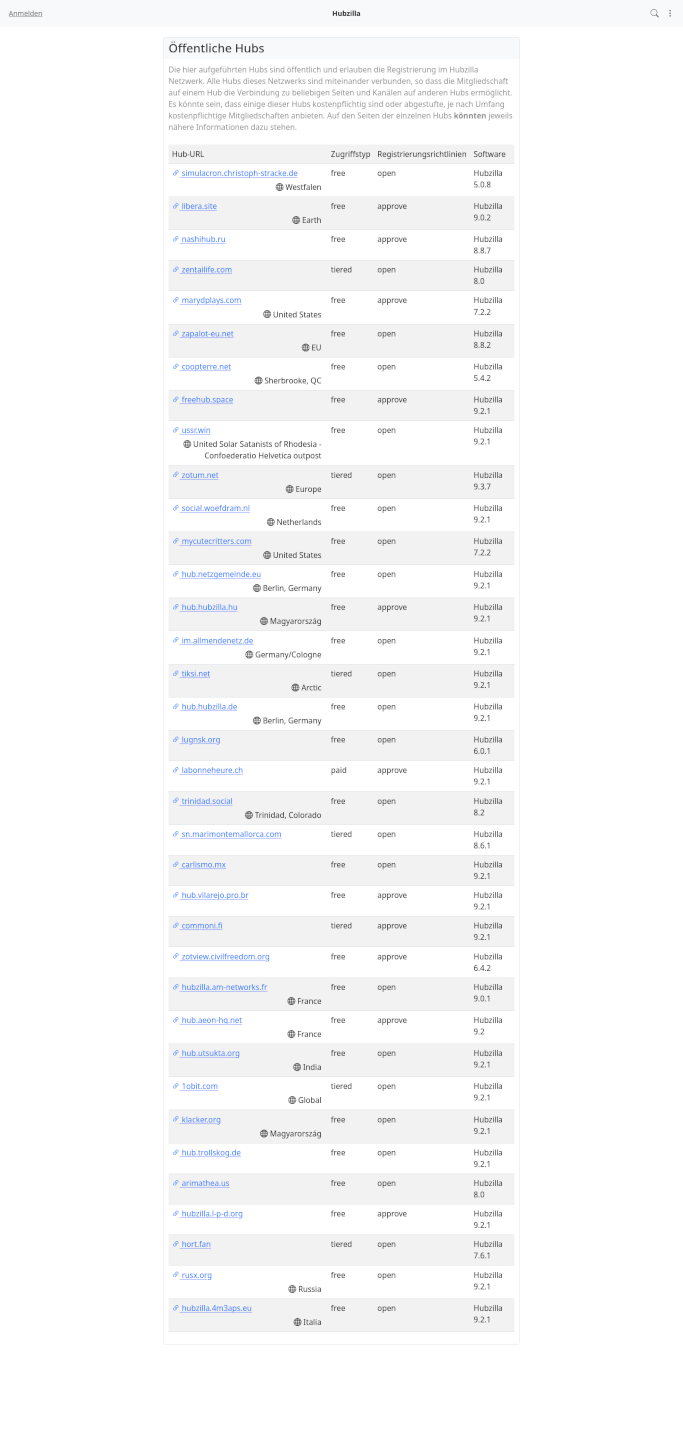
Once you have selected a hub, call up the URL. This will take you to a standard page. This may vary slightly from hub to hub, but you will usually find two menu items at the top of the screen: ‘Login’ and ‘Register’.

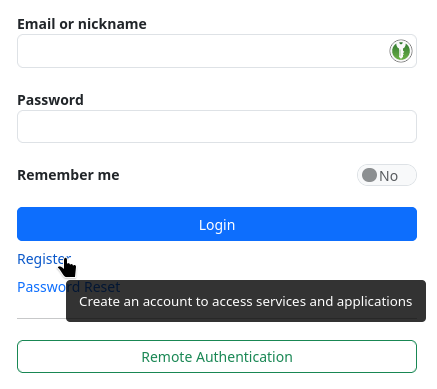
Clicking on the link leads to a registration form. There are several possible scenarios here. Some hubs are set up so that you create a channel when you register (another special feature of Hubzilla is that you can operate several channels with one account). With other hubs, you initially only create one account using the form. Once you have created this account and log in for the first time, you will be directed to the channel creation form.
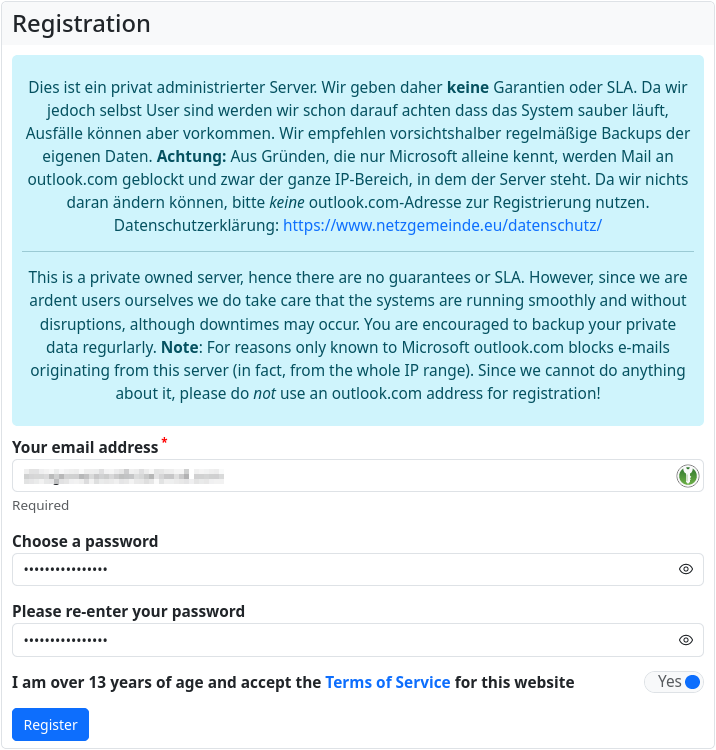
To create an account, you need a ( valid ) e-mail address and you have to come up with a password. You also have to confirm your age and then you can send the information you have entered. You will then be taken to an input mask where you have to enter a verification code (usually, there are also hubs that skip this step... I think it's risky). You will receive this code by e-mail after submitting the registration form.
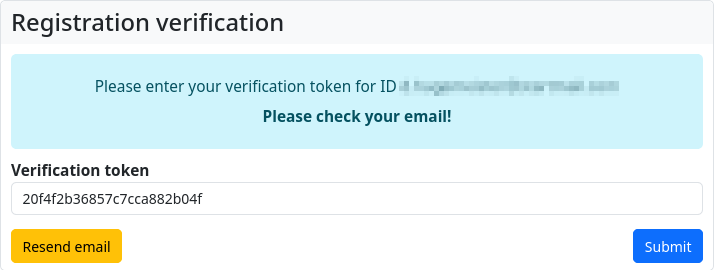
If you did not have to create a channel when you registered, you will be redirected to the ‘Create a channel’ page at this point. Here you must now come up with a name for your own identity. And also a short name (‘nickname’) for the channel (a suggestion is automatically generated from the channel name). This short name will be the main component of the Fediverse handle (i.e. your own ‘Fediverse address’).

| Note regarding the handle at Hubzilla: |
|---|
| Compared to other Fediverse services, Hubzilla makes an exception with the handle. While an ‘@’ is placed in front of the handle almost everywhere, this is not the case with Hubzilla. However, this is quickly internalised. For example, if you use Hubzilla to search for a user who has a Mastodon account via their handle, you simply omit the leading ‘@’. However, if you want to follow or search for a Hubzilla user from another Fediverse service, simply add an ‘@’ in front of the Hubzilla handle. |
Once you have created the channel, you are finally ‘in’. By default, Hubzilla takes you to the ‘’Headquarter‘’ (‘HQ’), an overview page of your own channel.
And, as always when you enter Fediverse, it's pretty empty. In the left sidebar you will find tabs with various information:
- Public (or Restricted) Messages: This is a compact view of your personal timeline (called ‘Stream’ on Hubzilla)
- Direct Messages: Postings that are only exchanged among selected participants.
- Favourite posts: You can add a ‘star’ to a post to mark it. Posts marked in this way end up here.
- Notifications
The personal stream (timeline) is displayed in the centre. Important information (notification of new contacts, new posts, etc.) is displayed in the right-hand sidebar. For a newly created channel, a list for the first steps with Hubzilla and links that lead to the corresponding functions also appear here.
If you no longer need this help for beginners, you can switch it off under Settings → Display settings → Content settings.
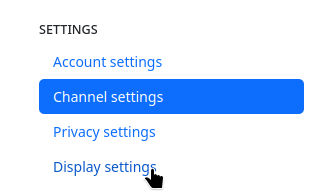
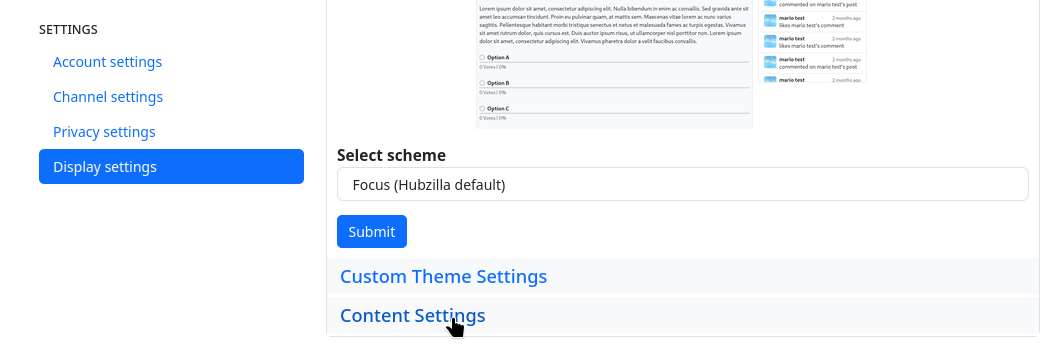
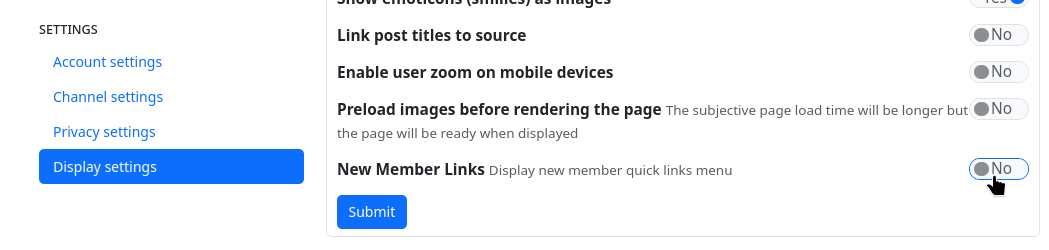
Firstly, you should fill your profile with useful information... as with any Fediverse service. No black magic! The navigation bar is located at the top of the screen. On the left is the menu for channel selection, your profile and settings. On the right are icons for some functions and the so-called ‘app menu’ (⋮), which takes you to the installed apps. The most important applications are already available there by default:
- Files: Access to your own cloud
- Photos: Access to your own photo album
- Help: Help
- Calendars
- Channel: The page of your own channel with the channel information. Only your own posts are displayed here in the stream.
- Stream: Switches to the federated stream view.
- Connections: The existing connections are listed here (‘Followers’ and ‘Followed’). You can also add new connections in the connections directory.
- Directory: The user directory is displayed. Note: You can view the global directory or just a directory with the users of your own instance. You can also create new connections here.
I strongly recommend installing and activating a few more apps:
ActivityPub, Superblock and Privacy Groups.
The ActivityPub app is essential if you want to participate in the Fediverse. This app is a MUST and only requires installation and activation. No further settings are required.
Superblock is also very important, as it allows you to exclude posts from (even unfollowed) users from the stream.
Many (unfortunately, but understandably, not all) hubs also offer the ‘Public post stream’ app. This provides the public timeline of all Fediverse instances that are federated with your own hub. A good place to orientate yourself and find new contacts.
Installing and activating apps is no problem. Select the last entry ‘+ Apps’ in the app menu to access the app management.
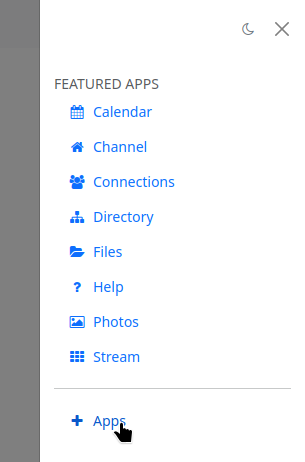
Here you can view the installed apps (i.e. the preset apps) and the generally available apps (all apps, including those that are not installed).
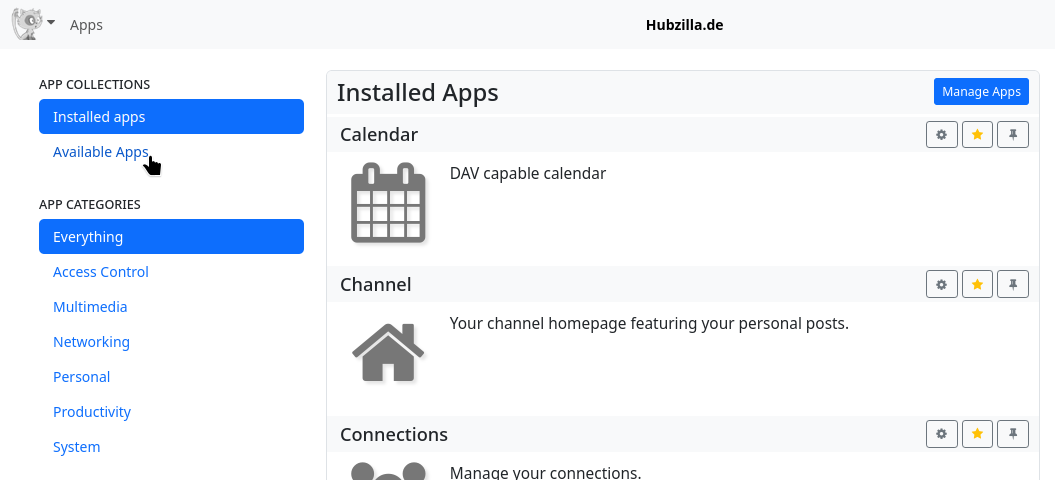
ActivityPub, Superblock and Privacy groups are still only available under ‘Available apps’. Click on ‘Install’ to install them and they will then also be available under ‘Installed apps’.
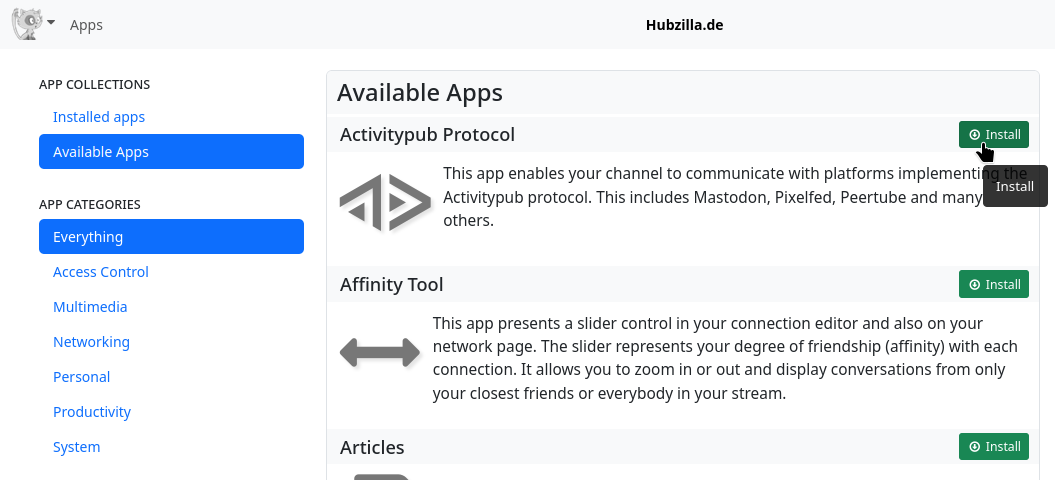
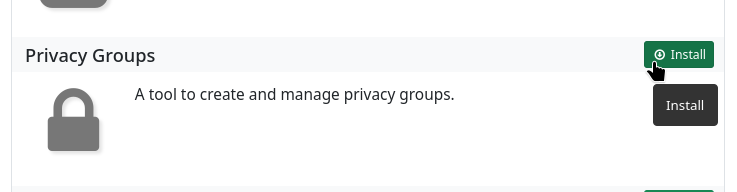
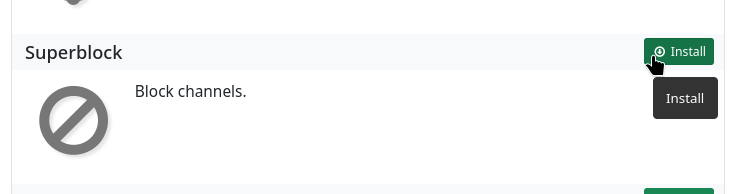
The newly installed apps still need to be ‘activated’, i.e. made usable via the menu. You will find a ‘star symbol’ in the app box. If you click on it, the star turns yellow and the app is active and now also appears in the app menu.
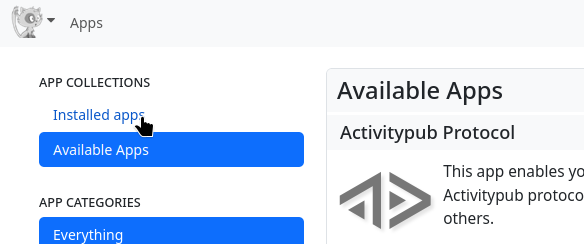
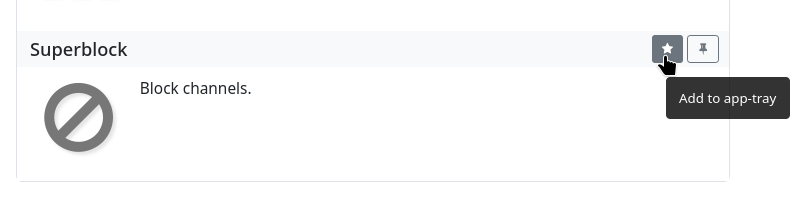
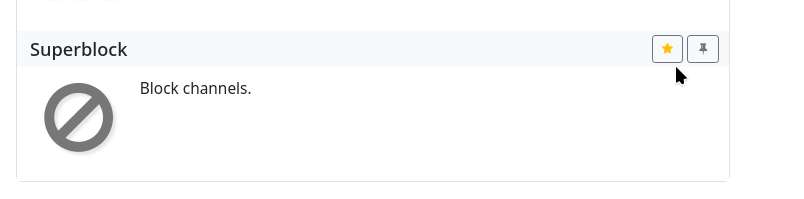
There is also a pin symbol. If you click on this, the app will also appear permanently in the navigation bar at the top right.
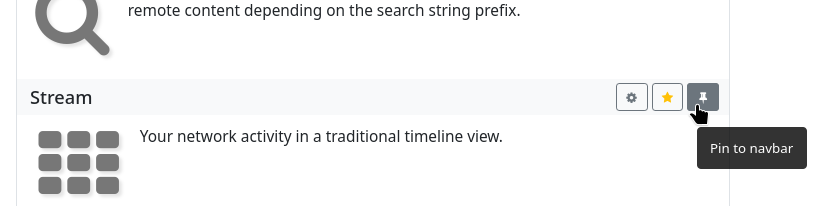
It is also recommended that you take this opportunity to pin the ‘Channel’ and ‘Stream’ apps to the navigation bar, as these are often needed.
It is also important to know how to add contacts...
For example, if you have found an interesting user in the public stream (if activated by the admin and the app is installed), you can simply click on the user's profile picture and select ‘Connect’ from the drop-down menu. You can also click on the user's handle, which will take you to a page with a ‘Connect’ button.
If you know the handle of a Fediverse user, you can also simply click on the ‘Connections’ app. The connection directory opens. There is a ‘+ Add’ button at the top. If you click on this, an input field opens in which you can enter the handle (remember: without the leading ‘@’). Click on the ‘+’ next to it and the contact will be added.
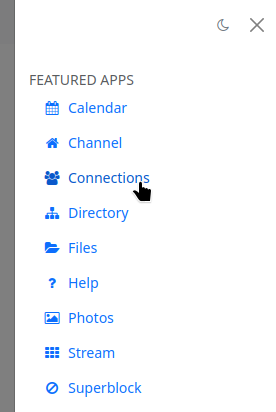

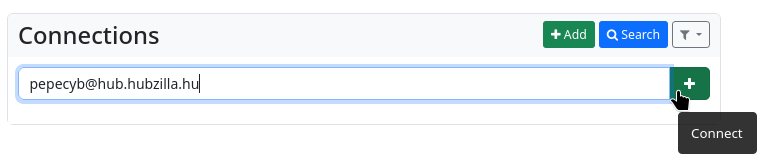

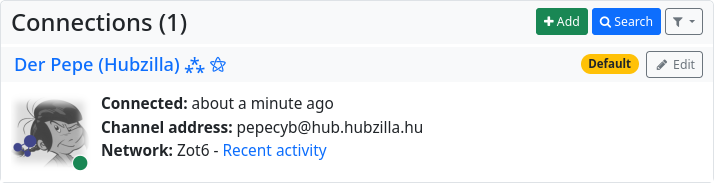
Finally, you can also call up the directory (it is best to deactivate ‘This website only’ in the left-hand sidebar in order to use the global directory). Here you can simply scroll through or search specifically by name or interests, or by tags (quick access also via a keyword cloud in the left sidebar). To connect, click on the ‘Connect’ button.
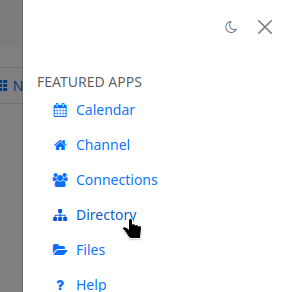
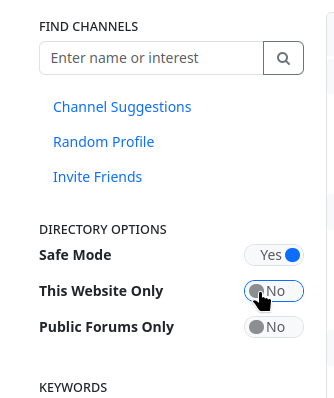
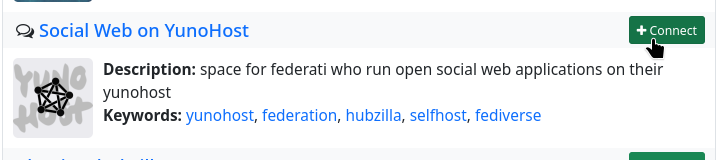
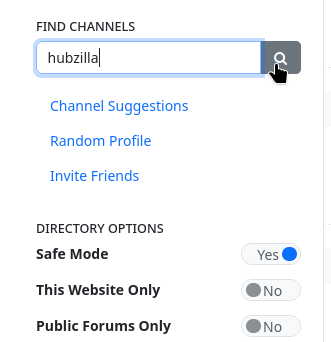
Once you have contacts, installed the apps and completed your profile, you can now use Hubzilla just like any other Fediverse service.
Is there an app?
Yes and no...
Basically, you don't need one. You can simply call up the hub in your web browser on your mobile device. The responsive design makes it easy to use.
However, there is an older app for Android that still works very well today. You can find it at F-Droid, for example, under the name Nomad. I still use it when I want to work with Hubzilla on my smartphone (which is rare).
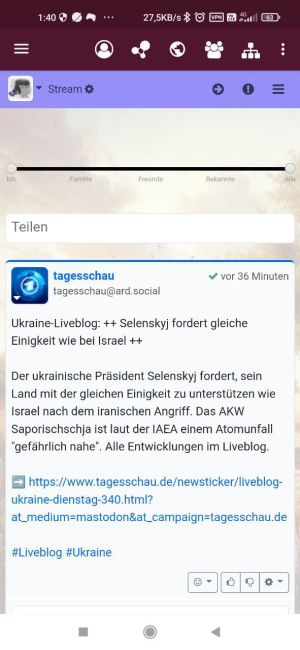
Customise the look of Hubzilla
After creating a channel, its appearance is not particularly appealing.
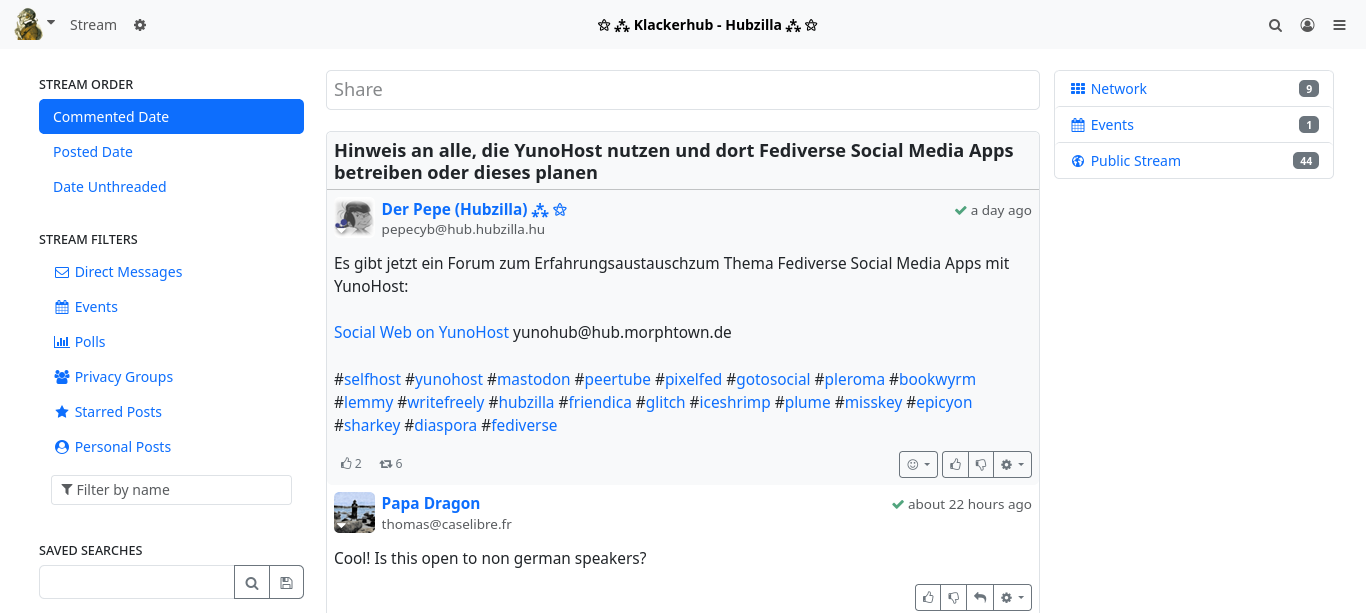
Pin apps
Firstly, pin the most important apps to the top navigation bar: ‘Write post’, ‘Channel’, ‘Stream’, ‘Connections’ and ‘Public post stream’. To do this, select the bottom menu item ‘+ Apps’ in the app menu (⋮ top right). This will take you to the app settings and immediately to the apps already installed. On this page, click on the small pin symbol for each desired app and you will immediately see the respective icon appear at the top of the navigation bar.
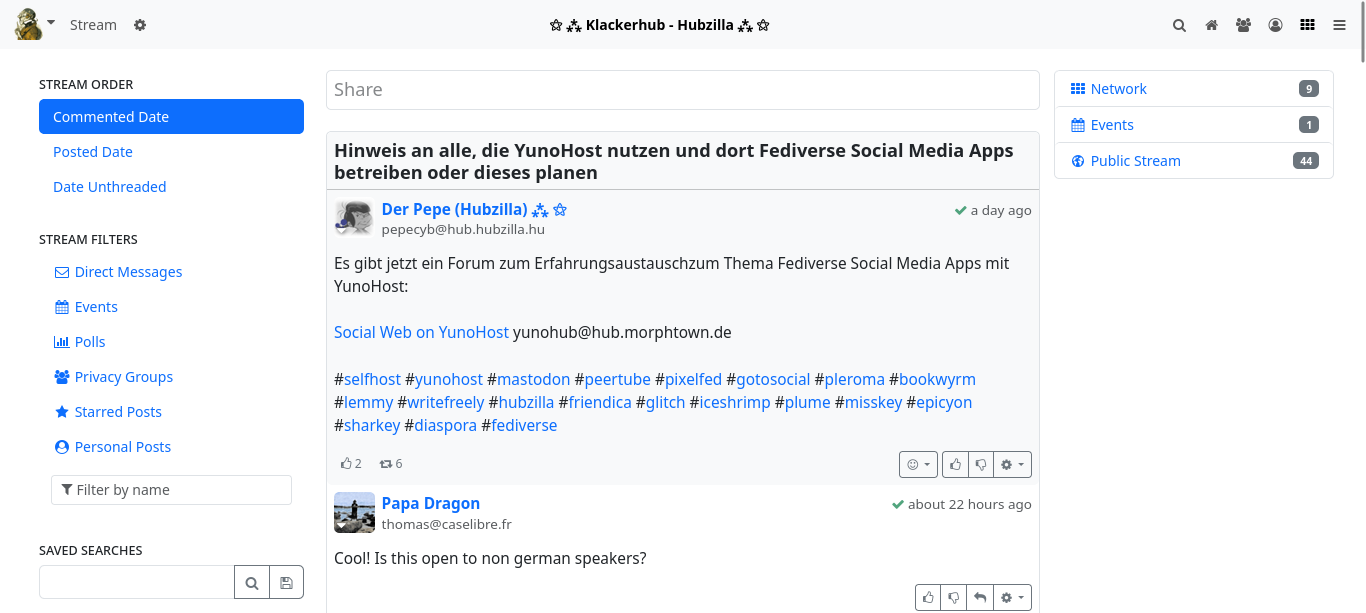
Display settings
Now it's time for the display settings. To do this, click on ‘Settings’ in the main menu (top left, where you can see your avatar image). The various settings categories can now be seen in the left-hand sidebar. Select ‘Display settings’ here.
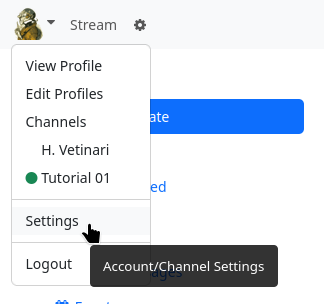
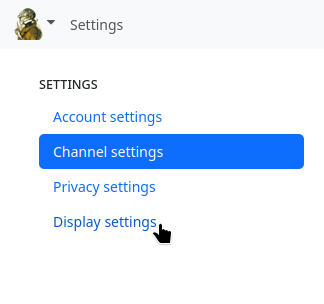
The page for the display settings is displayed. Since you want to customise the design, the ‘Custom theme settings’ tab is the right choice.
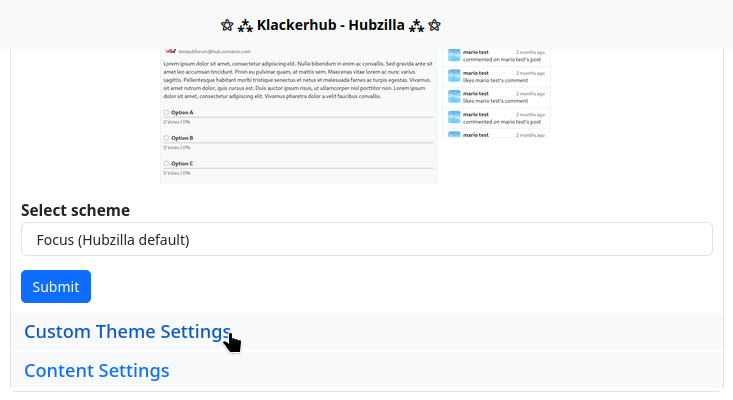
However, the input screen initially only has a few options (five settings). The last setting is the one for which you must switch on the switch first: ‘Show advanced settings’. Click on ‘Submit’ and call up the ‘Customised theme settings’ tab again. You will now see many more settings.
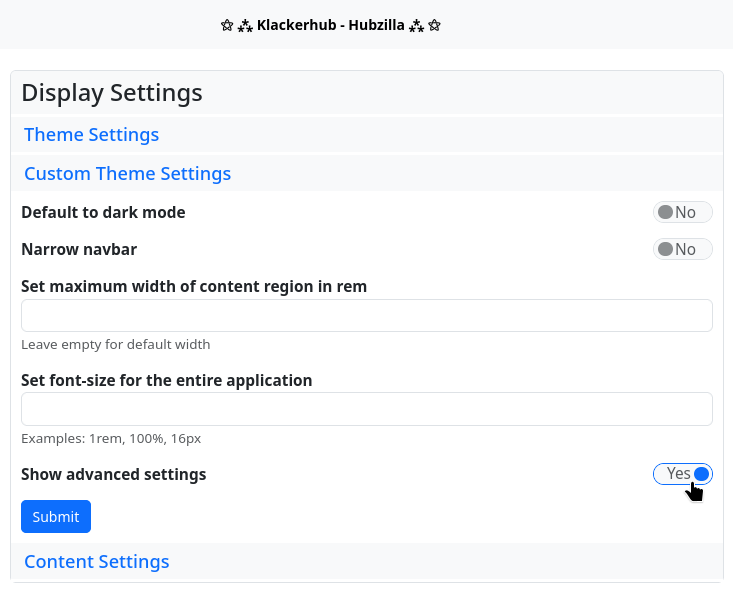
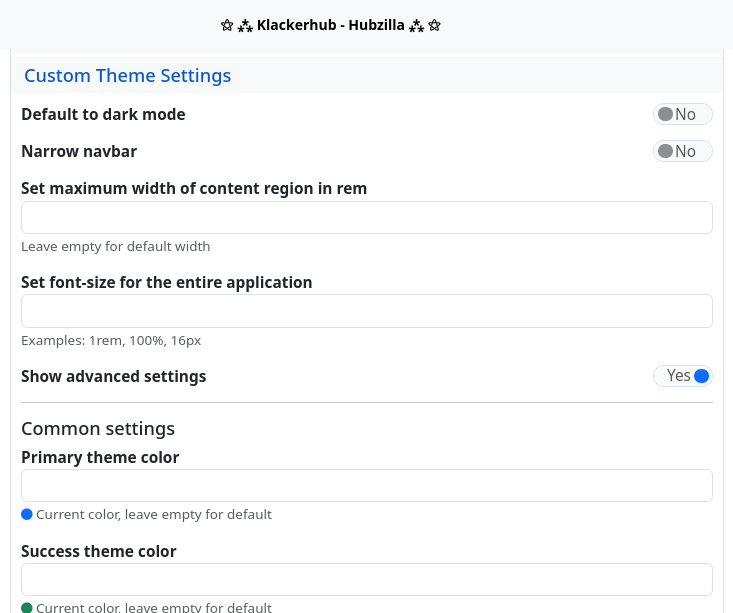
As an example, the colours are changed here, the size of the avatars in the stream is adjusted and a background image is set.
Under the main settings you will find the settings for the colours of the colour scheme. The default colour is displayed as a small circle under each input field. When choosing your own colour, it makes sense to use the standard colour as a guide, at least in terms of brightness. If you click in one of the input fields, a colour selection dialogue box opens, which you can use to specify the colour. As an example, here is a purple colour scheme in which the basic colours are changed: ‘Primary theme color’, i.e. the basic colour of the theme, ‘Success theme color’, which is the colour for clickable links, for example, ‘Info theme color’, which is displayed as the background colour for highlighted menu items, for example, and the ‘Background colour of the navigation bar’. All other colours are not changed in the example. The choice of colour is of course up to you.
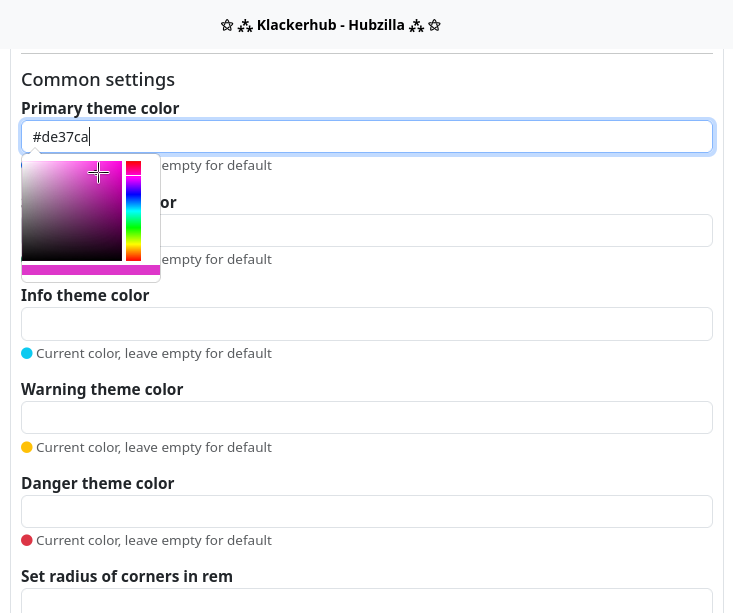
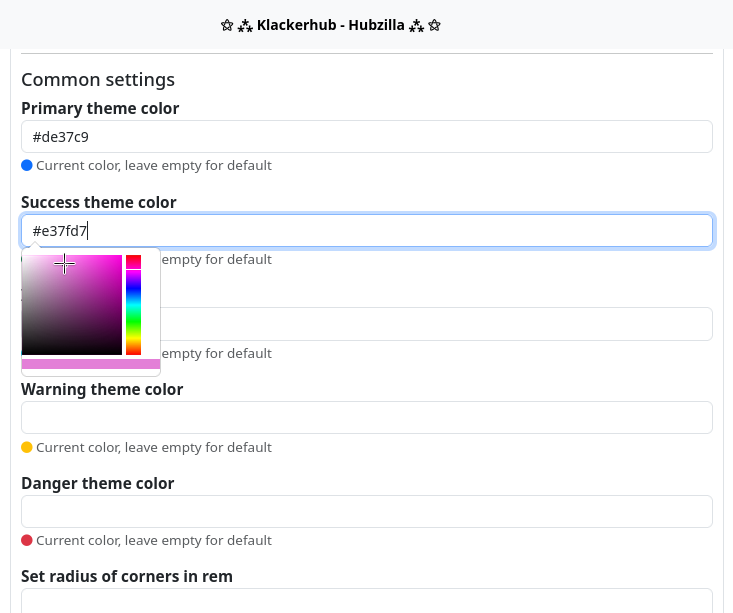
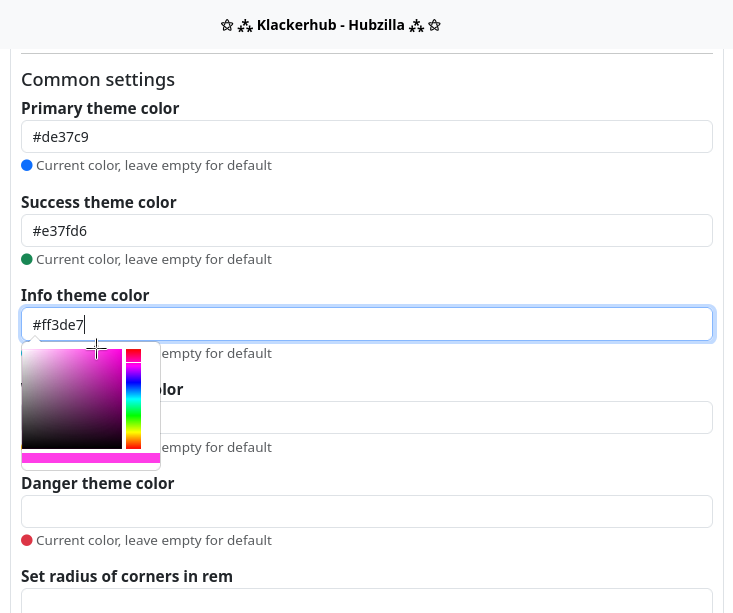
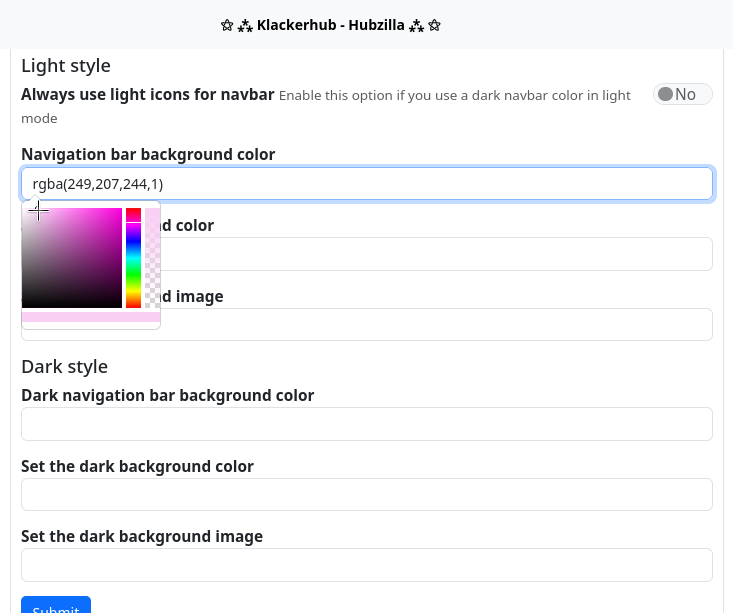
Schließlich die „Größe der Avatare von Themenstartern“ auf 48 Pixel festlegen.
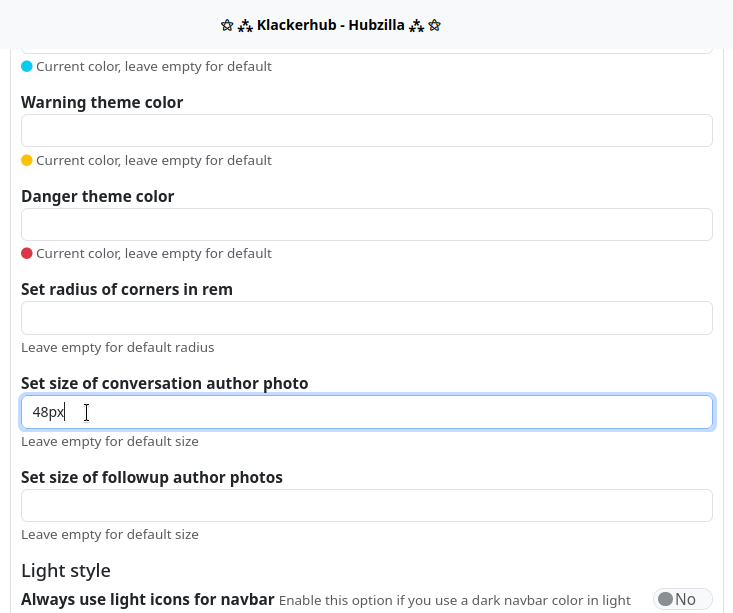
The background image is still missing. This should be relatively large, approximately the size of the main screen used. It is also advisable to use a rather light or pale image (if necessary, lighten it with the graphics programme and reduce the contrast) so that it does not ‘overwhelm’ the actual content.
The background image must be accessible somewhere via a URL. It makes sense to upload the image to the files (cloud) of your own channel and use it from there.
To do this, open the ‘Files’ app in the app menu. Here you can create an extra folder if you like (please note that the folder and the image uploaded there are publicly accessible... adjust the access rights with the small padlock, the privacy tool, if necessary) and then upload the image.
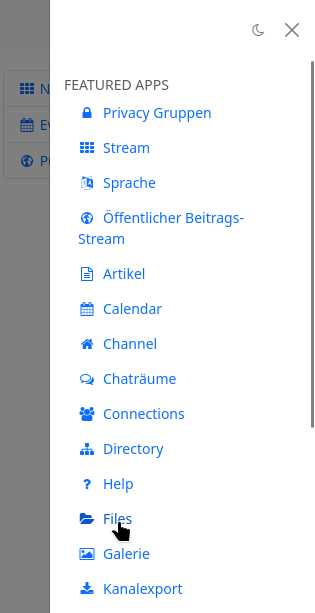
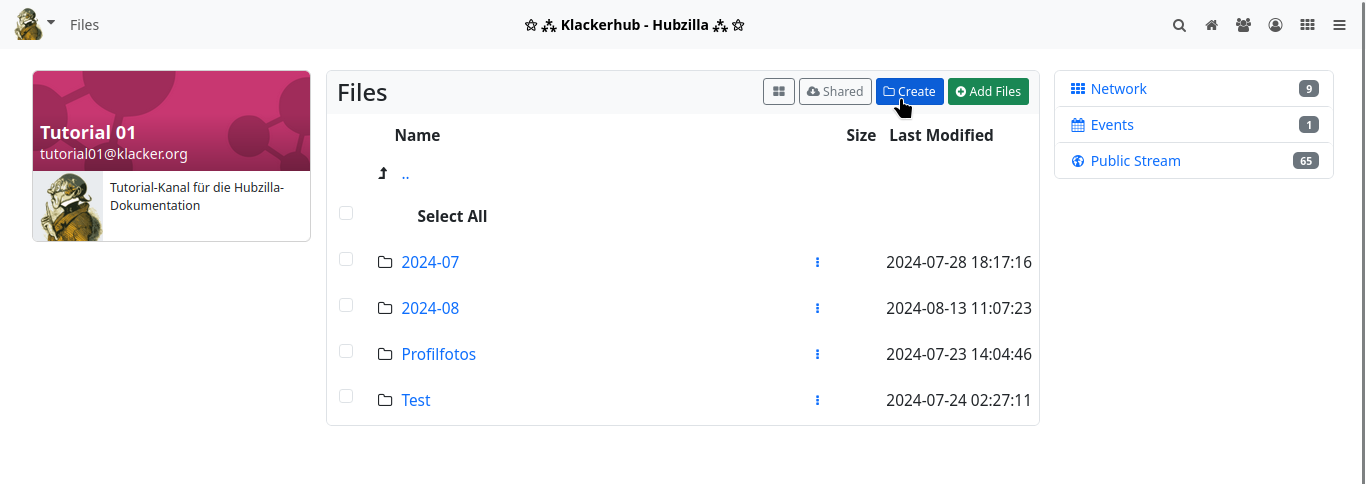
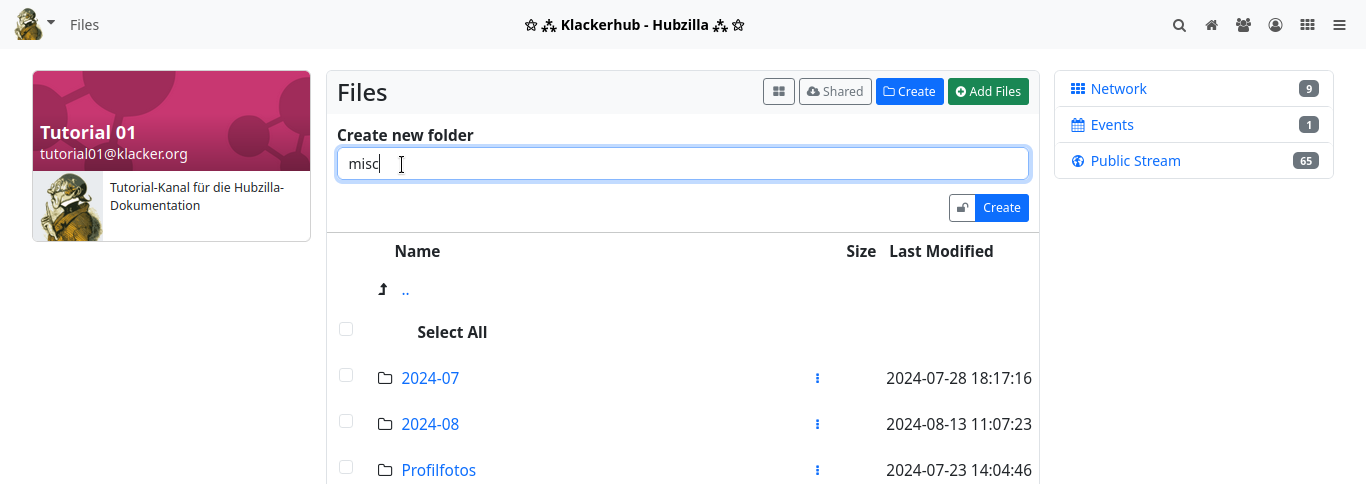
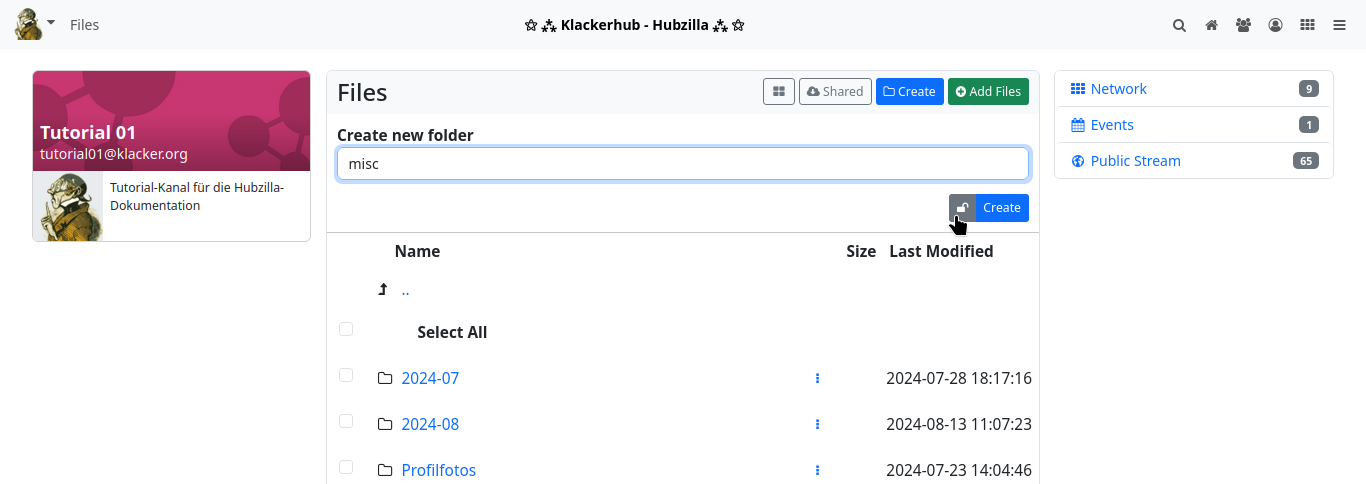
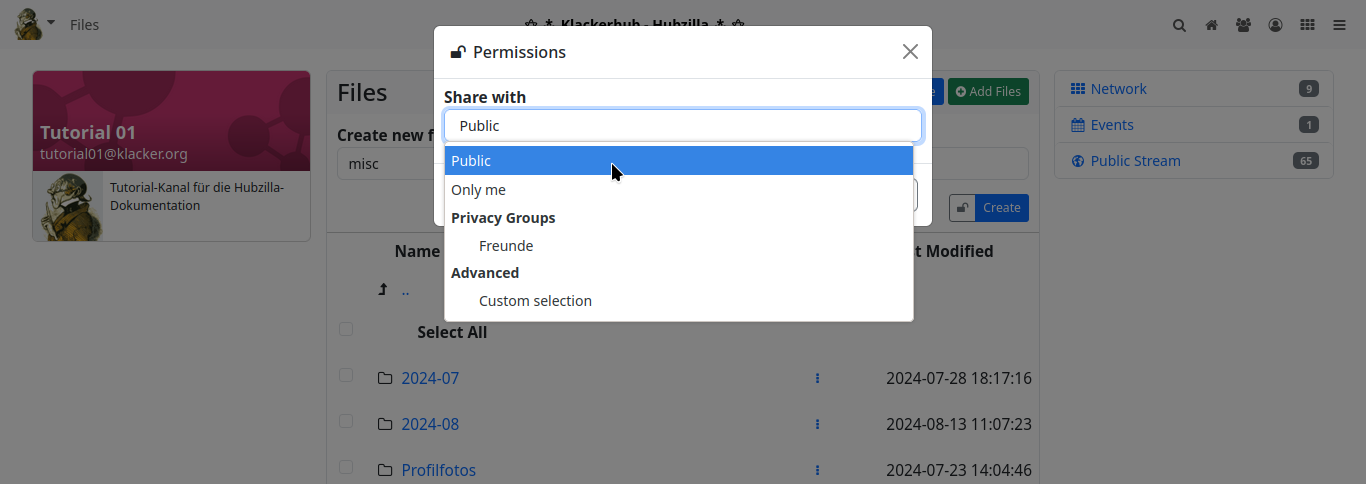
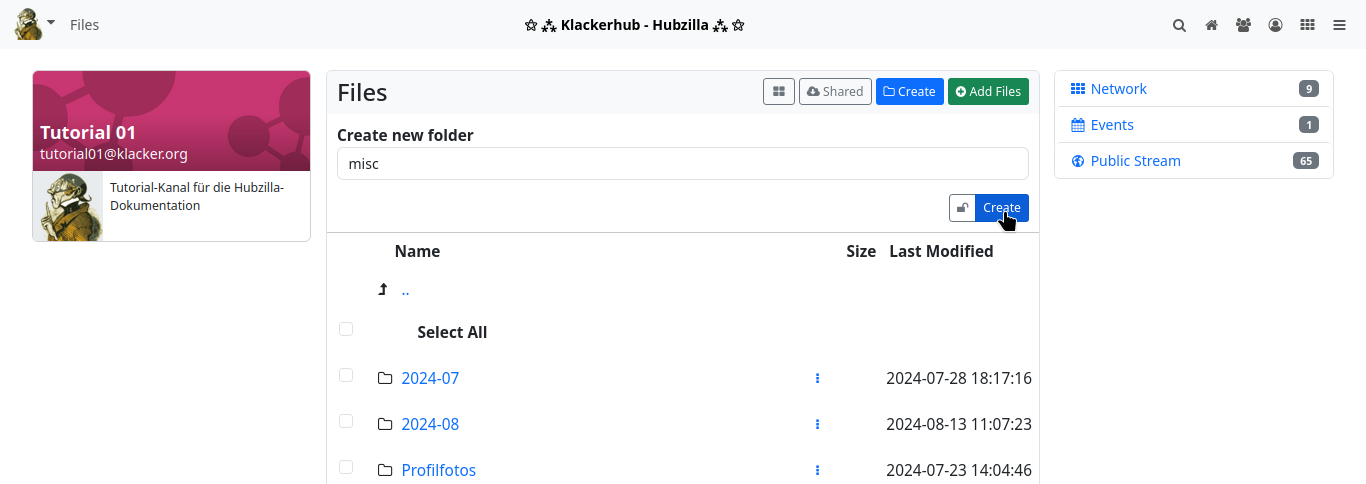
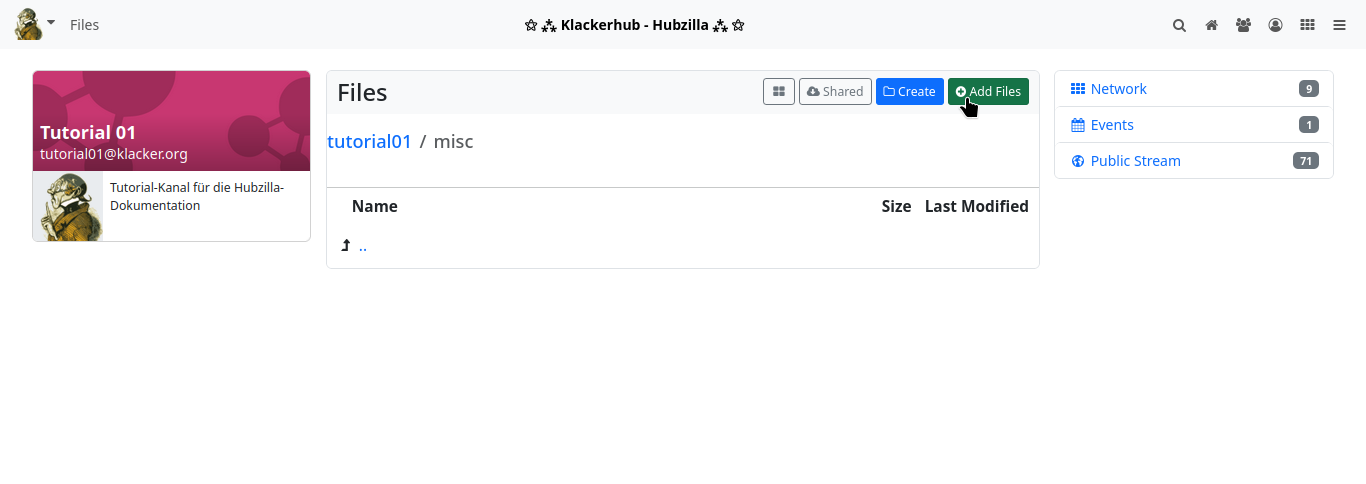
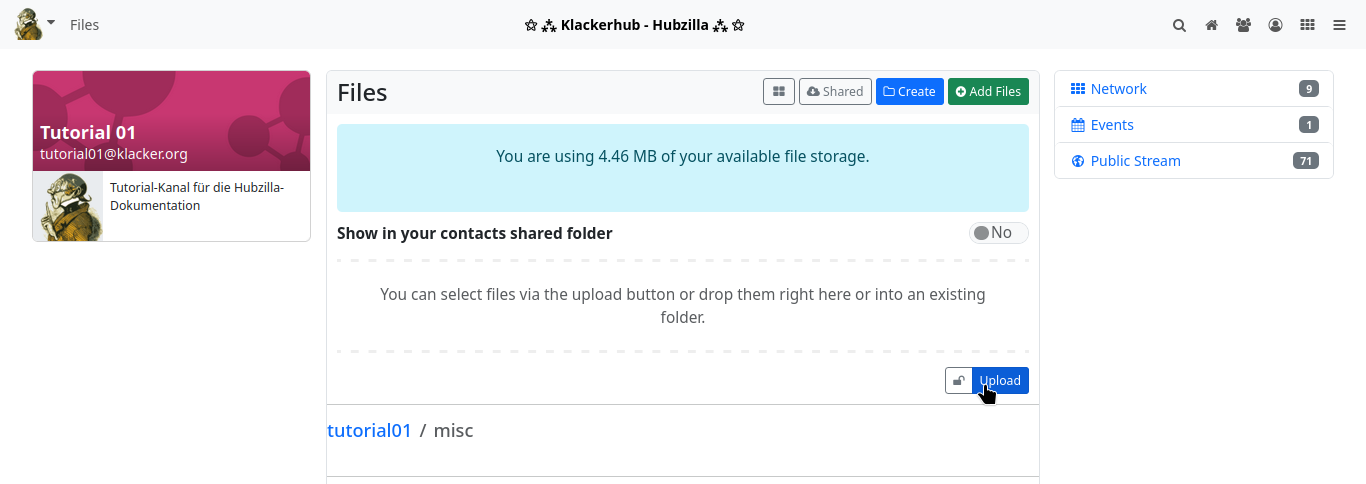
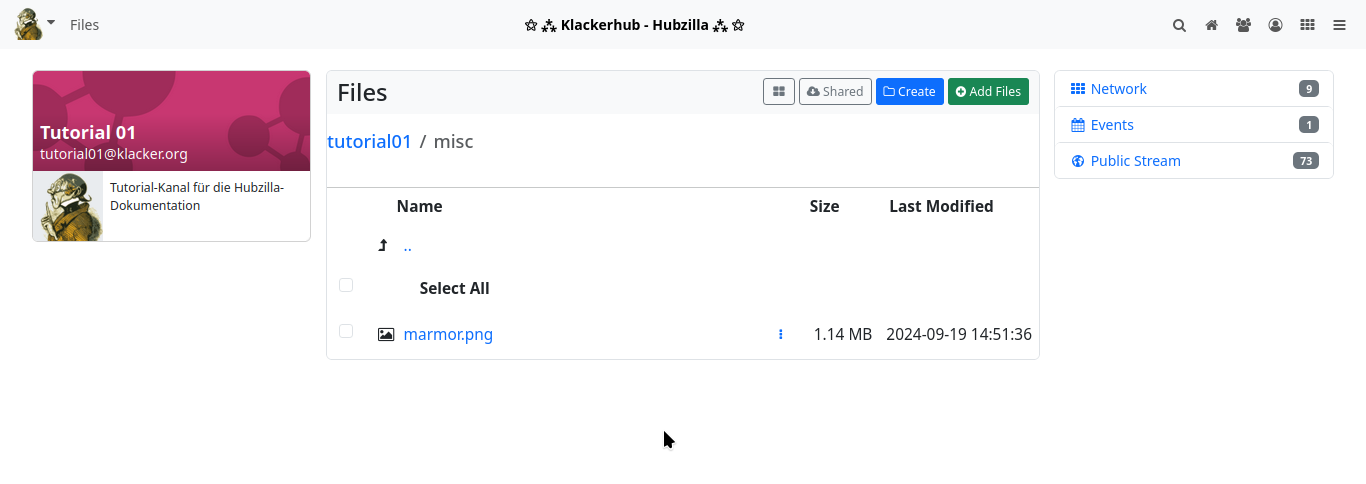
After uploading, the image is displayed in the file list. Right-click on the entry and select to copy the URL to move the URL for the image to the clipboard.
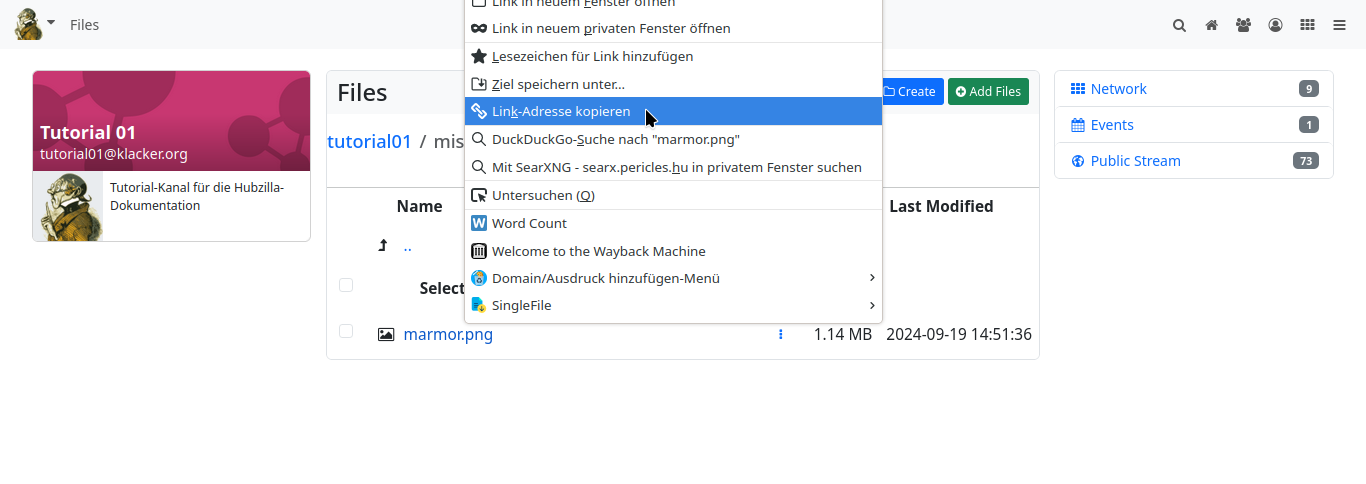
Back at ‘Customised theme settings’, you can now enter the URL in the ‘Background image’ input field.
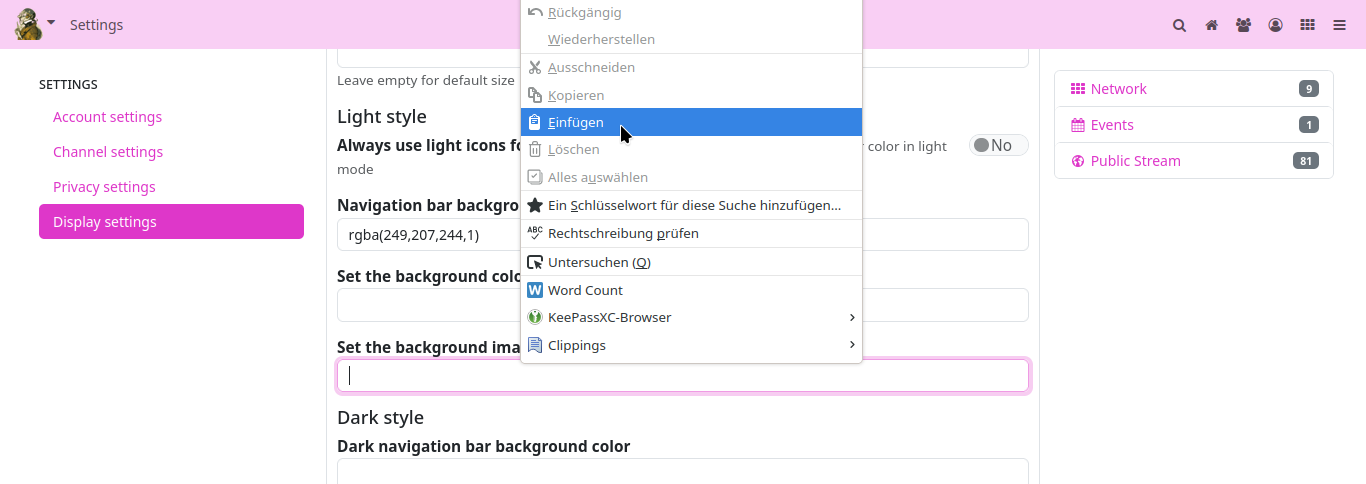
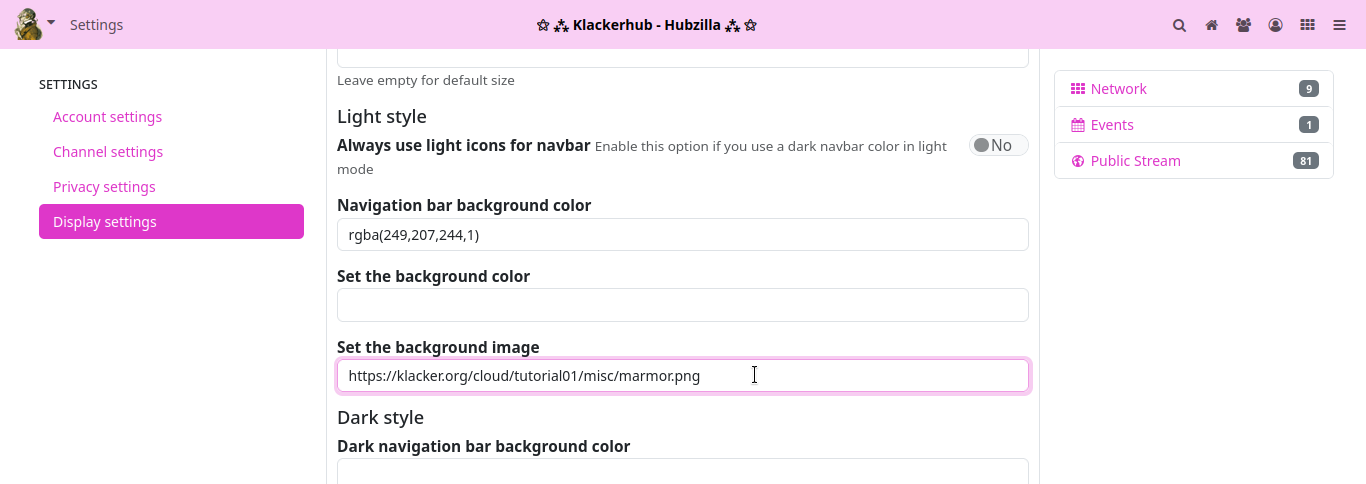
One last click and Hubzilla shines in its new look.
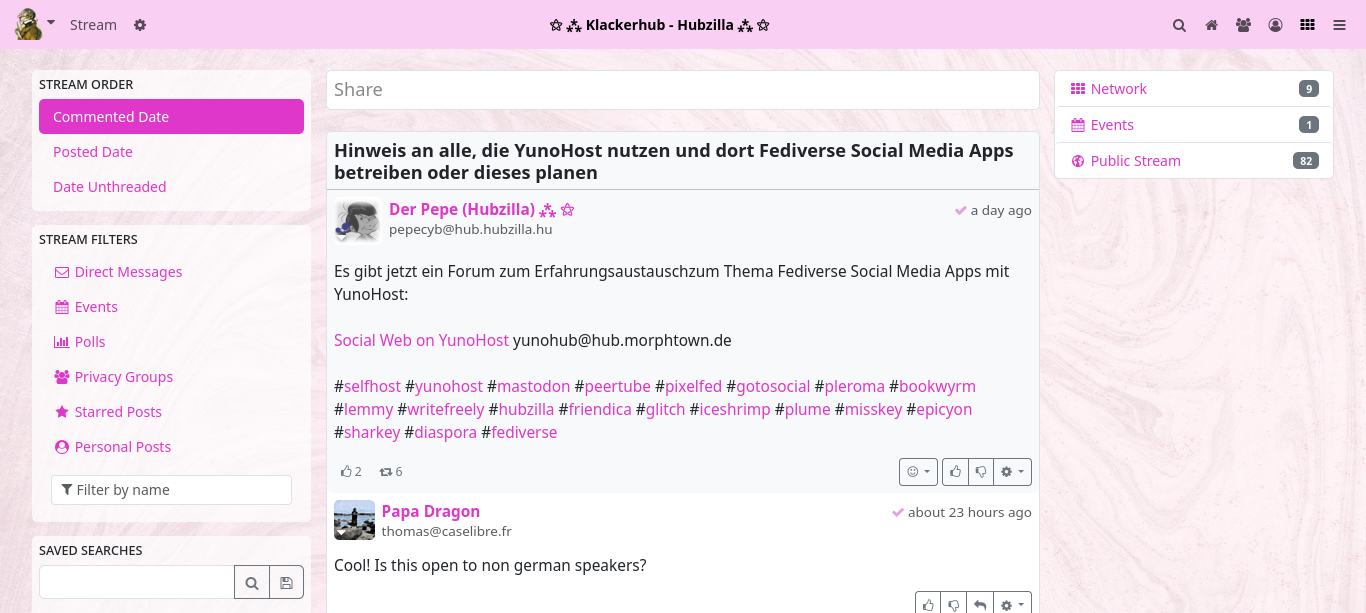
PDL Editor
Basics
Various Hubzilla apps and basic functions are based on specially designed websites. The user does not come into contact with the underlying mechanisms, they simply use these pages. If you call up the ‘Channel’ app, for example, your own channel is displayed.
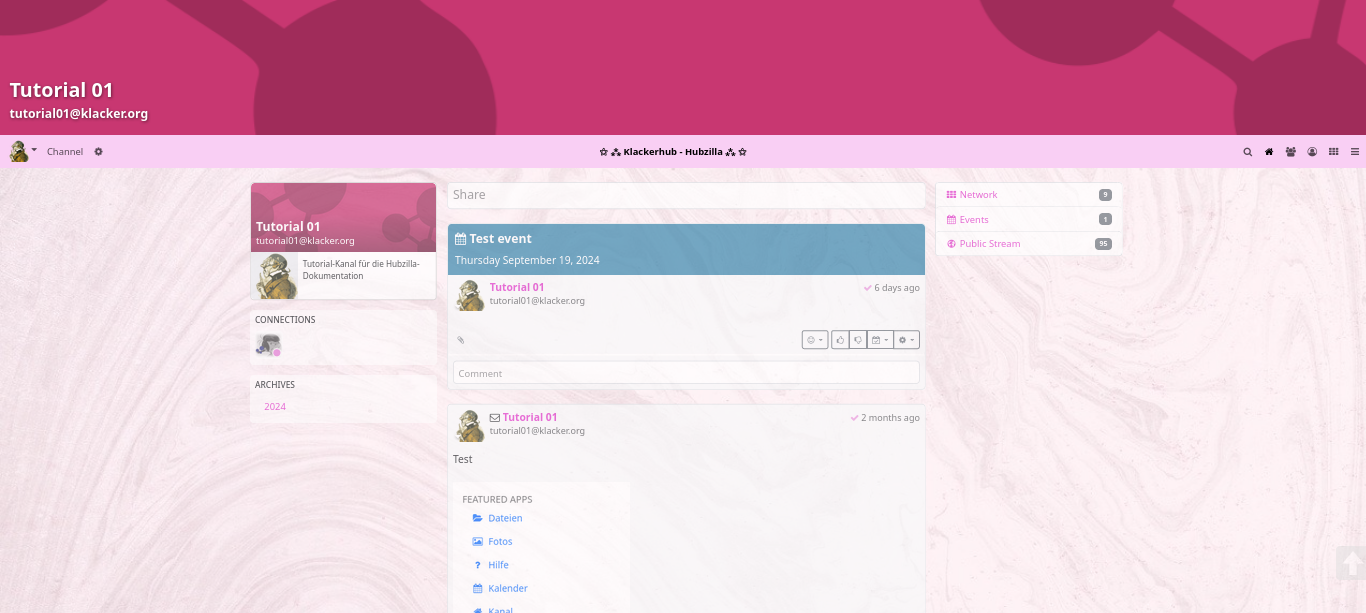
The channel banner can be seen at the top. The channel name and the channel address (handle) are embedded in this banner.
Below this is the navigation bar with the main menu, the title of the hub, any pinned apps and the app menu.
However, the area below the navigation bar is where things get interesting. This is where the biggest differences can be seen between the various apps. On the channel page, a card with the channel information (banner, profile picture, short description, profile information) can be found at the top of the left-hand sidebar (in the unchanged default state).
In the centre, in the content area, the content created by this channel is displayed. Below the profile info card, in the left sidebar, there is a card with some of the connections (when calling up external channels, the shared contacts are displayed here).
Below this is a card with the archives of the content (the top level is the years, one level below the months). If you select an archive, only the content published in the selected archive period is displayed in the content area. Below the archive card is the category card. All categories under which content was published are listed here. Clicking on such a category causes all content published by the channel under the corresponding category to be displayed in the content area.
Below the archive card is the card with the keyword cloud, which displays the hashtags used and can be used to filter the content of the content area (channel articles).
If there are unseen notifications, these are shown in another card in the right-hand sidebar.
This is the ‘normal state’.
Editing modules with the PDL editor
The various pages that can be accessed via apps are also referred to as ‘modules’.
As a user, you can now customise and design the appearance of these pages to a large extent. Internally, the structure of such a page is determined by a PDL file. These files are layout files that use the Comanche page description language.
So that the user does not have to deal with such a language, there is the app ‘PDL Editor’, with which you can change / create the page structure with a GUI.
The app must first be installed and activated. Then you can call it up from the app menu. If you call up the PDL Editor, the page structure of the HQ is displayed as standard.
The main menu of the PDL Editor is located at the bottom centre of the screen. Here you will find the entries
‘MODULES’, “TEMPLATES”, “ITEMS”, “SOURCE” and “APPLY”.
From the ‘MODULES’ menu, you can select the module to be edited (this corresponds to the page to be edited).
Assuming you want to customise the channel page (as it is displayed to you and visitors), select the ‘channel’ module here.
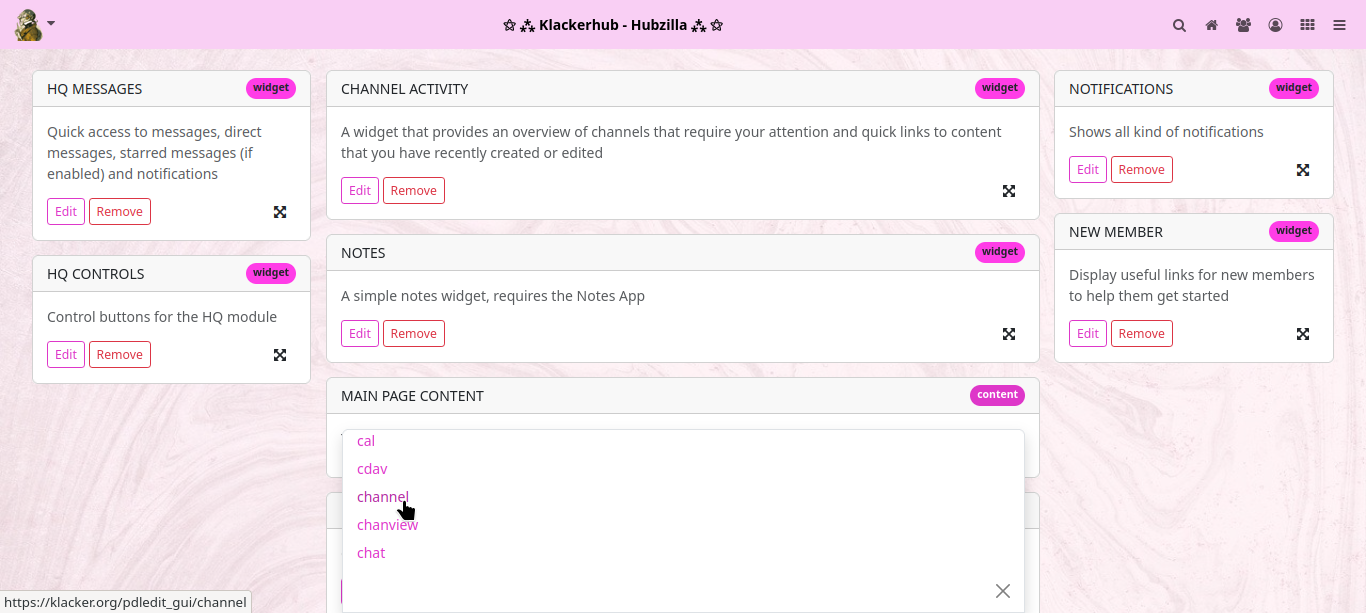
The PDL file for the channel page is loaded and you can see the corresponding components (‘ITEMS’) of this page that have just been described.
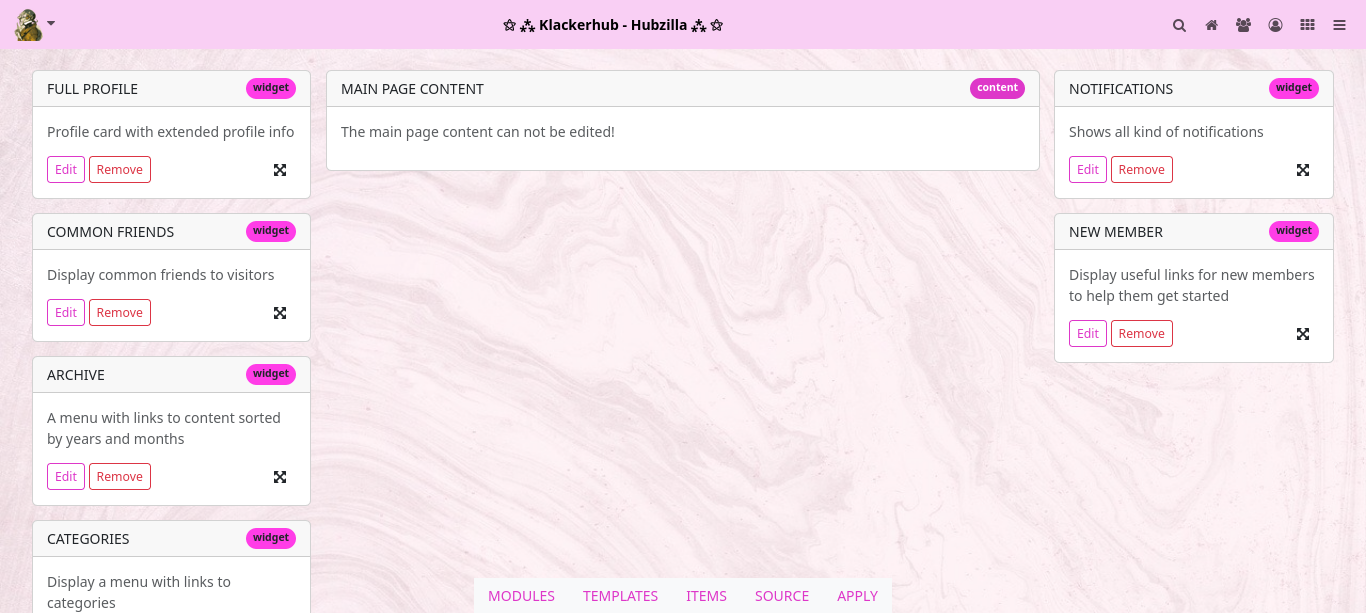
Assuming you would now like to ‘refine’ our channel page by displaying the time in the right-hand sidebar, select the ‘CLOCK’ item under ‘ITEMS’, ‘grab’ it with the mouse pointer at the cross arrow symbol and drag it to the right into the sidebar.
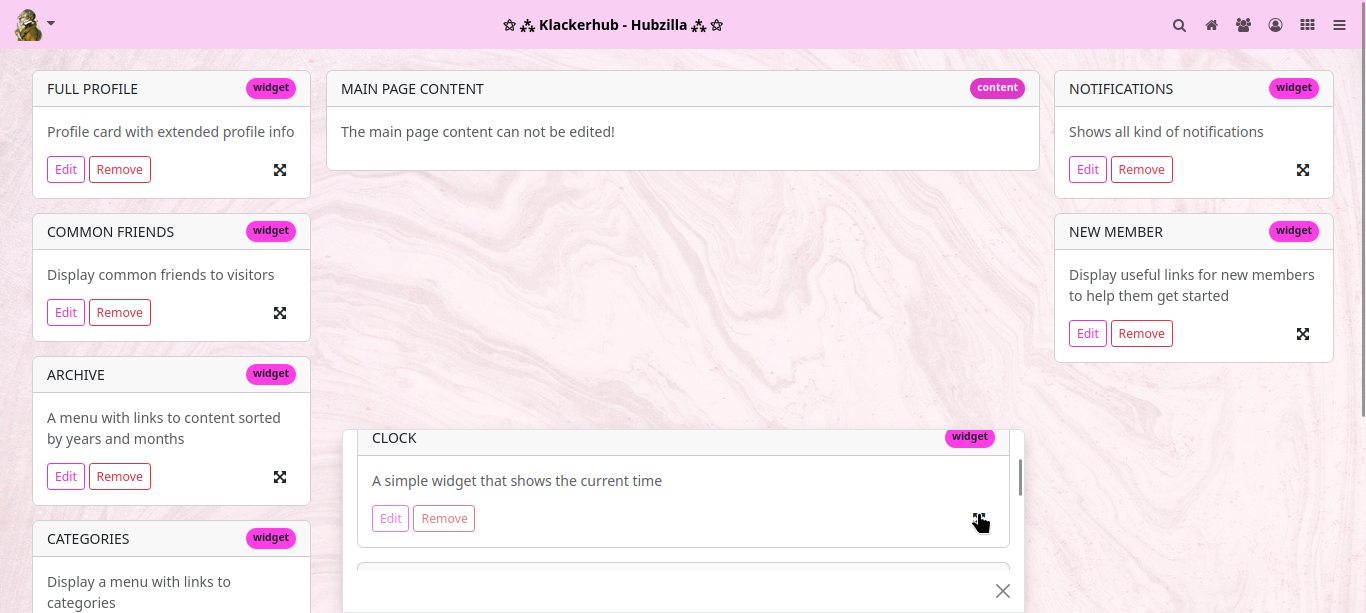
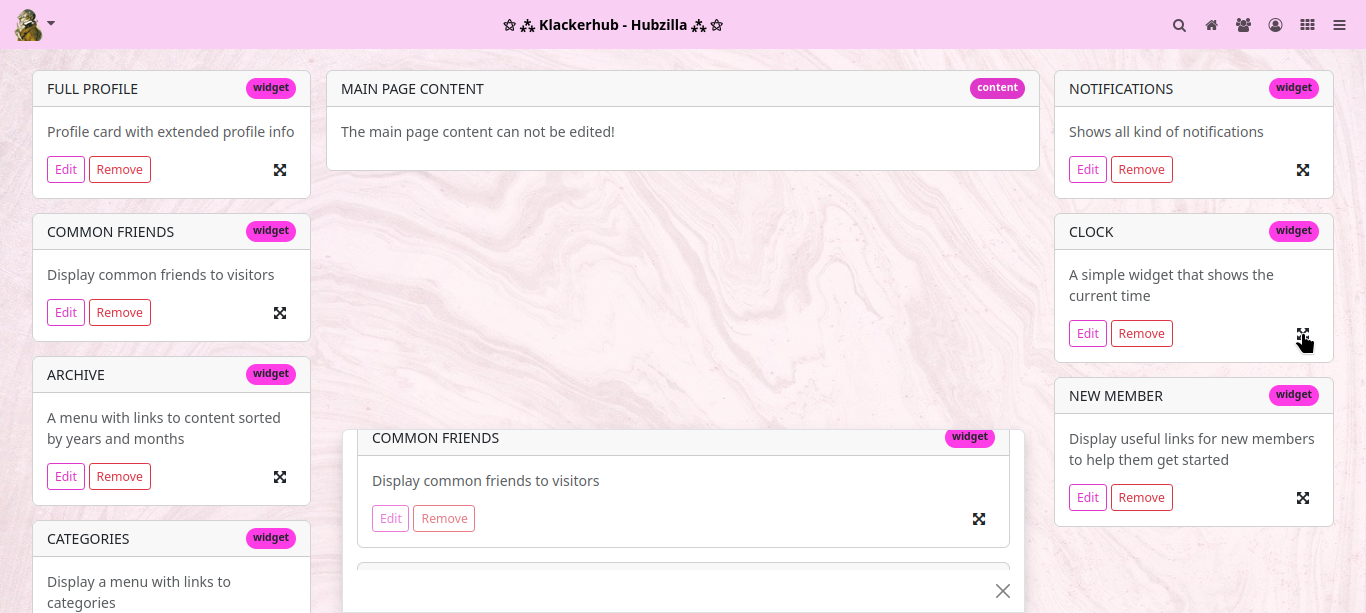
To apply the changes, click on ‘APPLY’ in the main menu.
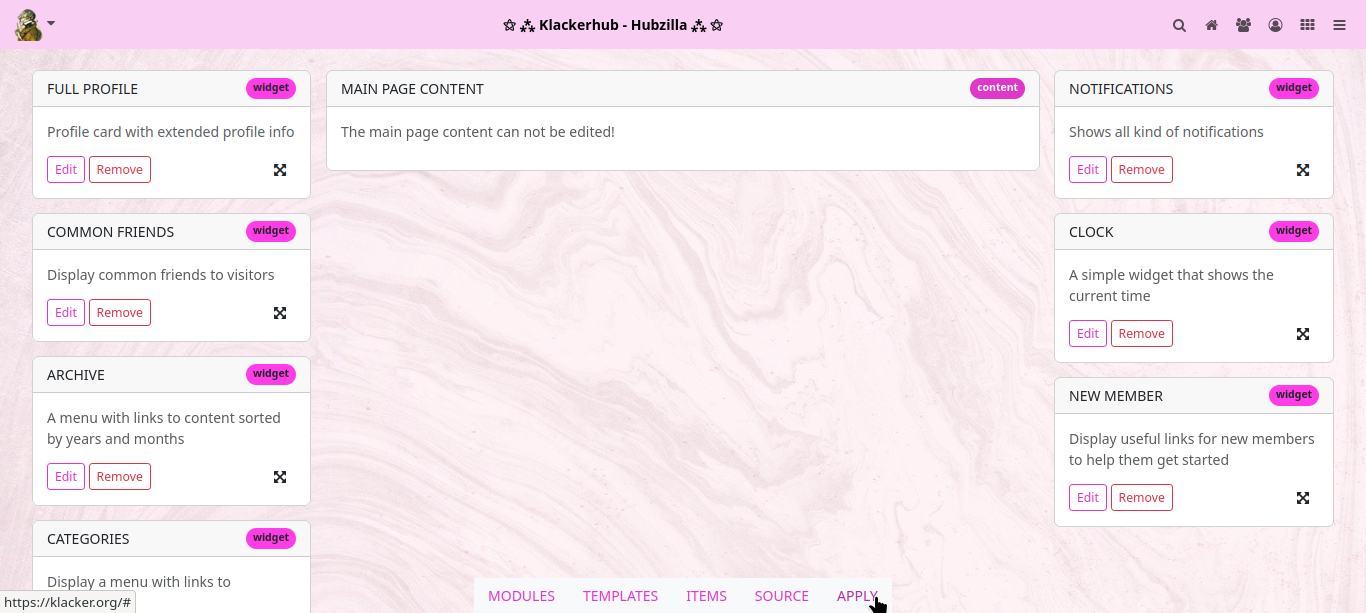
If you now open the channel page, a card with the current time appears in the right-hand sidebar.
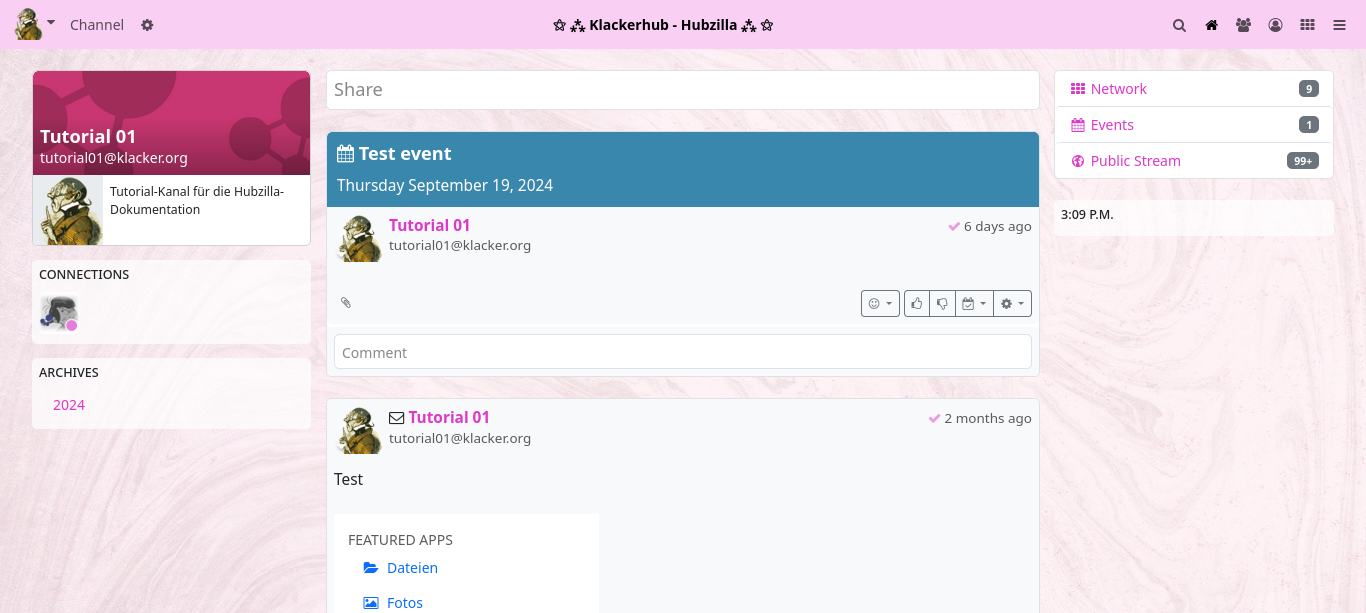
In this way, you can customise all the pages found under ‘MODULES’ to your own taste.
If you have customised your page and it is somehow ‘so completely chopped up’: No need to panic! In the main menu, you will find the additional entry ‘RESET’ for customised layout pages. Click on it to reset the page layout to the Hubzilla standard.
However, not all items are presented here... Everyone can experiment a little. Most of them have an explanatory title.
If you click on ‘SOURCE’ in the PDL main menu, the source code of the current layout is displayed. A look here will help you familiarise yourself with PDL. You can also make changes directly in the source code... if something is not accessible via the ‘ITEMS’. However, you should familiarise yourself with the page markup language, blocks and modules beforehand.
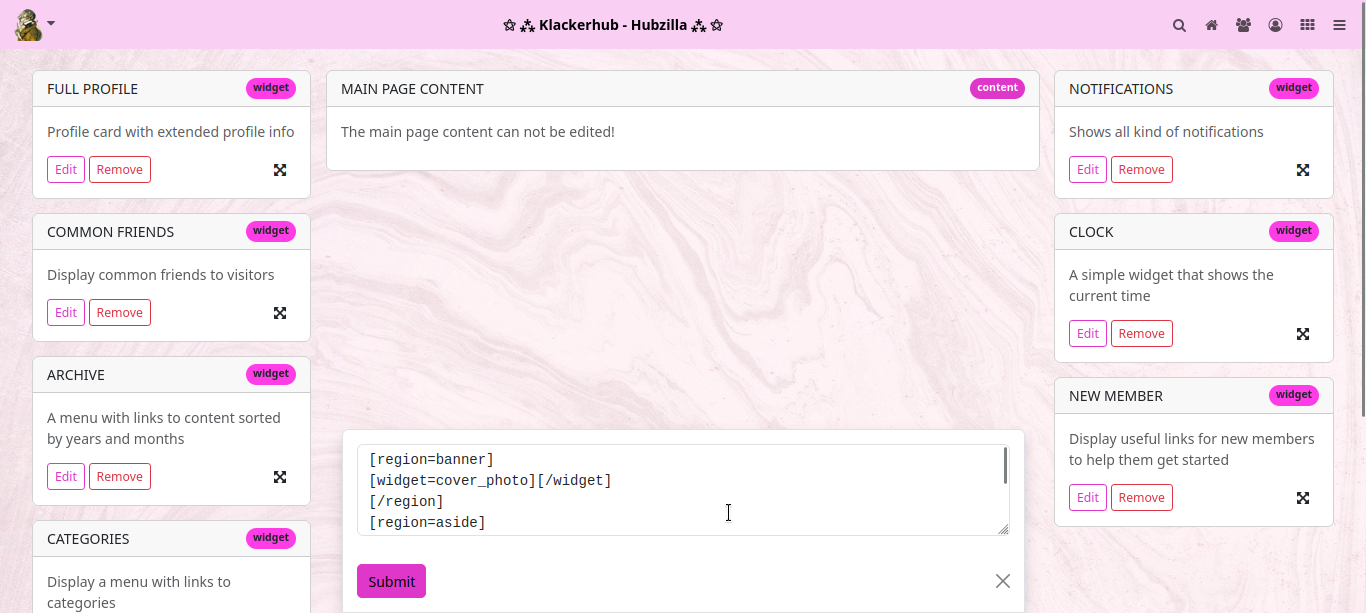
PDL editor for advanced users
Suppose you want to make some links accessible via a menu in the right-hand sidebar of the channel page. This is perfectly feasible.
But first you need a menu. To create menus, however, you need to install and activate the ‘Websites’ app, because creating menus is part of the website functionality. So even if you don't want to create websites in your channel, you need the ‘Websites’ app to create menus. Although... that's not quite true. You can also access the menu editor in a different way than via the ‘Websites’ app. To do this, enter <url-des-hub>/menu/<channel name>. Now you also end up in the menu ‘app’. However, it is easier with the website app.
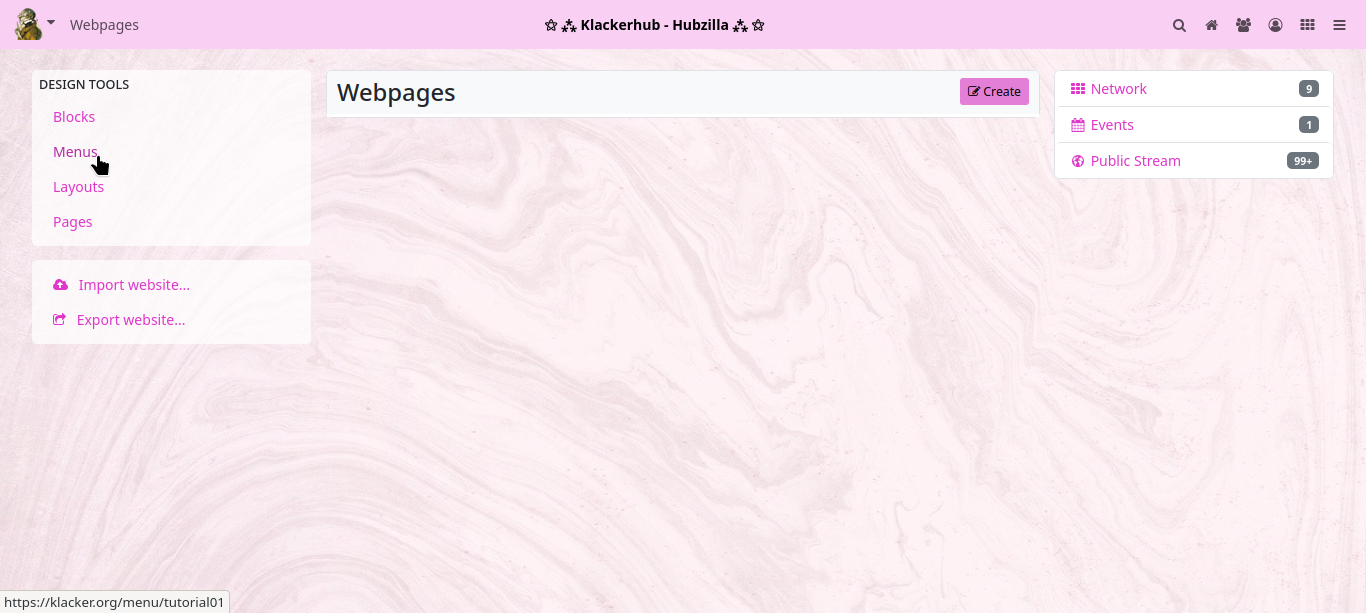
Click on ‘Create’ to open the menu editor.
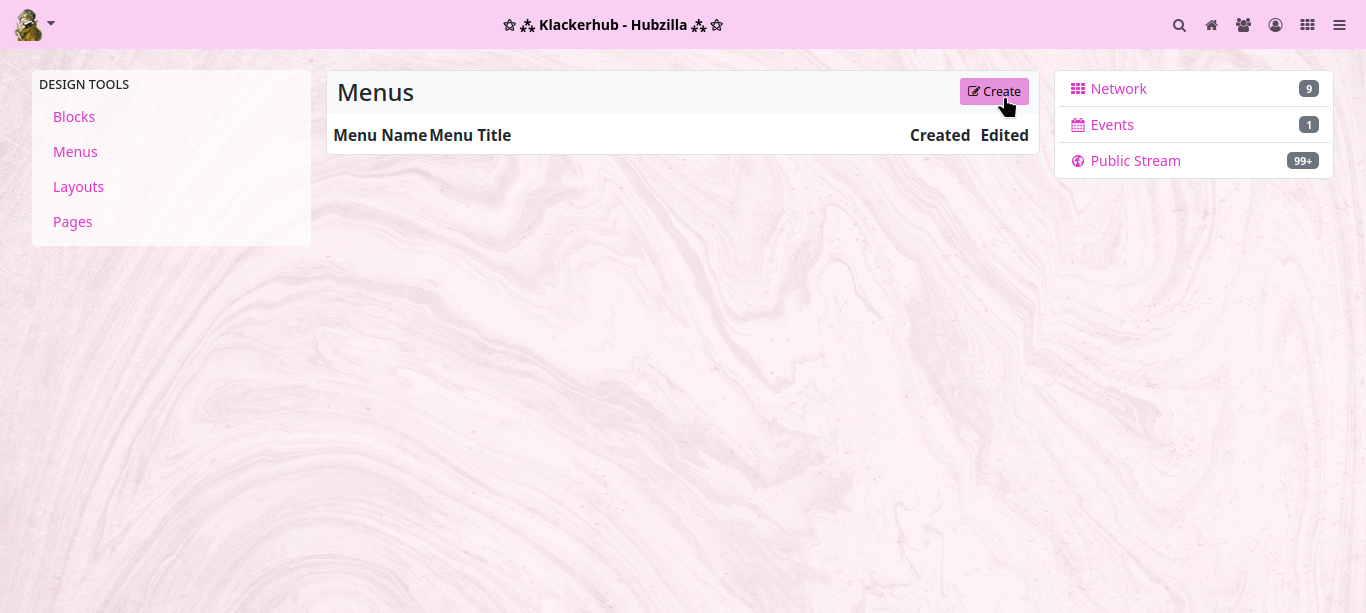
Here you now have to enter a suitable name (which you can use to address the menu later) and (optionally) a title for the menu (this can be seen later on the website).
Then click on ‘Submit and continue’.
You will now be taken to the link editor for the menu you have just created. Here you enter the title of the menu item and the corresponding URL. You can also specify the order in which the menu items are sorted using the ‘Order in list’ field. Once you have completed the entry and clicked on ‘Submit and continue’, you can then enter another menu item. Clicking on ‘Submit and finalise’ adds the entry and closes the menu editor (you can of course also edit menus afterwards).
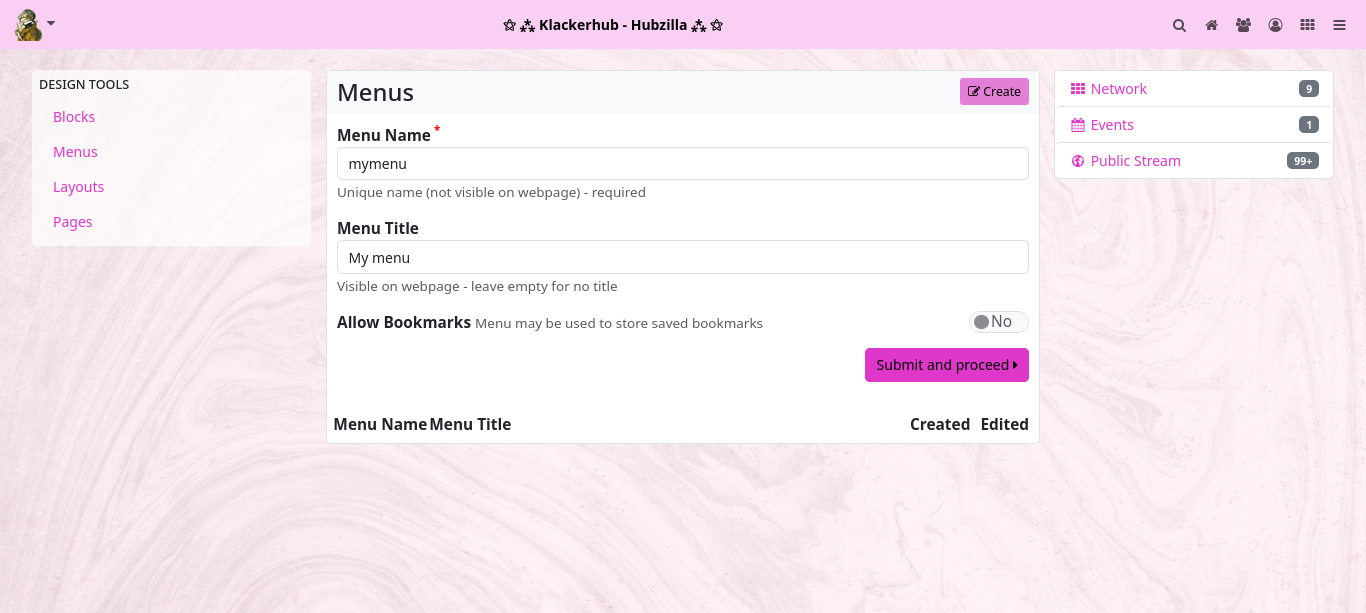
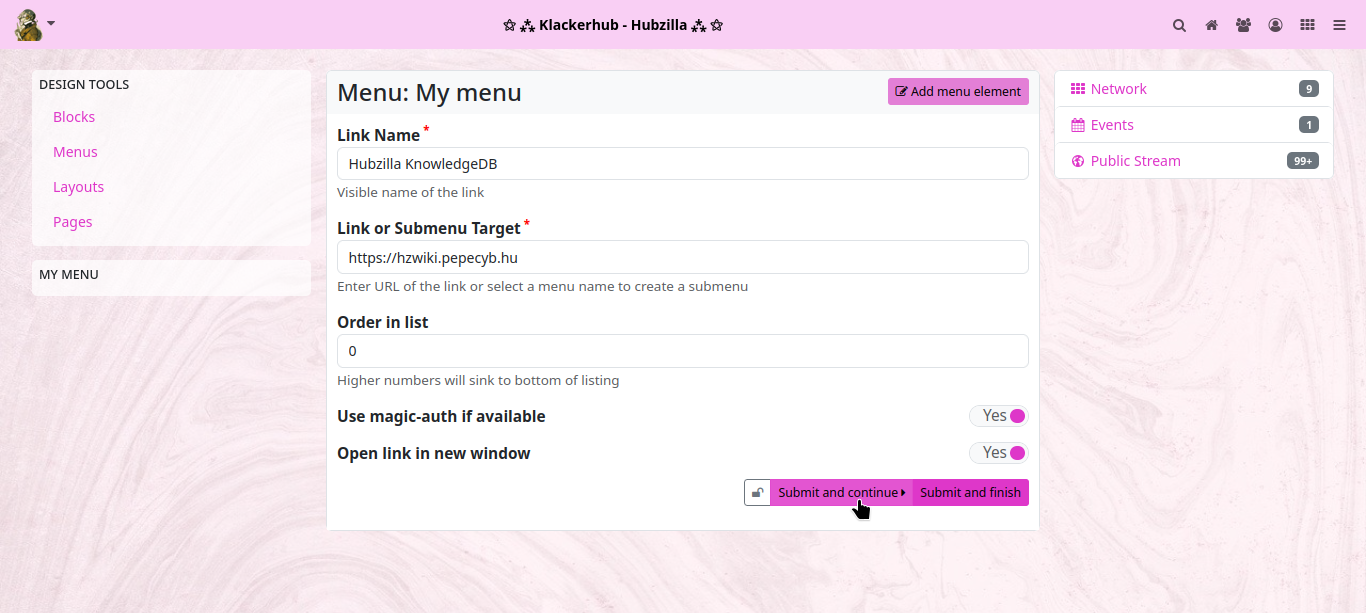
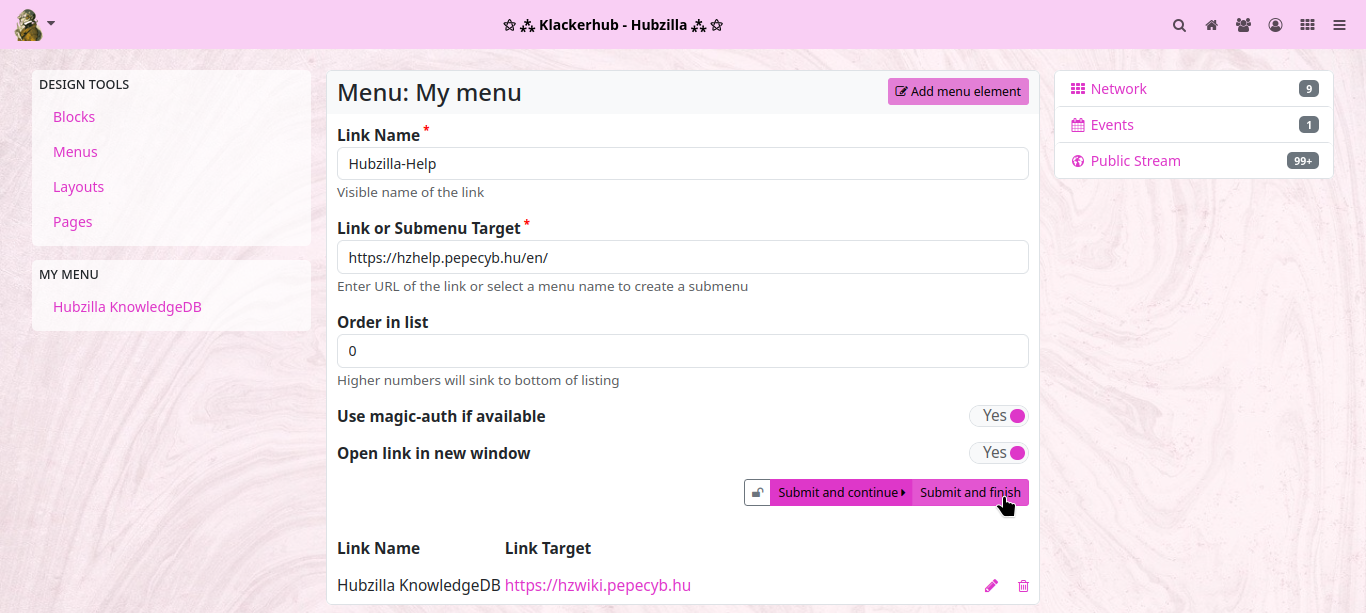
The new menu now appears in the list of menus.
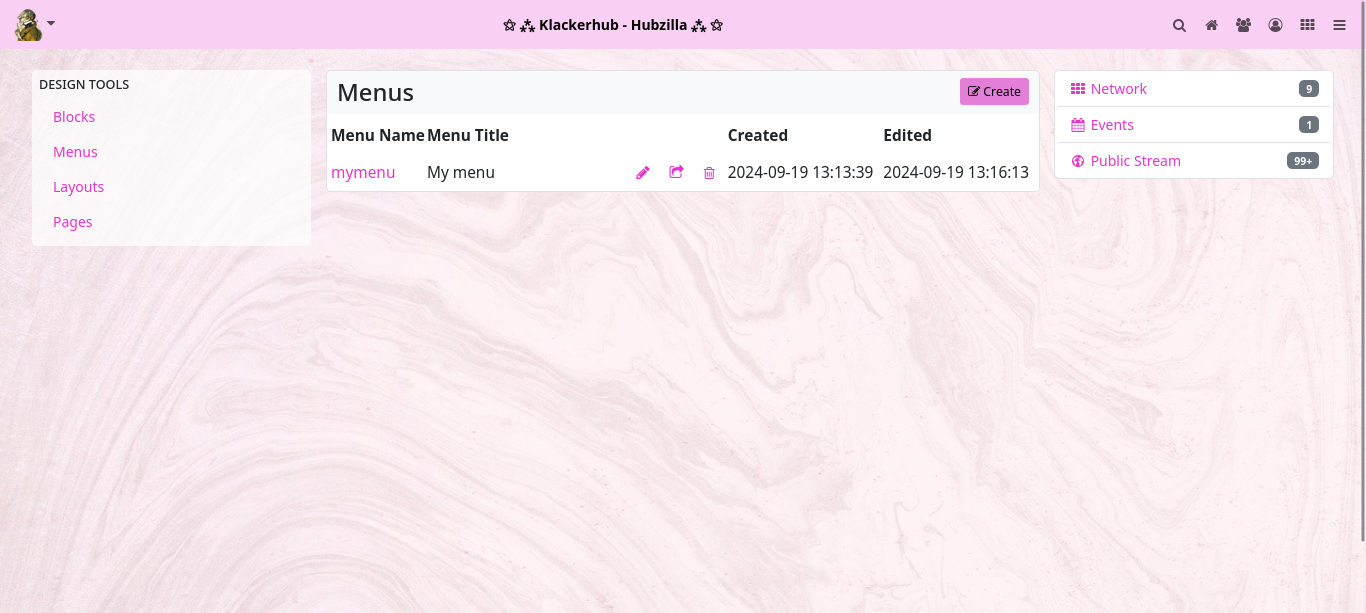
Now return to the PDL editor and call up the channel module.
Now there are again two possibilities. Either you open the source text editor ‘SOURCE’ and enter the entry for the menu card in the appropriate place by hand...
If you want the menu to appear in the sidebar, select the ‘aside’ region and enter [menu]mymenu[/menu] as a new line.
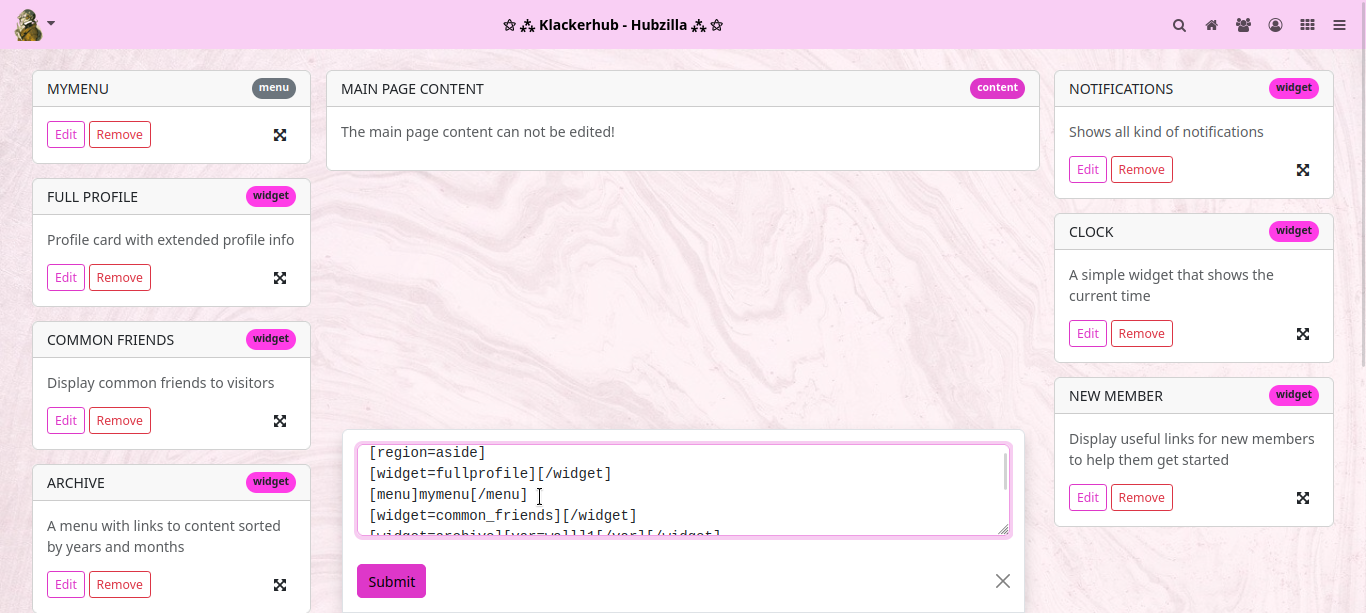
Now click on ‘Submit’ and the new map will appear in the visual PDL editor. Accept with ‘APPLY’... and then the menu is shown on the channel website.

The second method (with which you don't have to search for the right place in the source code) is to simply drag any item in the PDL editor to the place where the menu should appear. Then click on the ‘Edit’ button for this item, change the existing entry to [menu]mymenu[/menu] and click on ‘Submit’. Then click on ‘APPLY’ and you have the same result.
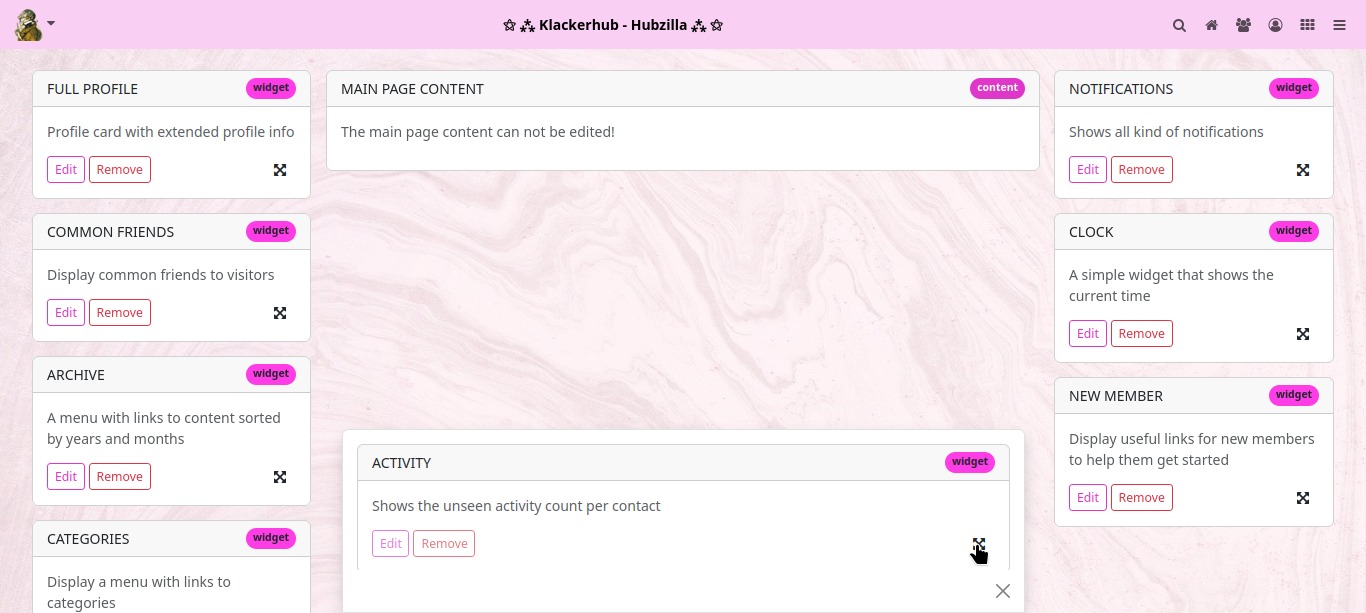
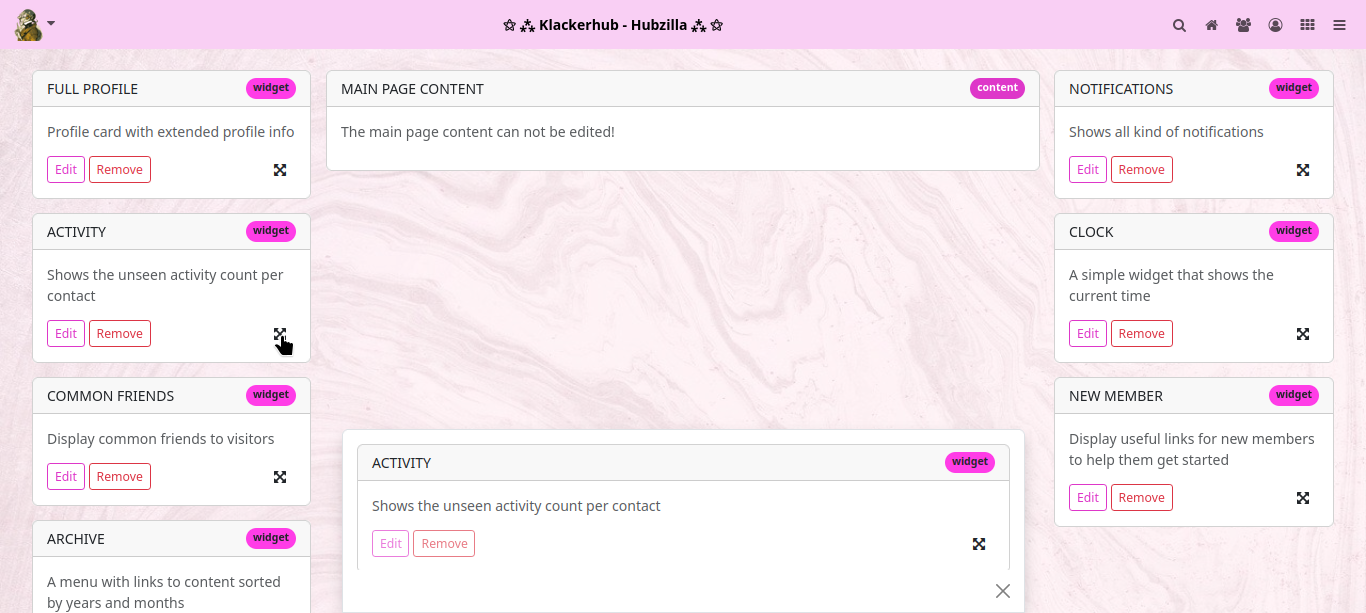
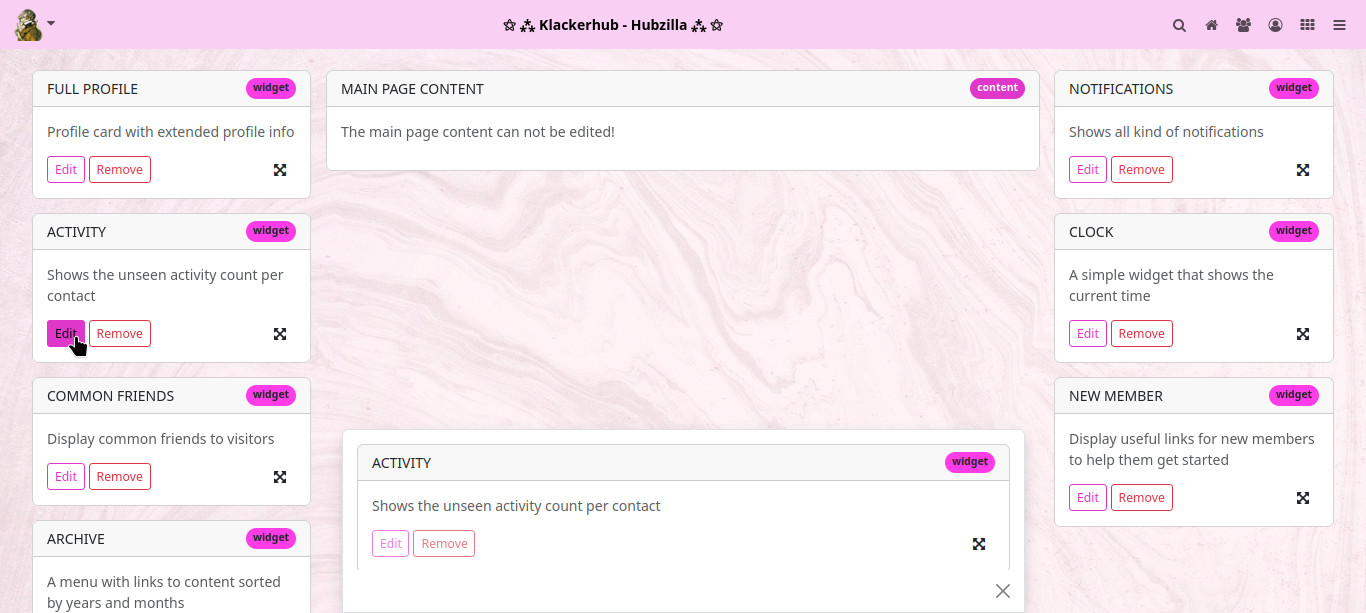
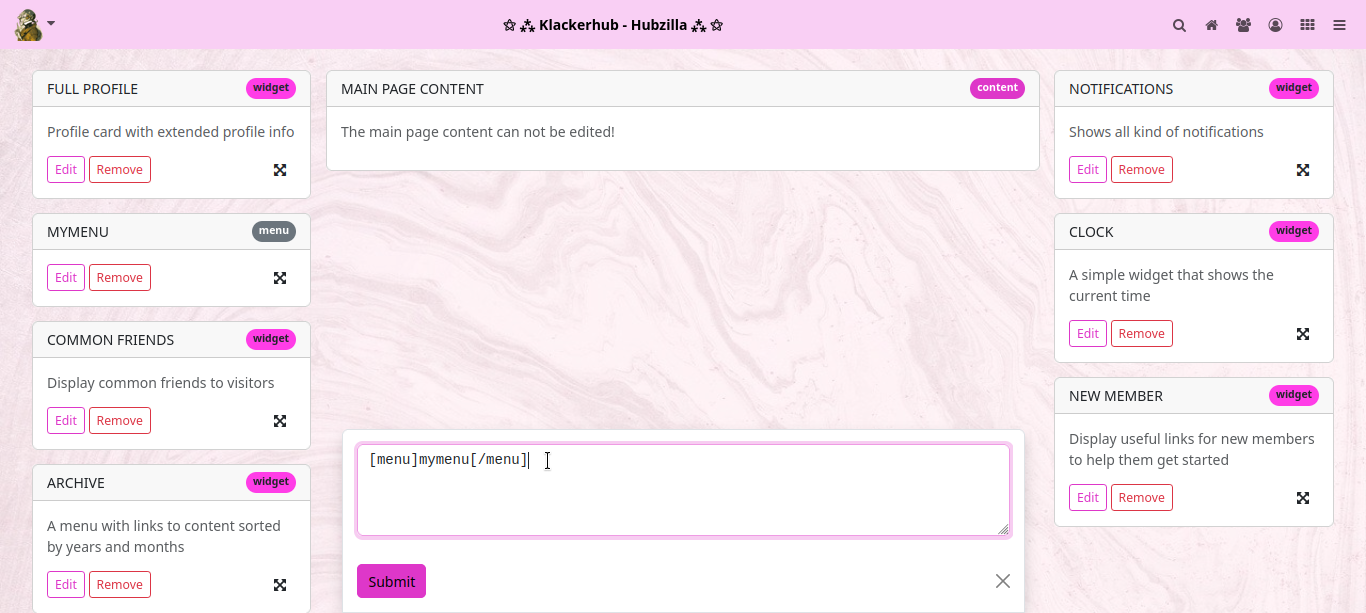
Have fun experimenting!
Creating a Derived Theme
Lesson 1
A derived theme takes most of the settings from its "parent" theme and lets you change a few things to your liking without creating an entire theme package.
To create a derived theme, first choose a name. For our example we'll call our theme 'mytheme'. Hopefully you'll be a bit more creative. But throughout this document, wherever you see 'mytheme', replace that with the name you chose.
Directory Structure
First you need to create a theme directory structure. We'll keep it simple. We need a php directory and a css directory. Here are the Unix/Linux commands to do this. Assume that 'mywebsite' is your top level hubzilla folder.
cd mywebsite
mkdir view/theme/mytheme
mkdir view/theme/mytheme/css
mkdir view/theme/mytheme/php
Great. Now we need a couple of files. The first one is your theme info file, which describes the theme.
It will be called view/theme/mytheme/php/theme.php (clever name huh?)
Inside it, put the following information - edit as needed
<?php

/**
 *   * Name: Mytheme
 *   * Description: Sample Derived theme
 *   * Version: 1.0
 *   * Author: Your Name
 *   * Compat: Red [*]
 *
 */

function mytheme_init(&$a) {

    App::$theme_info['extends'] = 'redbasic';


}
Remember to rename the mytheme_init function with your theme name. In this case we will be extending the theme 'redbasic'.
Now create another file. We call this a PCSS file, but it's really a PHP file.
The file is called view/theme/mytheme/php/style.php
In it, put the following:
<?php

require_once('view/theme/redbasic/php/style.php');

echo @file_get_contents('view/theme/mytheme/css/style.css');
That's it. This tells the software to read the PCSS information for the redbasic theme first, and then read our CSS file which will just consist of changes we want to make from our parent theme (redbasic).
Now create the actual CSS file for your theme. Put it in view/theme/mytheme/css/style.css (where we just told the software to look for it). For our example, we'll just change the body background color so you can see that it works. You can use any CSS you'd like.
body {
    background-color: #DDD;
}
You've just successfully created a derived theme. This needs to be enabled in the admin "themes" panel, and then anybody on the site can use it by selecting it in Settings->Display Settings as their default theme.
Lesson 2
If you want to use the redbasic schemas for your derived theme, you have to do a bit more.
Do everything as above, but don't create view/theme/mytheme/php/style.php, but copy instead view/theme/redbasic/php/style.php to view/theme/mytheme/php/style.php. Modify that file and remove (or comment out) these two lines:
if(local_channel() && App::$channel && App::$channel['channel_theme'] != 'redbasic')
	set_pconfig(local_channel(), 'redbasic', 'schema', '---');
Also add this line at the bottom:
echo @file_get_contents('view/theme/mytheme/css/style.css');
To show the schema selector you have to copy view/theme/redbasic/tpl/theme_settings.tpl to view/theme/mytheme/tpl/theme_settings.tpl. Modify that file and replace the lines:
{{if $theme == redbasic}}
{{include file="field_select.tpl" field=$schema}}
{{/if}}
with:
{{include file="field_select.tpl" field=$schema}}
Manual for administrators
Hubzilla is more than a simple web application. It is a complex communication system that is more like an email server than a web server. For reliability and performance reasons, messages are delivered in the background and queued for later delivery when websites are down. This type of functionality requires a little more from the host system than the typical blog. Not every PHP/MySQL hosting provider is able to support Hubzilla. Many can, but please check the requirements and confirm with your hosting provider prior to installation. We have gone to great lengths to ensure that Hubzilla runs on standard hosting platforms such as those used for WordPress blogs and Drupal websites. It runs on most Linux systems.
Where to find further help
If you run into problems or have questions that are not covered in this documentation, please let us know via the Github Issue Tracker. Please describe your operating environment as accurately as possible and provide as much detail as possible about the error messages you see so that we can avoid them in the future. Due to the wide variety of operating systems and PHP platforms, we have limited ability to debug your PHP installation or obtain missing modules, but we will do our best to resolve common code issues.
Before you start
Select a domain name or a subdomain name for your server.
The software can only be installed in the root directory of a domain or subdomain and cannot be installed via alternative TCP ports. These restrictions may be relaxed in the future, but they are inconvenient, so we STRONGLY recommend that you continue to adhere to them.
Decide if you want to use SSL and obtain an SSL certificate before installing the software. You SHOULD use SSL. If you use SSL, you MUST use a ‘browser valid’ certificate. You CANNOT use self-signed certificates! Please test your certificate before installation. You can find a web tool for testing your certificate at ‘http://www.digicert.com/help/'. When you visit your website for the first time, please use the SSL URL (‘https://’) if SSL is available. This will avoid problems later on. The installation routine does not allow you to use a non-browser valid certificate.
This restriction is made because public posts by you may contain links to images in your own hub. Other members viewing your stream on other hubs will receive warnings if your certificate is not trusted by their web browser. This will confuse many people as it is a decentralised network and they will receive the warning about your hub while viewing their own hub and may think their own hub has a problem. These warnings are very technical and scary for some people, many of whom don't know how to proceed other than to follow the browser's advice. This is disruptive to the community. That said, we recognise the problems associated with the current certificate infrastructure and agree that there are many issues, but that doesn't change the requirement.
Free ‘browser valid’ certificates are available from providers such as ZeroSSL, LetsEncrypt and a few others. If you are NOT using SSL, there may be a delay of up to a minute on the first install script - while we check the SSL port to see if anything is responding there. When communicating with new sites, Hubzilla will always try to connect via the SSL port first before falling back to a less secure connection. If you are not using SSL, your web server does not HAVE to listen on port 443 at all.
If you are using LetsEncrypt to provide certificates and create a file under .well-known/acme-challenge so that LetsEncrypt can verify your domain ownership, please remove the .well-known directory or rename it once the certificate has been generated. The software provides its own handler for ‘.well-known’ services during installation, and an existing directory in this location may prevent some of these services from working correctly. This should not be a problem with Apache, but can be a problem with nginx or other web server platforms.
Installation
There are several ways to install a new hub.
- Manual installation on an existing server
- Automated installation on an existing server with a shell script
- Automated deployment via an OpenShift Virtual Private Server (VPS)
- Installation as Docker-Container
Installation requirements
- Apache with mod-rewrite enabled and ‘AllowOverride All’ so you can use a local .htaccess file. Some people have successfully used nginx and lighttpd. Example configuration scripts are available for these platforms in doc/install. Apache and nginx have the most support.
- PHP 8.1 or higher. Note that in some shared hosting environments, the command line version of PHP may differ from the web server version
- PHP command line access if register_argc_argv is set to true in the php.ini file and the hosting provider has no restrictions on the use of exec() and proc_open().
- curl, gd (with at least jpeg and png support), pdo-mysql (or pdo-postgres), mbstring, zip and openssl extensions. The imagick extension is not required, but is recommended.
- The xml extension is required if you want to use webdav.
- Some kind of email server or email gateway so that PHP mail() works.
- A supported database server. The supported databases are:
- Mysql version 8.0.22 or higher
- MariaDB version 10.4 or higher
- PostgreSQL version 12 or higher
- Ability to schedule jobs with cron.
- Installation in a top-level domain or sub-domain (without directory/path component in the URL) is REQUIRED.
Manual installation
Unzip the Hubzilla files into the root directory of your web server document area
When copying the directory tree to your web server, make sure to include the hidden files such as .htaccess.
If you are able to, we recommend cloning the source code repository with git instead of using a packed tar or zip file. This makes it much easier to update the software. The Linux command to clone the repository into a ‘mywebsite’ directory is as follows:
git clone https://framagit.org/hubzilla/core.git mywebsite
and then you can pull the latest changes at any time with:
git pull
Make sure that the folders store/[data]/smarty3 and store exist and are writable by the web server:
mkdir -p ‘store/[data]/smarty3’
chmod -R 777 store
This authorisation (777) is very dangerous and if you have sufficient privileges and knowledge, you should only change these directories for the web server and, if different, for the user running the cron job (see below). In many shared hosting environments, this can be difficult without opening a trouble ticket with your provider. The above authorisations allow the software to function, but are not optimal.
The following directories must also be writable by the web server for certain web-based management tools to work:
addonextendview/themewidget
Official addons
Installation
Navigate to your website. Then you should clone the addon repository (separately). We nickname this repository ‘hzaddons’. You can include other Hubzilla addon repositories by giving them different nicknames:
cd mywebsite
util/add_addon_repo https://framagit.org/hubzilla/addons.git hzaddons
Refresh
To keep the addon tree up to date, you should be at the top level of the website directory and enter an update command for this repository::
cd mywebsite
util/update_addon_repo hzaddons
Create searchable representations of the online documentation. You can do this every time the documentation is updated:
cd mywebsite
util/importdoc
Automated installation via the shell script .homeinstall
There is a shell script in (.homeinstall/hubzilla-setup.sh) that will install Hubzilla and its dependencies on a fresh installation of Debian stable. It should work on similar Linux systems, but your results may vary.
Requirements
The installation script was originally developed for a small hardware server behind your home router. However, it has been tested on several systems running Debian 9:
- Home-PC (Debian-9.2-amd64) and Rapberry-Pi 3 (Rasbian = Debian 9.3)
- Internet connection and router at home
- Mini-PC / Raspi connected to the router
- USB drive for backups
- Fresh installation of Debian on your mini PC
- Router with open ports 80 and 443 for your Debian
Overview of the installation steps
apt-get install gitmkdir -p /var/www/htmlcd /var/www/htmlgit clone https://framagit.org/hubzilla/core.git .nano .homeeinstall/hubzilla-config.txtcd .homeeinstall/./hubzilla-setup.shReload apache2 service- Open your domain with a browser and go through the initial configuration of Hubzilla.
Installation using Docker
It is possible to install Hubzilla comfortably and conveniently as a Docker container. Saiwal (sk@hub.utsukta.org) offers a preconfigured environment for a Hubzilla container for this purpose.
The key features are:
- Use Docker Compose to set up a fully functional Hubzilla instance with just a few commands.
- Prebuilt images available via dockerhub for amd64, arm/v7, arm64.
- Continuous Updates: The Docker image is built to allow for easy updates whenever new changes are made to the Hubzilla core or its dependencies.
- SMTP Integration: Built-in support for sending emails using ssmtp, making it easy to configure email notifications for your Hubzilla instance.
The repository for the container is located here: skprg/hubzilla-docker
Building the image from scratch
- Clone the Repository:
git clone https://github.com/skprg/hubzilla-docker.git
cd hubzilla-docker
- Configure Your Environment: Update the
docker-compose.ymlfile with your SMTP and other settings. - Build and Run the Container:
docker-compose up --build -d
Using prebuilt image
- Replace the following lines in
docker-compose.yml
    build:
      context: .
      dockerfile: Dockerfile
with
image: ghcr.io/skprg/hubzilla-docker:latest
- Run the container:
docker compose up -d
Access Your Hubzilla Instance: Navigate to http://localhost (or the appropriate URL) to view your Hubzilla instance.
Further notes / update / tips
Further notes, upgrade instructions and tips can be found in the repository linked above.
Recommended addons
We recommend installing the following addons on all public pages:
nsfw - hide inappropriate posts/comments
superblock - blocks content from inappropriate channels
Problems Following An Update
A good 90% of all bugs encountered immediately after updating the code to the latest version are simple cache errors of one sort or another. If you update and find something very obvious is broken - like your matrix page doesn't load, notifications are missing, or comment boxes are missing - the chances are it's not a bug at all. Breaking basic functionality is the kind of thing developers tend to notice.
If this happens to you, there are a few simple steps to take before resorting to the support forums:
Browser Cache
Symptoms: Menus do not expand, ACL selector does not open, progress indicator does not display (or loops forever), Matrix and channel pages do not load.
Force reload the page. Shift reload, or ctrl+f5. Occasionally, but very, very rarely, you will also need to clear the session data - which is achieved by restarting the browser.
FastCGI
Symptoms: Incorrect variables. The basic UI mostly works, but displays incorrect content or is missing content entirely.
If you're using php-fpm, this problem is usually resolved with
service php-fpm restart
Smarty Cache
Symptoms:
-
White Screen Of Death. This is most prevalent on the settings and admin pages.
-
Missing icons, tabs, menus or features.
We use the Smarty3 template engine to generate pages. These templates are compiled before they are displayed. Occasionally, a new or modified template will fail to overwrite the old compiled version. To clear the Smarty cache, delete all the files in store/[data]/smarty3/compiled but do not delete the directory itself. Templates will then be recompiled on their next access.
Theme Issues
There are many themes for Hubzilla. Only Redbasic is officialy supported by the core developers. This applies even if a core developer happens to support an additional theme. This means new features are only guaranteed to work in Redbasic.
Redbasic uses a few javascript libraries that are done differently, or entirely absent in other themes. This means new features may only work properly in Redbasic. Before reporting an issue, therefore, you should switch to Redbasic to see if it exists there. If the issue goes away, this is not a bug - it's a theme that isn't up to date.
Should you report an issue with the theme developers then? No. Theme developers use their themes. Chances are, they know. Give them two or three days to catch up and then report the issue if it's still not fixed. There are two workarounds for this situation. Firstly, you can temporarily use Redbasic. Secondly, most themes are open source too - open a pull request and make yourself a friend.
Federation Addons
Various web communities have started to join together using common protocols. The protocols involved are somewhat limited in their possibilities. The Diaspora protocol is somewhat restrictive in terms of the types of communication allowed. All comments must be signed by the original author in a very unique way. The ActivityPub protocol is also supported. No other existing protocol supports nomadic locations (there is now support for nomadic identities in ActivityPub) as used in this project. This poses some challenges for support, as some features work with some networks and not with others. Nonetheless, federation protocols make it possible to connect to a much larger community of people worldwide. They are provided as add-ons.
- Diaspora Protocol - The Diaspora Protocol is used by Diaspora and Friendica. You should first enable ‘Diaspora Statistics’ to utilise all available features.
- PubCrawl - The ActivityPub protocol supported by Mastodon, MIsskey, Friendica and all Fediverse services.
Each member of your site must decide for themselves whether or not to allow these protocols, as they may conflict with some desirable core features and capabilities of this software (such as channel migration and cloning). You do this on your ‘Settings -> Feature/Addon Settings’ page.
Service classes
You can use service classes to limit system resources by restricting the options of individual accounts, e.g. the storage of files and the limitation of posts at the top level. Define customised service classes according to your requirements in the .htconfig.php file. For example, create a standard and a premium class with the following lines:
// Service classes

App::$config[‘system’][‘default_service_class’]=‘standard’; // this is the default service class that will be associated with each new account

// Configuration for the default service class
App::$config[‘service_class’][‘default’] =
array(‘photo_upload_limit’=>2097152, // total storage limit for photos per channel (here 2MB)
‘total_identities’ =>1, // Number of channels an account can create
‘total_items’ =>0, // Number of top-level items a channel can create. Applies only to top-level posts of the channel user, other posts and comments are not affected
‘total_pages’ =>100, // Number of pages a channel can create
‘total_channels’ =>100, // Number of channels the user can add, other users can still add this channel even if the limit is reached
‘attach_upload_limit’ =>2097152, // total storage space for attachments per channel (here 2MB)
‘chatters_inroom’ =>20);

// Configuration for premium service class
App::$config[‘service_class’][‘premium’] =
array(‘photo_upload_limit’=>20000000000, // total storage limit for photos per channel (here 20GB)
‘total_identities’ =>20, // Number of channels an account can create
‘total_items’ =>20000, // Number of top-level items a channel can create. Only applies to top-level posts of the channel user, other posts and comments are not affected
‘total_pages’ =>400, // Number of pages that a channel can create
‘total_channels’ =>2000, // Number of channels the user can add, other users can still add this channel even if the limit is reached
‘attach_upload_limit’ =>20000000000, // Total storage space for attachments per channel (here 20GB)
‘chatters_inroom’ =>100);
To apply a service class to an existing account, use the command line utility from the web root:
util/service_class list service classes
util/config system default_service_class firstclass sets the default service class to ‘firstclass’
util/service_class firstclass lists the services that are part of the ‘firstclass’ service class
util/service_class firstclass photo_upload_limit 10000000 sets the total photo disc usage of the firstclass to 10 million bytes
util/service_class --account=5 firstclass sets the account ID 5 to the service class ‘firstclass’ (with confirmation)
util/service_class --channel=blogchan firstclass sets the account to which the channel ‘blogchan’ belongs to the service class ‘firstclass’ (with confirmation)
Options for limiting the service class
- photo_upload_limit - maximum total number of bytes for photos
- total_items - maximum total number of top-level posts
- total_pages - maximum number of pages for Comanche
- total_identities - maximum number of channels owned by the account
- total_channels - maximum number of connections
- total_feeds - maximum number of RSS feed connections
- attach_upload_limit - maximum file upload space (bytes)
- minimum_feedcheck_minutes - lowest permissible setting for querying RSS feeds
- chatrooms - maximum number of chatrooms
- chatters_inroom - maximum number of chatters per room
- access_tokens - maximum number of guest access tokens per channel
Theme management
Example for repo management
-
Navigate to your hub web rootroot@hub
:/root# cd /var/www -
Add the theme repo and give it a nameroot@hub
:/var/www# util/add_theme_repo https://github.com/DeadSuperHero/redmatrix-themes.git DeadSuperHero
Creating Page Templates
A page template for use with Comanche requires two files - a PHP template and a CSS file. Page templates will need to be installed by the system administrator of your site.
First choose a name. Here we'll create a template and call it "demo".
You will need to create the files "view/php/demo.php" and "view/css/demo.css" to hold the PHP template and CSS respectively.
To get a better idea of this process, let's look at an existing template - the "default" template. This is used by default throughout the application.
view/php/default.php
<!DOCTYPE html >
<html>
<head>
	<title><?php if(x($page,'title')) echo $page['title'] ?></title>
	<script>var baseurl="<?php echo z_root() ?>";</script>
	<?php if(x($page,'htmlhead')) echo $page['htmlhead'] ?>
</head>
<body>
	<?php if(x($page,'nav')) echo $page['nav']; ?>
	<aside id="region_1"><?php if(x($page,'aside')) echo $page['aside']; ?></aside>
	<section id="region_2"><?php if(x($page,'content')) echo $page['content']; ?>
		<div id="page-footer"></div>
    	<div id="pause"></div>
	</section>
<aside id="region_3"><?php if(x($page,'right_aside')) echo $page['right_aside']; ?></aside>
<footer><?php if(x($page,'footer')) echo $page['footer']; ?></footer>
</body>
</html>
Here's is the corresponding CSS file
view/php/default.css
aside#region_1 {
	display: block;
	width: 210px;
	position: absolute;
	top: 65px;
	left: 0;
	margin-left: 10px;
}

aside input[type='text'] {
	width: 174px;
}


section {
	position: absolute;
	top: 65px;
	left: 250px;
	display: block;
	right: 15px;
	padding-bottom: 350px;
}
Some things you may notice when looking at these definitions:
-
We have not specified any CSS for the "nav", "right_aside", or "footer" regions. In this template "nav" and "footer" will be the full page width and we will let the size and placement of these elements be controlled by the theme. "right_aside" is not currently used.
-
There are elements on the page such as "page-footer" and "pause" for which there is no apparent content. This content will come from Javascript elements.
-
Our default template uses absolute positioning. Modern web design often uses "float" div containers so that scrollbars aren't typically needed when viewing on small-screen devices.
To design a new template, it is best to start with an existing template, and modify it as desired. That is what we will do here.
The way that Comanche provides content inside a specific region is by using a region tag.
[region=aside][widget=profile][/widget][/region]
This example will place a "profile" widget in the "aside" region. But what it actually does is place the HTML for the widget into a code variable $page['aside']. Our default page template defines a region on the page (the CSS positions this as an absolute sidebar) and then inserts the contents of $page['aside'] (if it exists).
So if you wanted to create a template with a region named "foo", you would provide a place for it on the page, then include the contents of $page['foo'] wherever you wanted to use it, and then using Comanche, you could specify
[region=foo][widget=profile][/widget][/region]
and this would place a profile widget into the "foo" region you created.
Use the CSS file to position the region on the page where desired and optionally control its size.
Hubzilla development - a guide to the schema system
A schema, in a nutshell, is a collection of settings for a bunch of variables to define certain elements of a theme. A schema is loaded as though it were part of config.php and has access to all the same information. Importantly, this means it is identity aware, and can be used to do some interesting things. One could, for example, restrict options by service class, or present different options to different members.
By default, we filter only by whether or not expert mode is enabled. If expert mode is enabled, all options are presented to the member. If it is not, only scheme, background image, font face, and iconset are available as choices.
A schema is loaded after the member's personal settings. Therefore, to allow a member to overwrite a particular aspect of a schema you would use the following syntax:
    if (! $foo)
        $foo = 'bar';
However, there are circumstances - particularly with positional elements - where it may be desirable (or necessary) to override a member's settings. In this case, the syntax is even simpler:
$foo = 'bar';
Members will not thank you for this, however, so only use it when it is required.
If no personal options are set, and no schema is selected, we will first try to load a schema with the file name "default.php". This file should never be included with a theme. If it is, merge conflicts will occur as people update their code. Rather, this should be defined by administrators on a site by site basis. default.php and default.css MUST be symlinks to existing scheme files.
You schema does not need to - and should not - contain all of these values. Only the values that differ from the defaults should be listed. This gives you some very powerful options with very few lines of code.
Note the options available differ with each theme. The options available with the Redbasic theme are as follows:
- nav_colour The colour of the navigation bar. Options are red, black and silver. Alternatively, one can set $nav_bg_1, $nav_bg_2, $nav_bg_3 and $nav_bg_4 to provide gradient and hover effects.
- banner_colour The font colour of the banner element. Accepts an RGB or Hex value.
- bgcolour Set the body background colour. Accepts an RGB or Hex value.
- background_image Sets a background image. Accepts a URL or path.
- item_colour Set the background colour of items. Accepts an RGB or Hex value.
- item_opacity Set the opacity of items. Accepts a value from 0.01 to 1
- toolicon_colour Set the colour of tool icons. Accepts an RGB or Hex value.
- toolicon_activecolour Set the colour of active or hovered icon tools.
- font_size Set the size of fonts in items and posts. Accepts px or em.
- body_font_size Sets the size of fonts at the body level. Accepts px or em.
- font_colour Sets the font colour. Accepts an RGB or Hex value.
- radius Set the radius of corners. Accepts a numeral, and is always in px.
- shadow Set the size of shadows shown with inline images. Accepts a numerical value. Note shadows are not applied to smileys.
- converse_width Set the maximum width of the content region in px.
- nav_min_opacity
- top_photo
- reply_photo
If a your_schema_name.css file is found, the content of this file will be attached to the end of style.css. This gives the schem developer the possiblity to override any style component.
Core Widgets
Some/many of these widgets have restrictions which may restrict the type of page where they may appear or may require login
-
clock - displays the current time
- args: military (1 or 0) - use 24 hour time as opposed to AM/PM
-
profile - displays a profile sidebar on pages which load profiles (pages with nickname in the URL)
-
tagcloud - display a tagcloud of webpage items
- args: count - number of items to return (default 24)
-
collections - privacy group selector for the current logged in channel
- args: mode - one of "conversation", "group", "abook" depending on module
-
suggestions - friend suggestions for the current logged on channel
-
follow - presents a text box for following another channel
-
notes - private notes area for the current logged in channel if private_notes feature is enabled
-
savedsearch - network/matrix search with save - must be logged in and savedsearch feature enabled
-
filer - select filed items from network/matrix stream - must be logged in
-
archive - date range selector for network and channel pages
- args: 'wall' - 1 or 0, limit to wall posts or network/matrix posts (default)
-
fullprofile - same as profile currently
-
categories - categories filter (channel page)
-
tagcloud_wall - tagcloud for channel page only
- args: 'limit' - number of tags to return (default 50)
-
catcloud_wall - tagcloud for channel page categories
- args: 'limit' - number of categories to return (default 50)
-
affinity - affinity slider for network page - must be logged in
-
settings_menu - sidebar menu for settings page, must be logged in
-
mailmenu - sidebar menu for private message page - must be logged in
-
design_tools - design tools menu for webpage building pages, must be logged in
-
findpeople - tools to find other channels
-
photo_albums - list photo albums of the current page owner with a selector menu
-
vcard - mini profile sidebar for the person of interest (page owner, whatever)
-
dirsafemode - directory selection tool - only on directory pages
-
dirsort - directory selection tool - only on directory pages
-
dirtags - directory tool - only on directory pages
-
menu_preview - preview a menu - only on menu edit pages
-
chatroom_list - list of chatrooms for the page owner
-
bookmarkedchats - list of bookmarked chatrooms collected on this site for the current observer
-
suggestedchats - "interesting" chatrooms chosen for the current observer
-
item - displays a single webpage item by mid or page title
- args:
- channel_id - channel that owns the content, defualt is the profile_uid
- mid - message_id of webpage to display (must be webpage, not a conversation item)
- title - URL page title of webpage (must provide one of either title or mid)
-
photo - display a single photo
- args:
- src - URL of photo, must be http or https
- zrl - use zid authenticated link
- style - CSS style string
-
cover_photo - display the cover photo for the selected channel
- args:
- channel_id - channel to use, default is the profile_uid
- style - CSS style string (default is dynamically resized to width of region)
-
photo_rand - display a random photo from one of your photo albums. Photo permissions are honoured
- args:
- album - album name (very strongly recommended if you have lots of photos)
- scale - typically 0 (original size), 1 (1024px), 2, (640px), or 3 (320px)
- style - CSS style string
- channel_id - if not your own
-
random_block - display a random block element from your webpage design tools collection. Permissions are honoured.
- args:
- contains - only return blocks which include the contains string in the block name
- channel_id - if not your own
-
tasklist - provide a task or to-do list for the currently logged-in channel.
- args:
- all - display completed tasks if all is non-zero.
-
forums - provide a list of connected public forums with unseen counts for the current logged-in channel.
-
activity - provide a list of authors of unread network content for the current logged-in channel.
-
album - provides a widget containing a complete photo album from albums belonging to the page owner; this may be too large to present in a sidebar region as is best implemented as a content region widget.
- args:
- album - album name
- title - optional title, album name is used if not present
Creating New Widgets
Class Widgets
To create a class-based widget named 'slugfish' create a file with the following contents:
<?php

namespace Zotlabs\Widget;


class Slugfish {

	function widget($args) {

	... widget code goes here.
	... The function returns a string which is the HTML content of the widget.
	... $args is a named array which is passed any [var] variables from the layout editor
	... For instance [widget=slugfish][var=count]3[/var][/widget] will populate $args with
	... [ 'count' => 3 ]

	}
The resultant file may be placed in widget/Slugfish/Slugfish.php , or Zotlabs/SiteWidgets/Slugfish.php . It also may be linked from a git repository using util/add_widget_repo.
Traditional function based widget:
If you want a widget named 'slugfish', create widget/widget_slugfish.php containing
<?php

function widget_slugfish($args) {

.. widget code goes here. See above information for class-based widgets for details.

}
Channel directory
Keywords
There is a ‘keyword cloud’ with keywords that can be shown on the channel directory page. If you want to hide these keywords, which are obtained from the directory server, you can use the configuration tool:
util/config system disable_directory_keywords 1
If your hub is in standalone mode because you do not want to connect to the global network, you can instead ensure that the directory_server system option is empty:
util/config system directory_server ‘’
Primary Directory
By default, hubzilla will use available Directories on the web, which show you channels available around the world.
There are certain scenarios where you might want your own directory-server that you can connect multiple hubs to. This will limit the channels that appear in all of your hubs to only channels on hubs connected to your directory-server.
Instuctions on how to set up one hub as the Primary Directory for a series of private hubs.
-
On the hub that will be the Directory Server, open the .htconfig.php file and set:
App::$config['system']['directory_mode'] = DIRECTORY_MODE_PRIMARY;By default it should already be set as DIRECTORY_MODE_NORMAL, so just edit that line to say DIRECTORY_MODE_PRIMARY
-
Next, for each hub (including the Directory Server), from a terminal, cd into the folder where it is installed and run this :
util/config system directory_realm YOURREALMNAME(YOURREALMNAME can be whatever you want your realm-name to be)
then:
util/config system realm_token THEPASSWORD(THEPASSWORD is whatever password you want for your realm)
NOTE: Use the same realm-name and password for each hub
-
Lastly, for each "client" hub, (from a terminal) run:
util/config system directory_server https://theaddressofyourdirectoryserver.com
Now when you view the directory of each hub, it should only show the channels that exist on the hubs in your realm. I have tested with two hubs so far, and it seems to be working fine. Channels created in each hub are reflected in the Primary Directory, and subsequently in the directory of all client hubs
Issues
When I created the first hub,it was up and running for an hour or so before I changed it to PRIMARY_MODE, and after changing it, there were a few channels from across the matrix still present in the directory. I deleted them from the xchan table and that seems to have fixed the issue.
Administration
Website administration
The website is usually managed via the administration page, which is located under /admin on your website. To access this page, you must have administration rights for the server. Administration rights are granted to the first account that registers on your website, provided that the email address of this account exactly matches the email address that you specified as the administrator's email address during setup. There are several ways in which this can fail and the system can be left without an administrator account, for example if the first account created has a different email address to the administrator email address specified during setup.
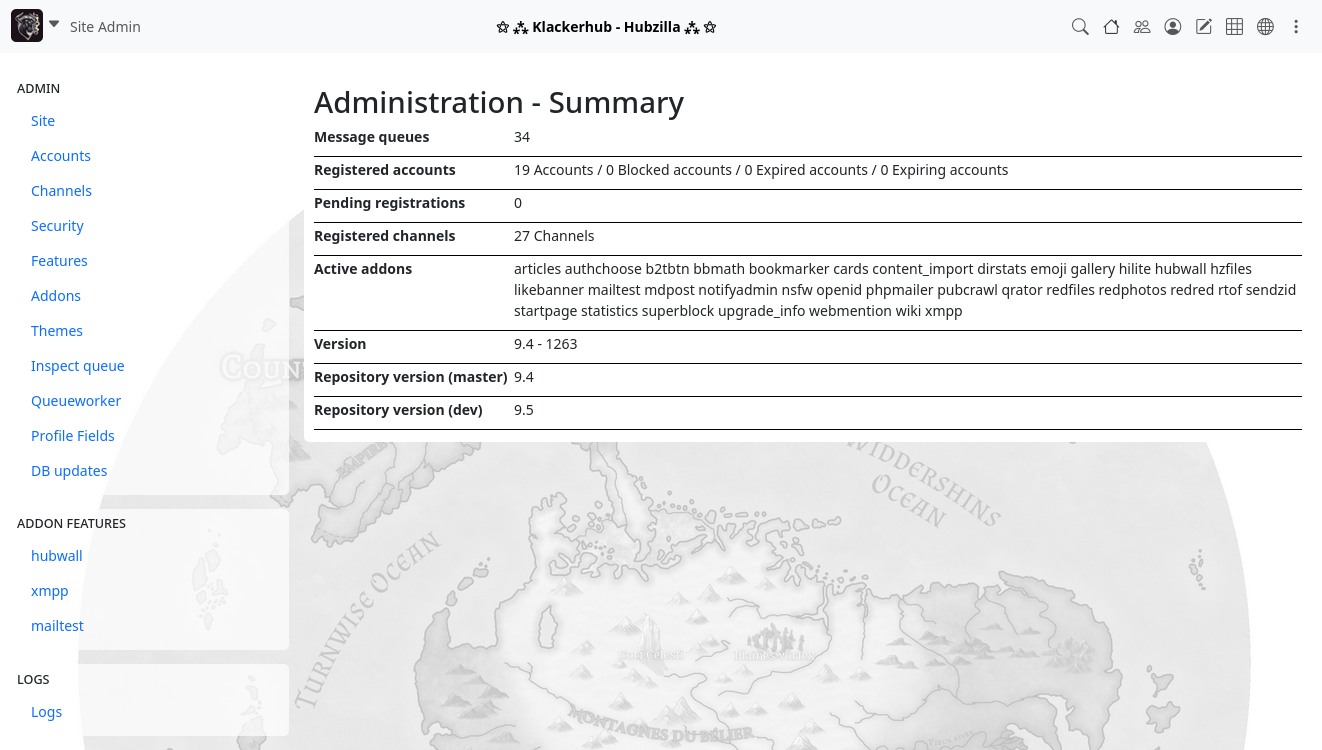
For security reasons, there is no web page or interface on the system that gives you administrator rights. If you need to correct a situation where a system does not have an administrator account, this must be done by editing the account table in the database. There is no other option. To do this, you must find the entry in the account table that belongs to the desired administrator and set ‘account_roles’ for this entry to 4096. You can then call up the administrator page via the profile menu of your system or directly via /admin. A hub can have several administrators and the number of administrators is not limited. Repeat the above procedure for each account that you want to give administration rights.
Troubleshooting
Log files
The system log file is an extremely useful resource for tracking down errors. This can be activated on the admin/log configuration page. A log level setting of LOGGER_DEBUG is preferred for stable production sites. Most problems with communication or storage are listed here. A setting of LOGGER_DATA provides much more detail, but can fill up your hard drive. In any case, we recommend using logrotate on your operating system to check the logs and delete older entries.
At the end of the .htconfig.php file there are several (commented out) lines that enable PHP error logging. This reports problems with the code syntax and execution of the code and is the first place you should look for problems that result in a ‘white screen’ or blank page. This is usually the result of code/syntax problems. Database errors are reported in the system log file, but we have found it useful to create a file called dbfail.out in your root directory where only database related problems are collected. If the file exists and is writable, database errors will be logged in this file as well as in the system log file.
In the case of ‘500’ errors, the problems are often logged in the logs of your web server, often in /var/log/apache2/error.log or similar. Consult the documentation of your operating system. There are three different logging options.
The first is the database error log.
This is only used if you create a file with the name dbfail.out in the root directory of your website and make it writable for the web server. If database queries have failed, they are reported here. They generally indicate typing errors in our queries, but also occur when the database server interrupts the connection or tables become corrupted. In rare cases, race conditions are reported here when two processes try to create an xchan or cache entry with the same ID. All other errors (especially persistent errors) should be investigated.
The second area is the PHP error log.
This is generated by the language processor and only reports problems in the language environment. Again, these can be syntax or programming errors, but they are usually fatal and result in a ‘white screen of death’, i.e. PHP is terminated. You should look at this file if something goes wrong that does not result in a white screen, but it is not uncommon for this file to be blank for days.
At the end of the supplied .htconfig.php file are some lines that, if not commented out, will enable a PHP error log (extremely useful for finding the cause of white screen errors). This is not the case by default as there may be issues with log file ownership and write permissions and the log file does not rotate by default.
The third file is the ‘application log’.
This is used by Hubzilla to report what is going on in the programme and usually reports any difficulties or unexpected data we have received. Occasionally, ‘heartbeat’ status messages are also output to indicate that we have reached a certain point in a script. This is the most important log file for us, as we create it ourselves for the sole purpose of reporting the status of background tasks and anything that seems strange or out of place. It doesn't necessarily have to be something bad, but maybe just unexpected. If you are running a task and a problem occurs, let us know what is in this file when the problem occurs. (Please don't send me 100M dumps, that would just annoy me). Just a few relevant lines so I can eliminate a few hundred thousand lines of code and focus on where the problem is occurring.
These are your website logs, not mine. We report serious issues at every log level. For most websites, I recommend the DEBUG log level - it provides a little extra information and doesn't generate huge log files. If a problem occurs that defies all attempts to track it, you should use the DATA log level for a short period of time to capture all the details of the structures we were dealing with at the time. This log level consumes a lot of memory and is therefore only recommended for short periods of time or for developer test sites.
I recommend configuring logrotate for both the php log and the application log. I usually take a look at dbfail.out every week or two, fix any reported issues and then start over with a new file. The same goes for the PHP log file. I check it from time to time to see if there is anything that needs to be fixed.
If something goes wrong and it's not a serious error, I look at the application log file. Often I will run
tail -f logfile.out
while repeating a process where there are problems. Often I'll add additional logging statements to the code if there's no indication of what's going wrong. Even something as simple as ‘got here’ or expressing the value of a variable that might be suspicious. You can do this too - in fact, I would encourage you to do so. Once you've found what you need to look for, you can run
git checkout file.php
to immediately delete any extra logging data you've added. Use the information from this log and any details you can provide from your investigation of the problem to file your bug report - unless your analysis points to the source of the problem. In this case, simply fix it.
Rotating log files
- Activate the logrot addon in the official hubzilla-addons repo
- Create a directory in your web root called
logwith write permissions for the web server - Go to the logrot admin settings and enter this folder name and the maximum size and number of log files kept.
Report problems
When reporting problems, please try to provide as much detail as necessary to allow the developers to reproduce the problem and include the full text of any error messages.
We encourage you to use these logs, along with the source code you have, to the best of your ability to fix problems and find their cause. The community can often help, but only you have access to your site's log files, and it is considered a security risk to share them.
If a code issue has been uncovered, please report it in the project's bug tracker (https://framagit.org/hubzilla/core/issues). Again, provide as much detail as possible so we don't have to keep asking questions about your configuration or duplicating the issue so we can address the problem directly and figure out what to do. You are also welcome to offer your own solutions and submit patches. In fact, we encourage you to do so, as we are all volunteers and have limited time available. The more people that help out, the easier the work will be for everyone. It's okay if your solution isn't perfect. Every little bit helps, and maybe we can improve it.
Hub snapshot tools
Hubzilla developers often need to switch between branches that may have incompatible database schemas or content. The following two scripts create and restore complete snapshots of a Hubzilla instance, including the Hub web root and the entire database state. Each script requires a configuration file called hub-snapshot.conf, which is located in the same folder and contains the specific directories and database details of your Hub.
Configuration file
The format of the configuration file is very strict. There must be no spaces between the variable name and the value. Replace only the content inside the inverted commas with your configuration. Save this file as hub-snapshot.conf together with the scripts.
# Location of the hub root. Normally this is the location of the Hubzilla repo clone.
HUBROOT=‘/var/www/’
# Name of the MySQL database
DBNAME=‘hubzilla’
# MySQL database user
DBUSER=‘hubzilla’
# MySQL database password
DBPWD=‘akeufajeuwfb’
# The target snapshot folder in which the Git repository is to be initialised
SNAPSHOTROOT=‘/root/snapshots/hubzilla/’
Snapshot
Example of use:
sh hub-snapshot.sh my-hub.conf ‘Commit message for the snapshot’
hub-snapshot.sh:
#!/bin/bash

if ! [ -f ‘$1’ ]; then
    echo ‘$1 is not a valid file. Aborting..."
    exit 1
fi
source ‘$1’
#echo ‘$DBNAME’
#echo ‘$DBUSER’
#echo ‘$DBPWD’
#echo ‘$HUBROOT’
#echo ‘$SNAPSHOTROOT’
MESSAGE=‘snapshot: $2’

if [ ‘$DBPWD’ == ‘’ -o ‘$SNAPSHOTROOT’ == ‘’ -o ‘$DBNAME’ == ‘’ -o ‘$DBUSER’ == ‘’ -o ‘$HUBROOT’ == ‘’ ]; then
    echo ‘Required variable is not set. Aborting..."
    exit 1
fi

if [ ! -d ‘$SNAPSHOTROOT’/db/ ]; then
    mkdir -p ‘$SNAPSHOTROOT’/db/
fi
if [ ! -d ‘$SNAPSHOTROOT’/www/ ]; then
    mkdir -p ‘$SNAPSHOTROOT’/www/
fi

if [ ! -d ‘$SNAPSHOTROOT’/www/ ] || [ ! -d ‘$SNAPSHOTROOT’/db/ ]; then
    echo ‘Error creating snapshot directories. Aborting..."
    exit 1
fi

echo ‘Export database...’
mysqldump -u ‘$DBUSER’ -p‘$DBPWD’ ‘$DBNAME’ > ‘$SNAPSHOTROOT’/db/‘$DBNAME’.sql
echo ‘Copy hub root files...’
rsync -va --delete --exclude=.git* ‘$HUBROOT’/ ‘$SNAPSHOTROOT’/www/

cd ‘$SNAPSHOTROOT’

if [ ! -d ‘.git’ ]; then
    git init
fi
if [ ! -d ‘.git’ ]; then
    echo ‘Cannot initialise git repo. Aborting..."
    exit 1
fi

git add -A
echo ‘Commit hub snapshot...’
git commit -a -m ‘$MESSAGE’

exit 0
Restore
/bin/bash
# Restore hub to a previous state. Input hub config and commit hash

if ! [ -f ‘$1’ ]; then
        echo ‘$1 is not a valid file. Aborting..."
        exit 1
fi
source ‘$1’
COMMIT=$2

if [ ‘$DBPWD’ == ‘’ -o ‘$SNAPSHOTROOT’ == ‘’ -o ‘$DBNAME’ == ‘’ -o ‘$DBUSER’ == ‘’ -o ‘$HUBROOT’ == ‘’ ]; then
        echo ‘Required variable is not set. Aborting..."
        exit 1
fi
RESTOREDIR=‘$(mktemp -d)/’

if [ ! -d ‘$RESTOREDIR’ ]; then
    echo ‘Cannot create restore directory. Aborting..."
    exit 1
fi
echo ‘Cloning the snapshot repo...’
git clone ‘$SNAPSHOTROOT’ ‘$RESTOREDIR’
cd ‘$RESTOREDIR’
echo ‘Checkout requested snapshot...’
git checkout ‘$COMMIT’
echo ‘Restore hub root files...’
rsync -a --delete --exclude=.git* ‘$RESTOREDIR’/www/ ‘$HUBROOT’/
echo ‘Restore hub database...’
mysql -u ‘$DBUSER’ -p‘$DBPWD’ ‘$DBNAME’ < ‘$RESTOREDIR’/db/‘$DBNAME’.sql

chown -R www-data:www-data ‘$HUBROOT’/{store,extend,addon,.htlog,.htconfig.php}

echo ‘Restored hub to snapshot $COMMIT’
echo ‘Removing temporary files...’

rm -rf ‘$RESTOREDIR’

exit 0
Database
Database updates
On the https://hub.hubzilla.hu/admin/dbsync page, the administrator can check whether an update has failed and retry it if necessary. If an update has failed, but for some reason is not registered as failed, the administrator can try to run the update again. For example, for DB update #1999, by visiting the web page: https://hubzilla.com.bradmin/dbsync/1999
Database tables
| Table | Description |
|---|---|
| abconfig | any storage space for connections from local channels |
| abook | Connections of the local channels |
| account | Service provider account |
| addon | registered plugins |
| app | personal app data |
| attach | File attachments |
| auth_codes | OAuth usage |
| cache | OEmbed cache |
| cal | CalDAV container for events |
| channel | local channels |
| chat | Chat room content |
| chatpresence | Channel presence information for the chat |
| chatroom | Data for the actual chat room |
| clients | OAuth usage |
| config | Main configuration storage |
| conv | Meta conversation structure for private messages in Diaspora |
| event | Events |
| pgrp_member | Data protection groups (collections), group information |
| pgrp | Data protection groups (collections), member information |
| hook | Plugin hook register |
| hubloc | xchan location storage, links a hub location with a xchan |
| iconfig | Expandable, arbitrary memory for elements |
| issue | Upcoming error/problem database |
| item | all articles and websites |
| item_id | (deprecated by iconfig) other identifiers in other services for contributions |
| likes | ‘Like‘ things |
| private messages | |
| menu | Website menu data |
| menu_item | Entries for menus on websites |
| notify | Notifications |
| obj | Object data for things (x has y) |
| outq | Outgoing queue |
| pconfig | Personal (per channel) configuration memory |
| photo | Photo store |
| poll | Data for polls |
| poll_elm | Data for poll elements |
| profdef | Definitions for user-defined profile fields |
| profext | User-defined profile field data |
| profile | Channel profiles |
| profile_check | DFRN remote authorisation, may be outdated |
| register | Registrations that require an administrative authorisation |
| session | Storage of web sessions |
| shares | Information on common elements |
| sign | Diaspora signatures. Is gradually being phased out. |
| site | Location table for finding directory peers |
| source | Data from channel sources |
| sys_perms | Extensible authorisations for OAuth |
| term | Article taxonomy table (categories, tags, etc.) |
| tokens | OAuth usage |
| updates | Directory synchronisation updates |
| verify | General verification structure |
| vote | Voting data for polls |
| xchan | List of known channels in the universe |
| xchat | Chat rooms with bookmarks |
| xconfig | like pconfig, but for channels without a local account |
| xign | Channels ignored by friend suggestions |
| xlink | ‘Friends of friends’ links derived from poco, also storage of ratings |
| xperm | OAuth/OpenID-Connect extendable authorisations Authorisation memory |
| xprof | if this node is a directory server, it contains basic public profile information about everyone on the network |
| xtag | if this hub is a directory server, it contains tags or interests from everyone on the network |
Advanced configurations for administrators
This document assumes that you are an administrator. Hubzilla contains many configuration options that are hidden in the main administration area. Generally, these are options that are considered too niche, advanced, or confusing. These settings can be changed via the shell from the top level web directory using the following syntax
util/config cat key value
for a website configuration, or
util/pconfig channel_id cat key value
for a member configuration.
For a site configuration, another option is to insert a line in .htconfig.php with the syntax:
App::$config[‘cat’][‘key’] = ‘value’;`
Member configuration (pconfig)
- system.always_my_theme Always use your own theme when watching channels in the same hub. This leads to some pretty imaginative problems when viewing channels with themed comanches.
- system.blocked An array of Xchans that are blocked by this channel. Technically this is a hidden configuration and belongs here, but addons (notably Superblock) have made this available in the UI.
- system.default_cipher Sets the default cipher used for E2EE elements.
- system.display_friend_count Defines the number of connections to be displayed in the connection profile widget.
- system.do_not_track Like the browser header. This will break many identity-based functions. You should really only set permissions that make sense.
- system.forcepublicuploads Forces uploaded photos to be public when uploaded as wall elements. It makes much more sense to set the permissions correctly in the first place. Do this instead.
- system.network_page_default Sets the default parameters for displaying the network page. This should contain the same query string as the manual filtering.
- system.paranoia Defines the security level of the IP check. If the IP address of a logged on session changes, this level is applied to determine if the account should be logged off as a security breach. The options are: 0 - no IP check 1 - check 3 octets 2 - check 2 octets 3 - check for all differences
- system.prevent_tag_hijacking Prevents external networks from hijacking hashtags in your posts and redirecting them to their own resources.
- system.startpage Another one of those technically hidden configurations provided by addons. Defines the default page that is displayed when you log in. This is made available to the user interface by the startpage add-on.
- system.taganyone Requires that the configuration of the same name is activated. Allows @mention tagging of everyone, regardless of whether you are connected or not. This does not scale.
- system.anonymous_comments By default or if set to 1, custom permissions can be set to allow anonymous (moderated) comments like WordPress, moderated by the channel owner. If set to 0, no member of your site can select or enable this.
- system.user_scalable Determines whether the app is scalable to touchscreens. Set to on by default, set to zero to deactivate - real zero, not just false.
Configuration of the website
- randprofile.check When requesting a random profile, first check whether it actually exists
- randprofile.retry Number of attempts to obtain a random profile
- system.admin_email Specifies the e-mail address of the administrator for this site. This is defined during installation.
- system.authlog Log file used for logging authentication errors. Used to connect to server-side software such as fail2ban. Auth errors are also logged in the main logs.
- system.auto_channel_create Adds the necessary form elements to create the first channel on the account registration page and creates it (possibly after email validation or administrator approval). This excludes the ability to import a channel from another site as the first channel created on this site for a new account. Use with system.default_permissions_role to streamline registration.
- system.auto_follow The first channel of an account automatically follows the channels listed here - comma separated list of webbies (member@hub addresses).
- system.blacklisted_sites An array of specific hubs that are to be completely blocked by this hub.
- system.block_public_search Similar to block_public, with the difference that only public access to the search functions is blocked. Useful for pages that want to be public but are overrun by search engines.
- system.cron_hour Specify an hour in which cron_daily should be executed. By default, without configuration, this is executed at midnight UTC.
- system.default_permissions_role If this value is set to a valid name for a permission role, this role will be used for the first channel created by a new account and will not prompt for the ‘channel type’ on the channel creation form. Examples of valid names are: ‘social’, ‘social_restricted’, ‘social_private’, ‘forum’, ‘forum_restricted’ and ‘forum_private’. Read more about authorisation roles here.
- system.default_profile_photo Defines the profile photo with which new channels start. This should contain the name of a directory located under images/default_profile_photos/ or it should not be set. If it is not set, ‘rainbow_man’ is assumed.
- system.directorytags Specifies the number of keyword tags to display on the directory page. The default is 50 if it is not set to a positive integer.
- system.disable_directory_keywords If ‘1’, no directory keywords are displayed. If the hub is a directory server, prevent keywords from being returned to all directory clients. Please do not set this for directory servers in the RED_GLOBAL area.
- system.disable_discover_tab Allows you to completely disable the ability to discover public content from external sites.
- system.disable_dreport If ‘1’, no delivery reports are saved or linked.
- system.dlogfile Log file used for logging development errors. Exactly the same as logger otherwise. This is not magic and requires your own logging instructions. Developer tool.
- system.email_notify_icon_url URL of the image (32x32) to be displayed in email notifications (HTML bodies).
- system.expire_delivery_reports Expiry date in days for delivery reports - default value 10
- system.expire_limit Do not expire more than this number of reports per channel per expiry run to avoid exhausting the memory. Default value 5000.
- system.photo_storage_type If ‘1’, the file system is used instead of the SQL database to store the thumbnails. Default setting is ‘0’. Introduced in 4.2
- system.hidden_version_siteinfo If ‘true’, the software version is not displayed on the siteinfo pages (system.hide_version hides the version on these pages as well, this setting only hides the version on the siteinfo pages).
- system.hide_help Do not show the link to the help documentation in the navigation bar
- system.hide_in_statistics Instructs the red statistics servers to completely hide this hub in hub lists.
- system.hide_version If true, the software version is not displayed on websites and tools. (*) Must be set in .htconfig.php.
- system.ignore_imagick Ignores imagick and uses GD, even if imagick is installed on the server. Prevents some problems with PNG files in older versions of imagick.
- system.max_daily_registrations Defines the maximum number of new registrations allowed in a day. Useful to prevent oversubscription when publicising the project.
- system.max_import_size If configured, the maximum length of an imported text message. This is usually left at 200 KBytes or more to accommodate private Friendica photos that are embedded.
- system.max_tagged_forums Spam protection. Limits the number of tagged forums recognised in each post. Default is 2, only the first ‘n’ tags are delivered as forums, the others cause no delivery.
- system.minimum_feedcheck_minutes The minimum interval between checking RSS feeds. If this interval is less than the cron interval, the feeds are checked with every cron job. The default value is 60 if it has not been set. The site setting can also be overridden for each individual channel by a service class setting aptly named ‘minimum_feedcheck_minutes’.
- system.no_age_restriction Do not restrict registration to persons over the age of 13. In many countries it is required by law that age must be specified and that all personal data of minors must be blocked.
- system.object_cache_days Defines how long cached embedded content can be used without being retrieved again. The default setting is 30 days.
- system.openssl_conf_file Specify a file that contains the OpenSSL configuration. Required in some Windows installations to find the openssl configuration file on the system. Read the code first. If you cannot read the code, do not play with it.
- system.openssl_encrypt Use encryption engine from openssl, default is false (uses mcrypt for AES encryption)
- system.optimize_items Executes optimise_table during some tasks to keep your database clean and defragmented. This comes at the expense of performance while the operations are running, but also makes things run a bit faster when they are not. There are also CLI utilities to perform this operation that you may prefer, especially if you have a large site.
- system.override_poll_lockfile Ignores the lock file in the poller process to allow more than one process to run at a time.
- system.paranoia Like pconfig, but on a site-wide basis. Can be overridden by member settings.
- system.pin_types Array of allowed element types for pinning. The default values depend on the module, but can be changed here.
- system.photo_cache_time How long the photos should be cached, in seconds. The default value is 86400 (1 day). A longer time increases performance, but also means that it takes longer for changed authorisations to apply.
- system.platform_name What should be displayed as the platform name on websites and in statistics. (*) Must be set in .htconfig.php.
- system.rating_enabled Distributed reputation reports and data collection. This function is currently being revised.
- system.poke_basic Reduce the number of poke verbs to exactly 1 (‘poke’). Deactivate other verbs.
- system.proc_run_use_exec If 1, the system call exec in proc_run is used to execute background tasks. By default we use proc_open and proc_close. On some (currently rare) systems this does not work well.
- system.projecthome Displays the project page on your homepage for logged out viewers.
- system.projecthome Defines the project home page as the start page of the hub. (Obsolete)
- system.pubstream_order Defines the pubstream order. Possible values ‘commented’ (default), ‘created’ and ‘edited’.
- system.register_link Path to which the ‘register’ link in the registration form should point. For closed sites, this will point to ‘pubsites’. For open sites, it will normally redirect to ‘register’, but you can change this to a custom site page that offers subscriptions or similar.
- system.reserved_channels Do not allow members to register channels with this comma-separated list of names (no spaces).
- system.sellpage A URL to display in the list of public sites to sell your hub - show classes of service, etc.
- system.startpage Defines the default page that is displayed for all channels on this website after a login. Can be overridden by user settings.
- system.sys_expire_days How many days should discovered public content from other websites be kept?
- system.taganyone Allows @mention tagging of everyone, whether you are connected or not.
- system.tempdir Location where temporary files are stored (currently unused), default is defined in PHP configuration.
- system.tos_url Sets an alternative link for the ToS storage location.
- system.transport_security_header if non-zero and SSL is used, a strict-transport-security header is inserted on the web pages
- system.uploaddir Storage location for uploading files (default is system.tempdir, currently only used by the js_upload plugin)
- system.workflow_channel_next The page to which new members should be redirected immediately after creating a channel.
- system.workflow_register_next The page to which members are redirected immediately after creating an account (only if auto_channel_create or UNO is activated).
Directory configuration
Default values for the directory search
- directory.globaldir 0 or 1. default value 0. If you visit the directory on a site, you will only see the members of this site by default. You have to take an extra step to see the people in the rest of the network; and by doing this, there is a clear delineation that these people are not members of this site, but of a larger network.
- directory.pubforums 0 or 1. public forums should be 0 by default.
- directory.safemode 0 or 1.
Configuration of the directory server
- system.directory_mode
- system.directory_primary
- system.directory_realm
- system.directory_server
- system.realm_token
File Sync and Clone
File cloning across multiple instances of a channel is a very hard problem, due to the nature of PHP memory allocation. This needs to be handled dramatically differently than cloning or syncing of other information. (Processing one large video file or 40-50 photos could exhaust memory). Therefore we can't easily just dump all the data to a dump file and sequentially process it. Loading the dump file itself is likely to exhaust memory.
There are also two primary operations we are considering. The first is the hardest - saving and then importing all your channel information into a new channel clone. The second is synchronising file changes as they occur across two or more "active" clones.
For the first cut at this tool we will concentrate on the second case, while trying to maintain some measure of compatibility with the first case so that we can re-use the same tools.
Meta Data
First we need the metadata for the file in order to precisely re-construct its structure on another site. This requires the following information:
'attach' structure (without file contents - which is the default) for the file itself and its parent directories so that we can re-create its precise place in the file system, since we do not know if the parent directory has been imported previously or ever.
'photo' structure for any photo elements which were created as a result of uploading this file into the system. This typically contains several different 'scales' or thumbnail images, some of which may be cropped for profile photo use or cover photo use. We need to retain the cropping information which is not present in the metadata, but only in the stored data. The actual thumbnail image data may or may not be included in the metadata. A cover photo of large scale (scale #7) could potentially cause memory issues. Not as bad as a 100M video, but if you have several of these they could add up.
'item' entries which are linked to this file. These can be file share activities, the "parent item" linked to photos, and any attached conversation items (photo likes, comments, etc.)
All of these items will require URL replacement and re-signing of the item as they are relocated to another site.
File Data
Then we have the actual file data we need to reconstruct the file. This needs to be stored separately from the meta-data to avoid memory exhaustion when processing. The actual file data can be used to reconstruct the attach structure and the first four photo scales. If this is a photo, we need access to the "#4 scale" (profile photo) and the #7 scale (cover photo) as they were originally cropped. All other thumbnails can be generated from these.
File Sync
We will consider this operation first because it is probably the most straightforward to implement. When a photo is added to or removed or changed from the source system, we will send a clone sync packet to all known clones containing the metadata - but no file data . We can only send one sync packet per file operation that needs to be synced.
The receiving end will create and perform URL translation on all the metadata structures and store them. Then it will need to fetch the actual data. Assuming CURL supports streaming, an authenticated request is sent to the original site and the original file is requested and streamed directly to disk (bypassing all processing). If photo scale #4 or scale #7 is required, these are requested and stored into their respective structures. We're assuming in this case that the cover photo large scale will not exhaust memory. If CURL cannot be made to support streaming, request packets need to be queued and sent to the origination site to obtain "chunks" of the file and re-assembled once all chunks have been retrieved.
The authenticated request depends on the mechanism. For CURL streaming, some signed secret with a timestamp will probably need to be generated and posted to the file origination site. Then the data can be retrieved with minimal internal processing and dumped directly to disk using stdio buffering. In the case of a Nomad request, the Nomad request packet will be validated, however scheduling chunk batches and re-assembling them could be tricky.
File Backup/Restore
This is much more complicated as we do not have an authenticate web server to request data from. The metadata can be mostly the same, but we need some form of signalling that we will not be fetching the file via the web. This will likely require a client side process to parse each metadata file and locate a file on disk which it is associated with. Then the data would need to be streamed to the destination server with a special endpoint designed for this task. A java app might be the best option here to retain platform neutrality.
Another option would be to use WebDAV for this step. The metadata files would be uploaded first, and then the data files. If a data file corresponded to an existing metadata file, the metadata would be processed; the file stored appropriately, and the metadata file then removed. In this case, photos of scales 4 and 7 would need to be provided in the metadata.
Optionally, this step could also be performed with a filesystem local to the destination server. This would be the highest performance, and a suite of shell-based tools (in the case of Linux) could perform the "client-side" of the task.
The complexity of this task mandates careful planning into how the data is organised and stored and if necessary backed up remotely or transmitted for backup by the source website.
Backward Compatibility
There are some obvious issues with making data available for backup or cloning which existed on the system prior to the existence of restore/sync tools. To keep the tools themselves relatively uncomplicated (to the extent possible given the constraints) backward compatibility may have to be preformed by dedicated plugin or addon.
Nomad - A High Level Overview
Here's a high level description of how Nomad works.
In this example, "Indigo" is going to send a public message from his website at "podunk.edu". "Nickordo" is a recipient on another site ("example.com").
Indigo first posts his message at podunk.edu. podunk.edu looks up who should receive the message and finds Nickordo. Nickordo usually posts from example.com so we add that destination to our list of recipients. We may also add other destinations for nickordo and anybody else that is following Indigo's posts.
In this example we find that we only have one known recipient at one known location.
We send a packet to example.com:
{
  "type":"notify",
  "sender":{
    "guid":"kgVFf_1_SSbyqH-BNWjWuhAvJ2EhQBTUdw-Q1LwwssAntr8KTBgBSzNVzUm9_RwuDpxI6X8me_QQhZMf7RfjdA",
    "guid_sig":"PT9-TApzpm7QtMxC63MjtdK2nUyxNI0tUoWlOYTFGke3kNdtxSzSvDV4uzq_7SSBtlrNnVMAFx2_1FDgyKawmqVtRPmT7QSXrKOL2oPzL8Hu_nnVVTs_0YOLQJJ0GYACOOK-R5874WuXLEept5-KYg0uShifsvhHnxnPIlDM9lWuZ1hSJTrk3NN9Ds6AKpyNRqf3DUdz81-Xvs8I2kj6y5vfFtm-FPKAqu77XP05r74vGaWbqb1r8zpWC7zxXakVVOHHC4plG6rLINjQzvdSFKCQb5R_xtGsPPfvuE24bv4fvN4ZG2ILvb6X4Dly37WW_HXBqBnUs24mngoTxFaPgNmz1nDQNYQu91-ekX4-BNaovjDx4tP379qIG3-NygHTjFoOMDVUvs-pOPi1kfaoMjmYF2mdZAmVYS2nNLWxbeUymkHXF8lT_iVsJSzyaRFJS1Iqn7zbvwH1iUBjD_pB9EmtNmnUraKrCU9eHES27xTwD-yaaH_GHNc1XwXNbhWJaPFAm35U8ki1Le4WbUVRluFx0qwVqlEF3ieGO84PMidrp51FPm83B_oGt80xpvf6P8Ht5WvVpytjMU8UG7-js8hAzWQeYiK05YTXk-78xg0AO6NoNe_RSRk05zYpF6KlA2yQ_My79rZBv9GFt4kUfIxNjd9OiV1wXdidO7Iaq_Q",
    "url":"http:\/\/podunk.edu",
    "url_sig":"T8Bp7j5DHHhQDCFcAHXfuhUfGk2P3inPbImwaXXF1xJd3TGgluoXyyKDx6WDm07x0hqbupoAoZB1qBP3_WfvWiJVAK4N1FD77EOYttUEHZ7L43xy5PCpojJQmkppGbPJc2jnTIc_F1vvGvw5fv8gBWZvPqTdb6LWF6FLrzwesZpi7j2rsioZ3wyUkqb5TDZaNNeWQrIEYXrEnWkRI_qTSOzx0dRTsGO6SpU1fPWuOOYMZG8Nh18nay0kLpxReuHCiCdxjXRVvk5k9rkcMbDBJcBovhiSioPKv_yJxcZVBATw3z3TTE95kGi4wxCEenxwhSpvouwa5b0hT7NS4Ay70QaxoKiLb3ZjhZaUUn4igCyZM0h6fllR5I6J_sAQxiMYD0v5ouIlb0u8YVMni93j3zlqMWdDUZ4WgTI7NNbo8ug9NQDHd92TPmSE1TytPTgya3tsFMzwyq0LZ0b-g-zSXWIES__jKQ7vAtIs9EwlPxqJXEDDniZ2AJ6biXRYgE2Kd6W_nmI7w31igwQTms3ecXe5ENI3ckEPUAq__llNnND7mxp5ZrdXzd5HHU9slXwDShYcW3yDeQLEwAVomTGSFpBrCX8W77n9hF3JClkWaeS4QcZ3xUtsSS81yLrp__ifFfQqx9_Be89WVyIOoF4oydr08EkZ8zwlAsbZLG7eLXY"
  },
  "callback":"\/post",
  "version":1,
  "secret":"1eaa6613699be6ebb2adcefa5379c61a3678aa0df89025470fac871431b70467"
}
This packet says the following:
I'm Indigo and here is proof. I'm posting from podunk.edu and here is proof. I've got a package for you. The tracking number is "1eaa6613....".
Example.com accepts this packet and says "whoa, hold on - I don't know you. I want to prove who you are." So Example.com connects to podunk.edu through a "well-known URL" that we use for this purpose and looks up the "guid" mentioned above. It should return a bunch of information, one item of which is a public key. Example.com uses this key to verify the signatures in the message to verify that indeed there is a person named Indigo at podunk.edu. We only need to do this once. (Note that Indigo can post from any location. All we have to do is prove that it's Indigo and that Indigo can prove that he's posting from another site.)
Then example.com disconnects and flags that there's a message waiting at podunk.edu. Either immediately, or whenever the urge hits (depending on how important Indigo is to anybody on this site), example.com "calls" podunk.edu. It says something like this:
{
  "type":"pickup",
  "url":"http:\/\/example.com",
  "callback_sig":"teE1_fLIqfyeCuZY4iS7sNU8jUlUuqYOYBiHLarkC99I9K-uSr8DAwVW8ZPZRK-uYdxRMuKFb6cumF_Gt9XjecCPBM8HkoXHOi_VselzJkxPwor4ZPtWYWWaFtRfcAm794LrWjdz62zdESTQd2JJIZWbrli1sUhK801BF3n0Ye6-X1MWhy9EUTVlNimOeRipcuD_srMhUcAXOEbLlrugZ8ovy2YBe6YOXkS8jj0RSFjsOduXAoVhQmNpcobSYsDvaQS3e3MvE6-oXE602zGQhuNLr7DIMt9PCdAeQo-ZM-DHlZGCkGk4O2oQFCXFzGPqLUMWDACGJfTfIWGoh_EJqT_SD5b_Yi_Wk9S1lj7vb-lmxe5JuIf7ezWzHoBT8vswnZxPYlidH2i9wapdzij9il_qqcCWWHIp7q_XkY_Zj52Z4r4gdmiqM-8y1c_1SDX7hrJFRwqL_PKFbEvyi5nMWTEzqp55Tay5Woiv19STK_H_8ufFfD9AOkYnk6rIOMsk9dn3a5tAFpDRyRndXkBWAXwiJjiND2zjue7BFu7Ty40THXcfYRh1a5XrAXcaGeYuagg-8J9tAufu9_LY3qGazFg8kRBVMOn4M8DRKSIhKj7z4MnbYL0s09gREojy4jqWO3VkaOjP2jUGzoPuUDLasudE1ehWFq0K_MTQNavgmp8",
  "callback":"http:\/\/example.com\/post",
  "secret":"1eaa6613699be6ebb2adcefa5379c61a3678aa0df89025470fac871431b70467",
  "secret_sig":"O7nB4_UJHBXi28Suwl9LBZF9hI_9KGVTgehnUlWF1oYMNRnBbVHB9lzUfAoalvp3STbU3xJbtD_S58tv6MfV7J5j2V_S1W5ex3dulmDGB8Pt_7Fe5mbEPmjQFcfv3Eg5dUjYIuDl0TDScfrHyImj7RZIWHbwd7wWVoMzzDa_o33klpYmKZCBvObCh55bRrlFkXZs_dRuOiPwkfX0C6_XES4OyOIYl45V30rdhmf-STrf4L9dKYy_axQ12RIwRcKychvVLwlUJn3bn9lgNXRRU_HTne-09OPcJbUOdcD3DkFoKOxMULBNKPHzsCau0ICYug7S0EP6LpCom_mW78s08LyVA1vYeFZjevBCiGecj57yIAQDYi6_rpWJfihYaWHRN0oqtScUR4Bdf0bQbEHxMs4zAtrOAxfyJCbi6U1pfnGgzXzB9ulOYGnVGNTF7Ey4K7FOZIBtk0ILY2JfvBUaVvVs8ttagOOHmhWhnbCvrnOFlkNdlce7zoJCSUJENUOCYmTRfwB_Jno5fAzRnrsYU3_Z-l1mzniU_OmUPz8mPEh7PwhkqAiVlyaM-q15gn7l2lAIDk9kp2X_iCme7v4V0ADN_DbpaI_0-6mPw5HLbKrCsA-sxlSMB4DO4lDCHYkauj0l25sbfroRWB_hax1O4Q0oWyOlVJLUqEC5nuUJCCE"
}
What this message says is: This is example.com, I have proof, and I'm here to pick up a package. Here's the tracking number, and here's proof that this is the tracking number you presumably sent to example.com.
Good enough. Podunk.edu checks out the story and indeed, it is example.com, and yes, there's a package waiting with that tracking number. Here's the package...
{
  "success":1,
  "pickup":{
    "notify":{
      "type":"notify",
      "sender":{
        "guid":"kgVFf_1_SSbyqH-BNWjWuhAvJ2EhQBTUdw-Q1LwwssAntr8KTBgBSzNVzUm9_RwuDpxI6X8me_QQhZMf7RfjdA",
        "guid_sig":"PT9-TApzpm7QtMxC63MjtdK2nUyxNI0tUoWlOYTFGke3kNdtxSzSvDV4uzq_7SSBtlrNnVMAFx2_1FDgyKawmqVtRPmT7QSXrKOL2oPzL8Hu_nnVVTs_0YOLQJJ0GYACOOK-R5874WuXLEept5-KYg0uShifsvhHnxnPIlDM9lWuZ1hSJTrk3NN9Ds6AKpyNRqf3DUdz81-Xvs8I2kj6y5vfFtm-FPKAqu77XP05r74vGaWbqb1r8zpWC7zxXakVVOHHC4plG6rLINjQzvdSFKCQb5R_xtGsPPfvuE24bv4fvN4ZG2ILvb6X4Dly37WW_HXBqBnUs24mngoTxFaPgNmz1nDQNYQu91-ekX4-BNaovjDx4tP379qIG3-NygHTjFoOMDVUvs-pOPi1kfaoMjmYF2mdZAmVYS2nNLWxbeUymkHXF8lT_iVsJSzyaRFJS1Iqn7zbvwH1iUBjD_pB9EmtNmnUraKrCU9eHES27xTwD-yaaH_GHNc1XwXNbhWJaPFAm35U8ki1Le4WbUVRluFx0qwVqlEF3ieGO84PMidrp51FPm83B_oGt80xpvf6P8Ht5WvVpytjMU8UG7-js8hAzWQeYiK05YTXk-78xg0AO6NoNe_RSRk05zYpF6KlA2yQ_My79rZBv9GFt4kUfIxNjd9OiV1wXdidO7Iaq_Q",
        "url":"http:\/\/z.podunk.edu",
        "url_sig":"T8Bp7j5DHHhQDCFcAHXfuhUfGk2P3inPbImwaXXF1xJd3TGgluoXyyKDx6WDm07x0hqbupoAoZB1qBP3_WfvWiJVAK4N1FD77EOYttUEHZ7L43xy5PCpojJQmkppGbPJc2jnTIc_F1vvGvw5fv8gBWZvPqTdb6LWF6FLrzwesZpi7j2rsioZ3wyUkqb5TDZaNNeWQrIEYXrEnWkRI_qTSOzx0dRTsGO6SpU1fPWuOOYMZG8Nh18nay0kLpxReuHCiCdxjXRVvk5k9rkcMbDBJcBovhiSioPKv_yJxcZVBATw3z3TTE95kGi4wxCEenxwhSpvouwa5b0hT7NS4Ay70QaxoKiLb3ZjhZaUUn4igCyZM0h6fllR5I6J_sAQxiMYD0v5ouIlb0u8YVMni93j3zlqMWdDUZ4WgTI7NNbo8ug9NQDHd92TPmSE1TytPTgya3tsFMzwyq0LZ0b-g-zSXWIES__jKQ7vAtIs9EwlPxqJXEDDniZ2AJ6biXRYgE2Kd6W_nmI7w31igwQTms3ecXe5ENI3ckEPUAq__llNnND7mxp5ZrdXzd5HHU9slXwDShYcW3yDeQLEwAVomTGSFpBrCX8W77n9hF3JClkWaeS4QcZ3xUtsSS81yLrp__ifFfQqx9_Be89WVyIOoF4oydr08EkZ8zwlAsbZLG7eLXY"
      },
      "callback":"\/post",
      "version":1,
      "secret":"1eaa6613699be6ebb2adcefa5379c61a3678aa0df89025470fac871431b70467"
    },
    "message":{
      "message_id":"10b049ce384cbb2da9467319bc98169ab36290b8bbb403aa0c0accd9cb072e76@podunk.edu",
      "message_top":"10b049ce384cbb2da9467319bc98169ab36290b8bbb403aa0c0accd9cb072e76@podunk.edu",
      "message_parent":"10b049ce384cbb2da9467319bc98169ab36290b8bbb403aa0c0accd9cb072e76@podunk.edu",
      "created":"2012-11-20 04:04:16",
      "edited":"2012-11-20 04:04:16",
      "title":"",
      "body":"Hi Nickordo",
      "app":"",
      "verb":"post",
      "object_type":"",
      "target_type":"",
      "permalink":"",
      "location":"",
      "longlat":"",
      "owner":{
        "name":"Indigo",
        "address":"indigo@podunk.edu",
        "url":"http:\/\/podunk.edu",
        "photo":{
          "mimetype":"image\/jpeg",
          "src":"http:\/\/podunk.edu\/photo\/profile\/m\/5"
        },
        "guid":"kgVFf_1_SSbyqH-BNWjWuhAvJ2EhQBTUdw-Q1LwwssAntr8KTBgBSzNVzUm9_RwuDpxI6X8me_QQhZMf7RfjdA",
        "guid_sig":"PT9-TApzpm7QtMxC63MjtdK2nUyxNI0tUoWlOYTFGke3kNdtxSzSvDV4uzq_7SSBtlrNnVMAFx2_1FDgyKawmqVtRPmT7QSXrKOL2oPzL8Hu_nnVVTs_0YOLQJJ0GYACOOK-R5874WuXLEept5-KYg0uShifsvhHnxnPIlDM9lWuZ1hSJTrk3NN9Ds6AKpyNRqf3DUdz81-Xvs8I2kj6y5vfFtm-FPKAqu77XP05r74vGaWbqb1r8zpWC7zxXakVVOHHC4plG6rLINjQzvdSFKCQb5R_xtGsPPfvuE24bv4fvN4ZG2ILvb6X4Dly37WW_HXBqBnUs24mngoTxFaPgNmz1nDQNYQu91-ekX4-BNaovjDx4tP379qIG3-NygHTjFoOMDVUvs-pOPi1kfaoMjmYF2mdZAmVYS2nNLWxbeUymkHXF8lT_iVsJSzyaRFJS1Iqn7zbvwH1iUBjD_pB9EmtNmnUraKrCU9eHES27xTwD-yaaH_GHNc1XwXNbhWJaPFAm35U8ki1Le4WbUVRluFx0qwVqlEF3ieGO84PMidrp51FPm83B_oGt80xpvf6P8Ht5WvVpytjMU8UG7-js8hAzWQeYiK05YTXk-78xg0AO6NoNe_RSRk05zYpF6KlA2yQ_My79rZBv9GFt4kUfIxNjd9OiV1wXdidO7Iaq_Q"
      },
      "author":{
        "name":"Indigo",
        "address":"indigo@podunk.edu",
        "url":"http:\/\/podunk.edu",
        "photo":{
          "mimetype":"image\/jpeg",
          "src":"http:\/\/podunk.edu\/photo\/profile\/m\/5"
        },
        "guid":"kgVFf_1_SSbyqH-BNWjWuhAvJ2EhQBTUdw-Q1LwwssAntr8KTBgBSzNVzUm9_RwuDpxI6X8me_QQhZMf7RfjdA",
        "guid_sig":"PT9-TApzpm7QtMxC63MjtdK2nUyxNI0tUoWlOYTFGke3kNdtxSzSvDV4uzq_7SSBtlrNnVMAFx2_1FDgyKawmqVtRPmT7QSXrKOL2oPzL8Hu_nnVVTs_0YOLQJJ0GYACOOK-R5874WuXLEept5-KYg0uShifsvhHnxnPIlDM9lWuZ1hSJTrk3NN9Ds6AKpyNRqf3DUdz81-Xvs8I2kj6y5vfFtm-FPKAqu77XP05r74vGaWbqb1r8zpWC7zxXakVVOHHC4plG6rLINjQzvdSFKCQb5R_xtGsPPfvuE24bv4fvN4ZG2ILvb6X4Dly37WW_HXBqBnUs24mngoTxFaPgNmz1nDQNYQu91-ekX4-BNaovjDx4tP379qIG3-NygHTjFoOMDVUvs-pOPi1kfaoMjmYF2mdZAmVYS2nNLWxbeUymkHXF8lT_iVsJSzyaRFJS1Iqn7zbvwH1iUBjD_pB9EmtNmnUraKrCU9eHES27xTwD-yaaH_GHNc1XwXNbhWJaPFAm35U8ki1Le4WbUVRluFx0qwVqlEF3ieGO84PMidrp51FPm83B_oGt80xpvf6P8Ht5WvVpytjMU8UG7-js8hAzWQeYiK05YTXk-78xg0AO6NoNe_RSRk05zYpF6KlA2yQ_My79rZBv9GFt4kUfIxNjd9OiV1wXdidO7Iaq_Q"
      }
    }
  }
}
And that's the package (the original message). Example.com converts this into a form suitable for viewing by Nickordo and notifies Nickordo that there's a new message. Podunk.edu might discover that there are other packages waiting for example.com. If this happens it may also send any and all other waiting packages at this time. Each has the original tracking number attached.
Hubzilla FAQ
Is there a way to change the Admin account?
Is there a way to have multiple administrators?
Yes, but it's a bit messy at the moment as it is not yet exposed in the UI. To make an account an administrative account, one needs to add 4096 to the account_roles entry in the account table of the database. Likewise, to remove administrative permissions, one must subtract 4096 from the account roles.
I can log in, but there are no posts or webpages
Most likely, your item table has crashed. Run the MySQL command
repair table item;
Login doesn't work, immediately after login, the page reloads and I'm logged out
Most likely, your session table has crashed. Run the MySQL command
repair table session;
When I switch theme, I sometimes get elements of one theme superimposed on top of the other
a) store/[data]/smarty3 isn't writeable by the webserver. Make it so.
b) You're using Midori, or with certain themes, Konqueror in KHTML mode.
My network tab won't load, it appears to be caused by a photo or video
Your PHP memory limit is too low. Increase the size of the memory_limit directive in your php.ini
Contrary to popular belief, the number of users on a hub doesn't make any difference to the required memory limit, rather, the content of an individuals matrix counts. Streams with lots of photos and video require more memory than streams with lots of text.
I have no communication with anybody
You're listening on port 443, but do not have a valid SSL certificate. Note this applies even if your baseurl is http.
Don't listen on port 443 if you cannot use it. It is strongly recommended to solve this problem by installing a browser valid SSL certificate rather than disabling port 443.
How do I update a non-Git install?
- Backup .htconfig.php
- Backup everything in store/
- Backup any custom changes in mod/site/ and view/site
- Delete your existing installation
- Upload the new version.
- Upload the new version of themes and addons.
- Restore everything backed up earlier.
What do I need to do when moving my hub to a different server
- Git clone on the new server. Repeat the process for any custom themes, and addons.
- Rsync .htconfig.php
- Rsync everything in store/
- Rsync everything in mod/site/ and view/site (these will only exist if you have custom modules)
- Dump and restore DB.
How do I reinstall an existing hub on the same server?
git reset --hard HEAD
will reset all files to their upstream defaults. This will not reset any local files that do not also exist upstream. Eg, if you have local changes to mod/channel.php, this will reset them - but will not reset any changes in mod/site/channel.php 2) If you absolutely must reinstall - for example, if you need to upgrade operating system - follow the steps for moving to a different server, but instead of using rsync, backup and restore some other way.
Do not reinstall a hub with a fresh database and fresh .htconfig.php unless as a very last resort. Creating a temporary account and ask for help via a support channel for non-trivial reinstalls is preferable to reinstalling fresh.
How do I set the default homepage for logged out viewers?
Use the custom_home addon available in the main addons repository.
What do the different directory mode settings mean?
// Configure how we communicate with directory servers.
// DIRECTORY_MODE_NORMAL     = directory client, we will find a directory (all of your member's queries will be directed elsewhere)
// DIRECTORY_MODE_SECONDARY  = caching directory or mirror (keeps in sync with realm primary [adds significant cron execution time])
// DIRECTORY_MODE_PRIMARY    = main directory server (you do not want this unless you are operating your own realm. one per realm.)
// DIRECTORY_MODE_STANDALONE = "off the grid" or private directory services (only local site members in directory)
- The default is NORMAL. This off-loads most directory services to a different server. The server used is the config:system/directory_server. This setting MAY be updated by the code to one of the project secondaries if the current server is unreachable. You should either be in control of this other server, or should trust it to use this setting.
- SECONDARY. This allows your local site to act as a directory server without exposing your member's queries to another server. It requires extra processing time during the cron polling, and is not recommended to be run on a shared web host.
- PRIMARY. This allows you to run a completely separate 'Network' of directory servers with your own Realm. By default, all servers are on the RED_GLOBAL realm unless the config:system/directory_realm setting is overridden. Do not use this unless you have your own directory_realm.
- STANDALONE. This is like primary, except it's a 'Network' all on it's own without talking to any other servers. Use this if you have only one server and want to be segregated from the Red#Matrix directory listings.
Developers Guide
Information for Hubzilla developers
Who is a Hubzilla developer? Should I be reading this?
Anyone who contributes to making Hubzilla better is a developer. There are many different and important ways you can contribute to this amazing technology, even if you don't know how to write code. The software itself is only one part of the Hubzilla project. You can contribute by
- translating the text into your language so that people all over the world have the opportunity to use Hubzilla
- Promote Hubzilla and spread awareness of the platform through blog posts, articles and word of mouth
- Create artwork and graphics for project resources such as icons and marketing materials
- Supporting the project infrastructure such as the project website and demo servers
Software developers are of course welcome; there are so many great ideas that can be realised and not enough people to make them all happen! The Hubzilla codebase is an advanced and mature system, but the platform is still very flexible and open to new ideas.
We are pretty relaxed when it comes to developers. We don't have a lot of rules. Some of us are overworked, and if you want to help, we're happy to let you help. However, if you follow a few guidelines, the process will be smoother and collaboration easier. All developers are expected to adhere to our code of conduct. We have developers from all over the world with different skills, different cultural backgrounds and different levels of patience. Our number one rule is to respect others. Sometimes this is difficult, and sometimes we have very different views on how things should work, but if everyone makes an effort, we will get along well.
This document will help you get to know and help shape Hubzilla.
You want to contribute code?
...and don't know how to start to...
- debug hubzilla (php on the webserver),
- contribute code to the project,
- optionally - do it all from inside a virtual machine
This manual was tested for Debian (Wheezy) as virtual machine on Lubuntu (Ubuntu 14.0) as host.
Install a Virtual Machine (KVM)
Here the installation guide for Linux Debian. The summary:
- install KVM
# apt-get install qemu-kvm libvirt-bin
- add yourself to the group libvirt
# adduser <youruser> libvirt
- install gui to manage virtual machines
# apt-get install virt-manager
- download an operating system to run inside the vm (mini.iso)
- start the virt manager
- create new virtual machine (click on icon)
- choose your iso image (just downloaded) as installation source
- optional: configure the new vm: ram, cpu's,...
- start virtual machine > result: linux debian starts in a new window.
- (optional) avoid network errors after restart of host os
# virsh net-start default
# virsh net-autostart default
Install Apache Webserver
Open a terminal and make yourself root
su -l
Create the standard group for the Apache webserver
groupadd www-data
might exist already
usermod -a -G www-data www-data
Check if the system is really up to date
apt-get update
apt-get upgrade
Optional restart services after installation
reboot
If you restarted, make yourself root
su -l
Install Apache:
apt-get install apache2 apache2-doc apache2-utils
Open webbrowser on PC and check localhost Should show you a page like "It works"
(Source http://www.manfred-steger.de/tuts/20-der-eigene-webserver-mit-dem-raspberry-pi#)
Install PHP, MySQL, phpMyAdmin
PHP, MySQL
su -l
apt-get install libapache2-mod-php8.2 php8.2 php-pear php8.2-xcache php8.2-curl php8.2-mcrypt php8.2-xdebug
apt-get install php8.2-mysql
apt-get install mysql-server mysql-client
enter and note the mysql passwort
Optional since its already enabled during phpmyadmin setup
phpenmod mcrypt
phpMyAdmin
Install php myadmin
apt-get install phpmyadmin
Configuring phpmyadmin
- Select apache2 (hint: use the tab key to select)
- Configure database for phpmyadmin with dbconfig-common?: Choose Yes
(Source #^http://www.manfred-steger.de/tuts/20-der-eigene-webserver-mit-dem-raspberry-pi#)
Enable rewrite
The default installation of Apache2 comes with mod_rewrite installed. To check whether this is the case, verify the existence of /etc/apache2/mods-available/rewrite.load
nano /etc/apache2/mods-available/rewrite.load
(You should find the content: LoadModule rewrite_module /usr/lib/apache2/modules/mod_rewrite.so) To enable and load mod_rewrite, do the rest of steps. Create a symbolic link in /etc/apache2/mods-enabled
cd /var/www
root@debian /var/www $ a2enmod rewrite
Then open up the following file, and replace every occurrence of "AllowOverride None" with "AllowOverride all".
nano /etc/apache2/apache2.conf
or
gedit /etc/apache2/sites-enabled/000-default
Finally, restart Apache2.
service apache2 restart
Test installation
cd /var/www
create a php file to test the php installation
nano phpinfo.php
Insert into the file:
<?php
  phpinfo();
?>
(save CTRL+0, ENTER, CTRL+X)
open webbrowser on PC and try #^http://localhost/phpinfo.php (page shows infos on php)
connect phpMyAdmin with MySQL database
nano /etc/apache2/apache2.conf
- CTRL+V... to the end of the file
- Insert at the end of the file: (save CTRL+0, ENTER, CTRL+X)
Include /etc/phpmyadmin/apache.conf
restart apache
/etc/init.d/apache2 restart
apt-get update
apt-get upgrade
reboot
phpMyAdmin
open webbrowser on PC and try http://localhost/phpmyadmin
(Source http://www.manfred-steger.de/tuts/20-der-eigene-webserver-mit-dem-raspberry-pi#)
Create an empty database... that is later used by hubzilla
open webbrowser on PC and try http://localhost/phpmyadmin
Create an empty database, for example named "red". Create a database user, for example "red". Grant all rights for the user "red" to the database "red".
Note the access details (hostname, username, password, database name).
Fork the project on github
Please follow the instruction in the offiical documentation of git. It is a good idea to read the whole manual! Git is different to other version control systems in many ways.
Now you should
- create an account at github.com
- fork https://framagit.org/hubzilla/core
- fork https://framagit.org/hubzilla/addons
If you not want to use GIT from the command line - there is a usefull Eclipse plugin named ""Eclipse Mylyn to GitHub connector".
Install Hubzilla and its Addons
Git at your computer / vm
You should have created an account on github and forked the projects befor you procceed.
Delete the directory www
rm -R www/
Install git (and optionally git-gui a client gui)
apt-get install git git-gui
Download hubzilla and addons
Download the main project hubzilla and hubzilla-addons
git clone https://github.com/yourname/hubzilla www
cd www/
git clone https://github.com/yourname/hubzilla-addons addon
Make this extra folder
mkdir -p "store/[data]/smarty3"
Create .htconfig.php and make it writable by the webserver
touch .htconfig.php
chmod ou+w .htconfig.php
Make user www-data (webserver) is the owner all the project files
cd ..
chown -R www-data:www-data www/
Add yourself ("surfer" in this example) to the group www-data. Why? Later you want to modify files in eclipse or in another editor.
Then make all files writable by the group www-date you are now a member of.
cd www/
usermod -G www-data surfer
chmod -R  g+w www/
Restart the computer (or vm)
If you are still not able to modify the project files you can check the members of the group www-data with
cat /etc/group
Register yourself as admin
Open http://localhost and init the matrix
Befor you register a first user switch off the registration mails. Open /var/www/.htconfig.php and make sure "0" is set in this line
App::$config['system']['verify_email'] = 0;
You should be able to change the file as "yourself" (instead of using root or www-data).
Cron and the poller
Important! Run the poller to pick up the recent "public" postings of your friends Set up a cron job or scheduled task to run the poller once every 5-10 minutes to pick up the recent "public" postings of your friends
crontab -e
Add
*/10 * * * * cd /var/www/; /usr/bin/php include/poller.php
If you don't know the path to PHP type
which php
Debug the server via eclipse
Check the configuration of xdebug
You shoud already have installed xdebug in the steps befor
apt-get install php5-xdebug
Configuring Xdebug
Open your terminal and type as root (su -l)
gedit /etc/php5/mods-available/xdebug.ini
if the file is empty try this location
gedit /etc/php5/conf.d/xdebug.ini
That command should open the text editor gedit with the Xdebug configuration file At the end of the file content append the following text
xdebug.remote_enable=on xdebug.remote_handler=dbgp xdebug.remote_host=localhost xdebug.remote_port=9000
Save changes and close the editor. In you terminal type to restart the web server.
service apache2 restart
Install Eclipse and start debugging
Install eclipse. Start eclipse with default worspace (or as you like)
Install the PHP plugin Menu > Help > Install new software... Install "PHP Developnent Tools ..."
Optionally - Install the GitHub connector plugin Menu > Help > Install new software... Install "Eclipse Mylyn to GitHub connector"
Configure the PHP plugin Menu > Window > Preferences...
General > Webbrowser > Change to "Use external web browser" PHP > Debug > Debug Settings > PHP Debugger > Change to "XDebug"
Create a new PHP project Menu > File > New Project > Choose PHP > "PHP Project"
Choose Create project at existing location" and "/var/www"
Start debugging Open index.php and "Debug as..." Choose as Launch URL: "http://localhost/"
Expected:
- The web browser starts
- The debugger will stop at the first php line
Contribute your changes via github
Preparations
There is a related page in this docs: [zrl=[baseurl]/help/git_for_non_developers]Git for Non-Developers[/zrl]. As stated befor it is recommended to read the official documentation GitHub-Contributing-to-a-Project of git.
Eclipse has a usefull plugin for GIT: "Eclipse Mylyn to GitHub connector".
Make sure you have set your data
git config --global user.name "Your Name"
git config --global user.email "your@mail.com"
Your first contribution
Create a descriptive topic branch
git checkout -b dev_beginning
Make sure your local repository is up-to-date with the main project. Add the original repository as a remote named “upstream” if not done yet
git remote add upstream https://framagit.org/hubzilla/core/
Fetch the newest work from that remote
git fetch upstream
git merge upstream/master
Hint: You can list the branches
git branch -v
Make your changes. In this example it is a new doc file.
Check your modifications
git status
Add (stage) the new file
git add doc/dev_beginner.bb
Commit the changes to your local branch. This will open an editor to provide a message.
git commit -a
Push back up to the same topic branch online
git push
Now you can go to your (online) account at github and create the pull request.
Following contributions
In case the main devolpers want you to change something. Fetch the newest work from the remote upstream/master to be sure you have the latest changes.
git fetch upstream
git merge upstream/master
Make your changes, test them, commit (to local repository), push (to online repository)
git status
git commit -a -m "added modification of branch"
git push
Versions and releases
Hubzilla currently uses a standard version numbering sequence of $x.$y(.$z), for example ‘1.12’ or ‘1.12.1’. The first digit is the major version number. Major versions are released ‘approximately’ once a year, often in December.
The second digit is the minor version number. If this number is odd, it is a development version. If the number is even, it is a released version. Minor versions are usually released once a month (moved from the development version to the major version) when development is ‘stable’, but this is likely to increase. In the future, minor releases will be released between one and three months; this corresponds to a stable code point and when there is a general consensus in the community that the current code base is stable enough to consider a release.
The last digit is an interface or patch identifier.
The release process involves changing the version number (by definition, the minor version number is odd, and the minor number is incremented). Once a year, the major version number of a major version is incremented and the minor version number is reset to 0.
The version candidate is moved to a new branch and testing begins or continues for a period of 1-2 weeks, or until all major issues have been resolved. This branch is usually labelled RC (Release Candidate); for example, 1.8RC stands for the upcoming release of version 1.8. At this point, the version number of the development branch is increased to the next odd number. (For example 1.9). New developments can then take place in the development branch.
Bug fixes should always be applied to ‘dev’ and transferred from there (usually with git cherry-pick) to the RC branch and, if necessary, to the master or official release branch.
At the time a release candidate is created, the language string file is frozen until a new version is released. Translation work can continue, but all translations should be submitted to ‘dev’ and merged into RC. Once RC testing is complete, RC will be merged into ‘master’ and the RC version identifier removed; this will result in a final checkin to change the version number. The CHANGELOG file should also be updated at this point or shortly before. If there are conflicts during this final merge, the merge is cancelled and ‘git merge -s ours’ is applied. This results in the master branch being replaced by the content of the RC branch. Conflicts often arise due to string updates that were made to master after the last release and cannot simply be resolved without manual editing. As this is a release of tested code, manual editing is not recommended and the replacement merge strategy should be used instead. It is assumed that RC now contains the latest, well-tested code.
Once the release is live and merged into the master branch, the RC branch can be removed.
After the release, corrections can be made to master. If possible, these should be made in dev and ‘git cherry-pick’ should be used to merge; this preserves the commit information and avoids conflicts when merging in the next cycle. Only rarely does a patch only apply to the master branch. If necessary, this can be done. If the change is major, the version number of the interface should be increased. This is at the discretion of the community. In any case, a ‘git pull’ of the master branch should always result in the latest version, to which all patches are applied after release.
The interface number (the $z in $x.$y.$z) should be incremented in dev whenever a change is made that alters the interfaces or API in an incompatible way, so that any external packages (especially addons and API clients) that rely on the current behaviour can detect their own interfaces at the point where it has changed and change them accordingly.
Git repository branches
There are two official branches of the Hubzilla Git repository.
- The stable version is maintained in the master branch. The latest commit in this branch is considered suitable for production hubs.
- Experimental development takes place in the dev branch, which is transferred to the master branch as soon as it is deemed tested and stable enough.
Git For Non-Developers
So you're handling a translation, or you're contributing to a theme, and every time you make a pull request you have to talk to one of the developers before your changes can be merged in?
Chances are, you just haven't found a quick how-to explaining how to keep things in sync on your end. It's really very easy.
After you've created a fork of the repo (just click "fork" at github), you need to clone your own copy.
For the sake of examples, we'll assume you're working on a theme called redexample (which does not exist).
git clone https://github.com/username/red.git
Once you've done that, cd into the directory, and add an upstream.
cd red
git remote add upstream https://framagit.org/hubzilla/core/
From now on, you can pull upstream changes with the command
git fetch upstream
Before your changes can be merged automatically, you will often need to merge upstream changes.
git merge upstream/master
You should always merge upstream before pushing any changes, and must merge upstream with any pull requests to make them automatically mergeable.
99% of the time, this will all go well. The only time it won't is if somebody else has been editing the same files as you - and often, only if they have been editing the same lines of the same files. If that happens, that would be a good time to request help until you get the hang of handling your own merge conflicts.
Then you just need to add your changes
git add view/theme/redexample/
This will add all the files in view/theme/redexample and any subdirectories. If your particular files are mixed throughout the code, you should add one at a time. Try not to do git add -a, as this will add everything, including temporary files (we mostly, but not always catch those with a .gitignore) and any local changes you have, but did not intend to commit.
Once you have added all the files you have changed, you need to commit them.
git commit
This will open up an editor where you can describe the changes you have made. Save this file, and exit the editor.
Finally, push the changes to your own git
git push
And that's it, your repo is up to date!
All you need to do now is actually create the pull request. There are two ways to do this.
The easy way, if you're using Github is to simply click the green button at the top of your own copy of the repository, enter a description of the changes, and click 'create pull request'. The main repository, themes, and addons all have their main branch at Github, so this method can be used most of the time.
Most people can stop here.
Some projects in the extended RedMatrix ecosphere have no Github presence, to pull request these is a bit different - you'll have to create your pull request manually. Fortunately, this isn't much harder.
git request-pull -p <start> <url>
Start is the name of a commit to start at. This must exist upstream. Normally, you just want master.
URL is the URL of your repo.
One can also specify
Example:
git request-pull master https://example.com/project
And simply send the output to the project maintainer.
Tools and workflows for developers
Hub snapshots
The hub snapshots page contains instructions and scripts for creating full snapshots of a hub to support switching between consistent and fully known states. This is useful to avoid situations where the content or database schema may be incompatible with the code.
Creating Documentation
To contribute documentation, simply put some words in a cunning order, and make their existence known to a developer. You can do this literally anywhere as long as a developer can see it. Once made aware, somebody will check it in for you. You should try to avoid proprietary formats, or locations that require authentication with methods other than Nomad in order to make it easy for a developer to access, but even this is not a strict requirement.
If you wish to contribute directly, that's fine too. To contribute directly, documentation should be in one of the following formats:
- Markdown
- BBCode
- HTML
- Plain Text
- Other formats are also allowed, but support for the format must be added to mod/help.php first.
If editing a plain text file, please keep column width to 80. This is because plain text is used in instances where we may not have a working installation - the installation documentation, for example - and it should be easy to read these from a CLI text editor.
The advantage of Markdown is that it is human readable.
The advantage of BBCode is that it is identity aware.
Therefore, if using BBCode, try to make the most of it:
- Use ZRL links where appropriate to ensure a link to another site retains authentication and keeps identity based documentation working
- Use baseurl or observer.baseurl tags where appropriate instead of example.com for authenticated viewers.
- Support non-authenticated users with observer=0 tags. We presently do not do this due to historical oversights. This needs adding everywhere
Translations
To translate documentation, or provided documentation in languages other than English:
- Create a directory in doc/ with your two letter country code if it doesn't already exist (eg, doc/de/ for German or doc/fr/ for French)
- Create a document with the same filename as the English version, but with content in your own language. This allows us to fallback to the English if the translation for a particular page is not provided
To create documentation that has no equivalent file in English, you can create a new file with a name of your choosing - but you'll also need to provide a localised version of the index page (main.bb in English) to make it accessible from the menu.
Translations
Our translations are managed through Transifex. If you would like to help translate Hubzilla into another language, sign up at transifex.com, visit Transifex and apply to join one of the existing language teams or create a new one. Notify one of the lead developers if you have a translation update that needs merging, or ask if you can merge it yourself if you are familiar with Git and PHP. We have a string file called ‘messages.po’ which is gettext compatible, and a handful of email templates from which we automatically generate the application language files.
The translation process
The strings used in Hubzilla's user interface are translated at Transifex and then added to the Git repository on github. If you would like to help translate a language, be it correcting terms or translating Hubzilla into a currently unsupported language, please register an account on transifex.com and contact the translation team there.
Translating Hubzilla is easy. Simply use the online tool on transifex. If you don't want to bother with Git & Co. it's no problem, we regularly check the status of the translations and import them into the source tree on github for others to use.
We do not include every translation of transifex in the source tree to avoid a scattered and disrupted overall experience. As a rough estimate, we have a lower limit of 50% translated strings before we include the language. This limit is only based on the amount of translated strings, assuming that the most important strings for the user interface are translated first by a translation team. If you feel that your translation is usable before this limit, please contact us and we will likely include your team's work in the source tree. If you would like to add your work to the source tree yourself, please feel free to do so and contact us with any questions that arise. The process is simple and Hubzilla comes with all the necessary tools.
The location of the translated files in the source tree is
/View/LNG-CODE/
where LNG-CODE is the code of the language used, e.g. de for German or fr for French. For the e-mail templates (the *.tpl files), simply place them in the directory and you're done. The translated strings come as an ‘hmessages.po’ file from Transifex, which needs to be translated into the PHP file that Hubzilla uses. To do this, place the file in the directory mentioned above and use the ‘po2php’ utility from the util directory of your Hubzilla installation.
Assuming you want to convert the German localisation, which is located in view/en/hmessages.po, you would proceed as follows.
- At the command prompt, navigate to the base directory of your
Hubzilla installation
- Execute the po2php script that translates the
into the hstrings.php file used by Hubzilla.
$> php util/po2php.php view/en/hmessages.po
The output of the script will be placed in the view/en/hstrings.php file where froemdoca expects it, so you can test your translation immediately.
- Visit your Hubzilla page and check that it is in the language you just translated.
language you have just translated. If not, try to find the error, probably PHP will give you a hint in the log/warnings.about the error.
For debugging you can also try to ‘execute’ the file with PHP. This should give no output if the file is ok, but may give you a hint for the error in the file.
$> php view/en/hstrings.php
- Commit the two files to your git repository with a meaningful commit message, push it to your fork of the Hubzilla repository on github and make a pull request for this commit.
Utilities
In addition to the po2php script, there are several other utilities for translation in the ‘util’ directory of the Hubzilla source tree. If you just want to translate Hubzilla into another language, you probably won't need any of these tools, but it will give you an idea of how Hubzilla's translation process works. See the utils/README file for more information.
Known issues
* Hubzilla uses the language setting of the visitor's browser to set the language for the user interface. Most of the time this works, but there are some known quirks. * the early translations are based on the friendica translations, if you find some rough translations please let us know or correct them at Transifex.
Licensing
All code contributed to the project is subject to the MIT licence unless otherwise stated. We accept third party code that falls under MIT, BSD and LGPL, but copyleft licences (GPL and AGPL) are only allowed in addons. It must be possible to completely remove the GPL (copyleft) code from the main project without destroying anything.
Coding style
In the interest of consistency, we use the following code style. We also accept patches that use other styles, but please try to use a consistent coding style if possible. We will not argue or discuss the merits of this style, and it is irrelevant what project ‘xyz’ uses. This is not project ‘xyz’. This is a baseline to try to keep the code readable now and in the future.
- All comments should be in English.
- We use Doxygen to create documentation. This has not been used consistently, but it is highly recommended to learn and use it.
- Indentation is mainly done by tabs with a tab width of 4.
- String concatenations and operators should be separated by spaces. e.g. ‘$foo = $bar . ‘abc’;‘ instead of “$foo=$bar.”abc’;"
- In general, we use single quotes for string variables and double quotes for SQL statements. ‘Here documents’ should be avoided. Sometimes using strings in double quotes with variable substitution is the most efficient way to create the string. In most cases, you should use single quotes.
- Use spaces liberally to improve readability. When creating arrays with many elements, a key/value pair is often set per line, which is indented accordingly from the parent line. Lining up the assignment operators requires a little more work, but also increases readability.
- In general, opening curly brackets are placed on the same line as what the bracket opens. They are the last character in the line. Closing brackets are placed on a separate line.
- Some functions take arguments in argc/argv style, such as main() in C or function args in Bash or Perl. Urls are split within a module. e.g. for‘http://example.com/module/arg1/arg2’$this->argc is 3 (integer) and $this->argv contains: [0] => ‘module’, [1] => ‘arg1’, [2] => ‘arg2’. Only one argument is ever specified. If a naked domain URL is specified, $this->argv[0] is set to ‘home’.
File system layout
| Directory | Description |
|---|---|
| addon | Optional addons/plugins |
| boot.php | Each process uses this to boot the application structure |
| doc | Help files |
| images | required images |
| include | The ‘model’ in MVC - (back-end functions), also contains PHP ‘executables’ for background processing |
| index.php | The front-end controller for web access |
| install | Installation and upgrade files and DB schema |
| library | Third-party modules (must be licence-compatible) |
| mod | Control modules based on URL path names (e.g. http://sitename/foo loads mod/foo.php) |
| mod/site/ | Site-specific mod overrides that are excluded from Git |
| util | Translation tools, main database for English strings and other various utilities |
| version.inc | contains the current version (which is automatically updated via cron for the main repository and distributed via git) |
| view | Theme and language files |
| view/(css,js,img,php,tpl) | Standard theme files |
| view/(en,it,es ...) | Language strings and resources |
| view/theme/ | Single named themes that contain (css,js,img,php,tpl) overrides |
Hubzilla development - some useful basic functions
- get_account_id()
Returns numeric account_id if authenticated or 0. It is possible to be authenticated and not connected to a channel.
- local_channel()
Returns authenticated numeric channel_id if authenticated and connected to a channel or 0. Sometimes referred to as $uid in the code.
- remote_channel()
Returns authenticated string hash of Red global identifier, if authenticated via remote auth, or an empty string.
- App::get_observer()
returns an xchan structure representing the current viewer if authenticated (locally or remotely).
- get_config($family,$key), get_pconfig($uid,$family,$key)
Returns the config setting for $family and $key or false if unset.
Deprecated: Use Zotlabs\Lib\Config::Get instead.
- set_config($family,$key,$value), set_pconfig($uid,$family,$key,$value)
Sets the value of config setting for $family and $key to $value. Returns $value. The config versions operate on system-wide settings. The pconfig versions get/set the values for a specific integer uid (channel_id).
Deprecated: Use Zotlabs\Lib\Config::Set instead.
- dbesc()
Always escape strings being used in DB queries. This function returns the escaped string. Integer DB parameters should all be proven integers by wrapping with intval()
- q($sql,$var1...)
Perform a DB query with the SQL statement $sql. printf style arguments %s and %d are replaced with variable arguments, which should each be appropriately dbesc() or intval(). SELECT queries return an array of results or false if SQL or DB error. Other queries return true if the command was successful or false if it wasn't.
- t($string)
Returns the translated variant of $string for the current language or $string (default 'en' language) if the language is unrecognised or a translated version of the string does not exist.
- x($var), $x($array,$key)
Shorthand test to see if variable $var is set and is not empty. Tests vary by type. Returns false if $var or $key is not set. If variable is set, returns 1 if has 'non-zero' value, otherwise returns 0. -- e.g. x('') or x(0) returns 0;
Creating Plugins/Addons for Hubzilla
So you want to make hubzilla do something it doesn't already do. There are lots of ways. But let's learn how to write a plugin or addon.
In your hubzilla folder/directory, you will probably see a sub-directory called 'addon'. If you don't have one already, go ahead and create it.
mkdir addon
Then figure out a name for your addon. You probably have at least a vague idea of what you want it to do. For our example I'm going to create a plugin called 'randplace' that provides a somewhat random location for each of your posts. The name of your plugin is used to find the functions we need to access and is part of the function names, so to be safe, use only simple text characters.
Once you've chosen a name, create a directory beneath 'addon' to hold your working file or files.
mkdir addon/randplace
Now create your plugin file. It needs to have the same name, and it's a PHP script, so using your favourite editor, create the file
addon/randplace/randplace.php
The very first line of this file needs to be
<?php
Then we're going to create a comment block to describe the plugin. There's a special format for this. We use /* ... */ comment-style and some tagged lines consisting of
/**
 *
 * Name: Random Place (here you can use better descriptions than you could in the filename)
 * Description: Sample hubzilla plugin, Sets a random place when posting.
 * Version: 1.0
 * Author: Mike Macgirvin <mike@zothub.com>
 *
 */
These tags will be seen by the site administrator when he/she installs or manages plugins from the admin panel. There can be more than one author. Just add another line starting with 'Author:'.
The typical plugin will have at least the following functions:
- pluginname_load()
- pluginname_unload()
In our case, we'll call them randplace_load() and randplace_unload(), as that is the name of our plugin. These functions are called whenever we wish to either initialise the plugin or remove it from the current webpage. Also if your plugin requires things like altering the database schema before it can run for the very first time, you would likely place these instructions in the functions named
- pluginname_install()
- pluginname_uninstall()
Next we'll talk about hooks. Hooks are places in hubzilla code where we allow plugins to do stuff. There are a lot of these, and they each have a name. What we normally do is use the pluginname_load() function to register a "handler function" for any hooks you are interested in. Then when any of these hooks are triggered, your code will be called.
We register hook handlers with the 'register_hook()' function. It takes 3 arguments. The first is the hook we wish to catch, the second is the filename of the file to find our handler function (relative to the base of your hubzilla installation), and the third is the function name of your handler function. So let's create our randplace_load() function right now.
function randplace_load() {
    register_hook('post_local', 'addon/randplace/randplace.php', 'randplace_post_hook');

	register_hook('feature_settings', 'addon/randplace/randplace.php', 'randplace_settings');
	register_hook('feature_settings_post', 'addon/randplace/randplace.php', 'randplace_settings_post');

}
So we're going to catch three events, 'post_local' which is triggered when a post is made on the local system, 'feature_settings' to set some preferences for our plugin, and 'feature_settings_post' to store those settings.
Next we'll create an unload function. This is easy, as it just unregisters our hooks. It takes exactly the same arguments.
function randplace_unload() {
    unregister_hook('post_local', 'addon/randplace/randplace.php', 'randplace_post_hook');

	unregister_hook('feature_settings', 'addon/randplace/randplace.php', 'randplace_settings');
	unregister_hook('feature_settings_post', 'addon/randplace/randplace.php', 'randplace_settings_post');

}
Hooks are called with two arguments. The first is always $a, which is our global App structure and contains a huge amount of information about the state of the web request we are processing; as well as who the viewer is, and what our login state is, and the current contents of the web page we're probably constructing.
The second argument is specific to the hook you're calling. It contains information relevant to that particular place in the program, and often allows you to look at, and even change it. In order to change it, you need to add '&' to the variable name so it is passed to your function by reference. Otherwise it will create a copy and any changes you make will be lost when the hook process returns. Usually (but not always) the second argument is a named array of data structures. Please see the "hook reference" (not yet written as of this date) for details on any specific hook. Occasionally you may need to view the program source to see precisely how a given hook is called and how the results are processed.
Let's go ahead and add some code to implement our post_local hook handler.
function randplace_post_hook($a, &$item) {

    /**
	 *
     * An item was posted on the local system.
	 * We are going to look for specific items:
     *      - A status post by a profile owner
	 *      - The profile owner must have allowed our plugin
     *
	 */

    logger('randplace invoked');

    if(! local_channel())   /* non-zero if this is a logged in user of this system */
        return;

    if(local_channel() != $item['uid'])    /* Does this person own the post? */
        return;

    if(($item['parent']) || (! is_item_normal($item))) {
	    /* If the item has a parent, or isn't "normal", this is a comment or something else, not a status post. */
        return;
	}

    /* Retrieve our personal config setting */

    $active = get_pconfig(local_channel(), 'randplace', 'enable');

	if(! $active)
    	return;
    /**
	 *
     * OK, we're allowed to do our stuff.
	 * Here's what we are going to do:
     * load the list of timezone names, and use that to generate a list of world cities.
	 * Then we'll pick one of those at random and put it in the "location" field for the post.
     *
	 */

    $cities = array();
	$zones = timezone_identifiers_list();
    foreach($zones as $zone) {
	    if((strpos($zone,'/')) && (! stristr($zone,'US/')) && (! stristr($zone,'Etc/')))
    	    $cities[] = str_replace('_', ' ',substr($zone,strpos($zone,'/') + 1));
    }

	if(! count($cities))
    	return;
    $city = array_rand($cities,1);
	$item['location'] = $cities[$city];

    return;
}
Now let's add our functions to create and store preference settings.
/**
 *
 * Callback from the settings post function.
 * $post contains the global $_POST array.
 * We will make sure we've got a valid user account
 * and that only our own submit button was clicked
 * and if so set our configuration setting for this person.
 *
 */

function randplace_settings_post($a,$post) {
    if(! local_channel())
        return;
    if($_POST['randplace-submit'])
        set_pconfig(local_channel(),'randplace','enable',intval($_POST['randplace']));
}


/**
 *
 * Called from the Feature Setting form.
 * The second argument is a string in this case, the HTML content region of the page.
 * Add our own settings info to the string.
 *
 * For uniformity of settings pages, we use the following convention
 *     <div class="settings-block">
 *       <h3>title</h3>
 *       .... settings html - many elements will be floated...
 *       <div class="clear"></div> <!-- generic class which clears all floats -->
 *       <input type="submit" name="pluginnname-submit" class="settings-submit" ..... />
 *     </div>
 */


function randplace_settings(&$a,&$s) {

    if(! local_channel())
        return;

    /* Add our stylesheet to the page so we can make our settings look nice */

    head_add_css('/addon/randplace/randplace.css');

    /* Get the current state of our config variable */

    $enabled = get_pconfig(local_channel(),'randplace','enable');

    $checked = (($enabled) ? ' checked="checked" ' : '');

    /* Add some HTML to the existing form */

    $s .= '<div class="settings-block">';
    $s .= '<h3>' . t('Randplace Settings') . '</h3>';
    $s .= '<div id="randplace-enable-wrapper">';
    $s .= '<label id="randplace-enable-label" for="randplace-checkbox">' . t('Enable Randplace Plugin') . '</label>';
    $s .= '<input id="randplace-checkbox" type="checkbox" name="randplace" value="1" ' . $checked . '/>';
    $s .= '</div><div class="clear"></div>';

    /* provide a submit button */

    $s .= '<div class="settings-submit-wrapper" ><input type="submit" name="randplace-submit" class="settings-submit" value="' . t('Submit') . '" /></div></div>';

}
Advanced Plugins
Sometimes your plugins want to provide a range of new functionality which isn't provided at all or is clumsy to provide using hooks. In this case your plugin can also act as a 'module'. A module in our case refers to a structured webpage handler which responds to a given URL. Then anything which accesses that URL will be handled completely by your plugin.
The key to this is to create a simple function named pluginname_module() which does nothing.
function randplace_module() { return; }
Once this function exists, the URL https://yoursite/randplace will access your plugin as a module. Then you can define functions which are called at various points to build a webpage just like the modules in the mod/ directory. The typical functions and the order which they are called is
modulename_init($a)    // (e.g. randplace_init($a);) called first - if you wish to emit json or xml,
                       // you should do it here, followed by killme() which will avoid the default action of building a webpage
modulename_aside($a)   // Often used to create sidebar content
modulename_post($a)    // Called whenever the page is accessed via the "post" method
modulename_content($a) // called to generate the central page content. This function should return a string
                       // consisting of the central page content.
Your module functions have access to the URL path as if they were standalone programs in the Unix operating system. For instance if you visit the page
https://yoursite/randplace/something/somewhere/whatever
we will create an argc/argv list for use by your module functions
$x = argc(); $x will be 4, the number of path arguments after the sitename

for($x = 0; $x < argc(); $x ++)
	echo $x . ' ' . argv($x);


0 randplace
1 something
2 somewhere
3 whatever
Porting Friendica Plugins
Hubzilla uses a similar plugin architecture to the Friendica project. The authentication, identity, and permissions systems are completely different. Many Friendica plugins can be ported reasonably easily by renaming a few functions - and then ensuring that the permissions model is adhered to. The functions which need to be renamed are:
-
Friendica's pluginname_install() is pluginname_load()
-
Friendica's pluginname_uninstall() is pluginname_unload()
Hubzilla has _install and _uninstall functions but these are used differently.
-
Friendica's "plugin_settings" hook is called "feature_settings"
-
Friendica's "plugin_settings_post" hook is called "feature_settings_post"
Changing these will often allow your plugin to function, but please double check all your permission and identity code because the concepts behind it are completely different in hubzilla. Many structured data names (especially DB schema columns) are also quite different.
Testing
Hubzilla uses [PHPUnit] for automated testing, often called unit testing or integration testing.
The tests are written as PHP classes, and live under the tests/unit subdirectory of the main Hubzilla repository. This guide will explain how to run the tests, how the tests are structured, and how you can write your own tests.
Running the test suite
Installing the dependencies
To be able to run the tests you have to install the developer dependencies listen in the composer.json file. Make sure you have [composer installed] on your development system, and then run:
% composer install
This will install phpunit and a few other dependencies. It will also update some files in the vendor/composer subdirectory. This may seem a bit noisy, but it's important that these changes are not committed to the repository!
Warning: Do not commit the changes to the files in the vendor/composer directory to your repository!
Setting up the test database
We have included a script (tests/create_test_db.sh) that will help you set up the test database. You can run it like this:
% HZ_TEST_DB_TYPE=mysql ./tests/create_test_db.sh
If you are running PostgreSQL instead, you create the test db like this:
% HZ_TEST_DB_TYPE=postgres ./tests/create_test_db.sh
The script make some assumptions about your setup, but everything is configurable using environment variables. If you need any customization, see the script source for the details.
Running the tests
Once you have installed the developer dependencies and set up the test database, you can run the tests like this:
% ./vendor/bin/phpunit -c tests/phpunit.xml
Again, by default the configuration in tests/phpunit.xml makes some assumptions about your setup, which can be overridden using environment variables. See tests/phpunit.xml for the details.
You can also run a specific test, or a specific set of tests using the --filter argument to PHPUnit:
% ./vendor/bin/phpunit -c tests/phpunit.xml --filter Autoname
Will run any test mathcing "Autoname".
Generating coverage reports
To generate coverage reports you need a driver that is able to generate the coverage info that PHPUnit will collect. We recommend [Xdebug], but see the PHPUnit page on code coverage analysis for alternatives and details.
With Xdebug properly set up, you can generate the coverage report like this:
% XDEBUG_MODE=coverage ./vendor/bin/phpunit -c ./tests/phpunit.xml
This will generate a number of HTML files in directories under the tests/results/coverage/ subdirectory.
Open the `index.php file in your web browser to view the stats.
Debugging
With Xdebug installed, you can also do step debugging and a number of other things to debug and get information about the execution of the tests. See the [Xdebug] pages and your prefered editor for how to set this up.
Test structure and organization
Tests are located in the tests/unit subdirectory, and subdirectories under there again, more or less reflecting the directory layout of the core code repository.
Tests are written as PHP classes that extends the UnitTestCase class (located in tests/unit/UnitTestcase.php). The file name and the test class it contains should be the same, and they must end with Test.php.
Examples are:
tests/unit/includes/AccountTest.phptests/unit/Lib/ActivityTest.php
The test classes contain one or more test functions, these must be public and prefixed with test.
Here's an example:
use Zotlabs\Tests\Unit\UnitTestCase;

class AccountTest extends UnitTestCase {
    public function test_get_account_by_id_returns_existing_account() {
        $account = get_account_by_id(42);
        $this->assertNotFalse($account);
        $this->assertEquals(
            $this->fixtures['account'][0]['account_email'],
            $account['account_email']
        );
    }
Notice that we try to make the name of the test funtion as descriptive as possible.
The class can also contain any number of other functions to keep things tidy and nice. These can be private, protected or public as needed by the test code.
Results and artifacts from the test runs will be left in the tests/results/ directory. This will typically include the test log, code coverage report etc.
Hubzilla specific features
Test database access:
Ideally it should be able to test each part of the code in isolation, where any dependencies should be replaced by stubs, mocks or fakes.
This is not feasible with a legacy codebase like Hubzilla, that has not been written with testability in mind. For this reason we use a separate test database, and make it available to the code under test using the same mechanisms as Hubzilla normally do.
This means that any code that executes database queries will behave as normal when called by a test.
To make this work we connect to the database before running each test function. We also load some initial data into the database to make sure things work as expected, and that we have a known state of the database when the test runs.
When the test finishes, the test database is wiped clean, so that we have the same consistent state when the next test runs.
All of this is handled by the UnitTestCase base class.
Database fixtures:
We need some predictable content in the database to set up things like logging, and other content that's useful in general for the tests. These are database fixtures that are loaded into the database for each test run.
The database fixtures are located in the tests/unit/include/dba/_files directory, and consist of YAML files, where each file represents the content of a database table with the same name as the file itself.
While database fixtures are nice to have, we try to keep the number of them as minimal as possible. It's usually better to add any content needed for a specific test in the test itself.
Fakes:
Fakes are classes that we can pass to the code under test that will look and (to the code under test) behave the same as the original class. These are useful when we're able to pass objects to the code under test, as we can control it completely from the test code.
Fakes are located under the tests/fakes directory.
Creating protocol federation services
There are three main components to writing federation plugins. These are:
- Channel discovery and making connections
- Sending posts/messages
- Receiving posts/messages
In addition, federation drivers must handle
- differences in privacy policies (and content formats)
Making connections
The core application provides channel discovery in the following sequence:
- Nomad channel discovery
- Webfinger (channel@hub) lookup 2.1 RFC7033 webfinger 2.2 XRD based webfinger (old style)
- URL discovery (currently only used to discover RSS feeds)
- If all of these fail, the network is "unknown" and we are unable to communicate with or connect with the channel. An 'xchan' record may still be created if there is enough information known to identify a unique channel.
Any of the lookup services may be bound to a plugin and extended. When a channel is discovered, we create an 'xchan' record which is a platform neutral representation of the channel identity. If we need to send information to the channel, a 'hubloc' (hub location) record is also generally required. A 'follow' plugin hook is provided to bypass webfinger and this discovery sequence completely.
The final step in gluing this together is to create an 'abook' record, which attaches an xchan in a relationship to a local channel with a given set of permissions.
For networks which do not support nomadic identity, your plugin must also set "abook_instance" which is a comma-separated list of local URLs that the remote channel is connected with. For instance if your member was connected to my channel clone at https://example.com, the abook_instance for that connection would read 'https://example.com'. If you also connected to my clone at https://abc.example.com, the string would be changed to 'https://example.com,https://abc.example.com'. This allows local channels to differentiate which instance a given remote channel is connected with and avoid delivery failures to those channels from other clone instances.
A federation plugin for a webfinger based system needs only to examine the webfinger or XRD results and identify a protocol stack which can be used to connect or communicate. Then create an xchan record with the given 'xchan_network' type and a hubloc record with the same 'hubloc_network' with the information given. Currently the plugin will need to create the entire record, but in the future this will be extended so that the plugin only need identify a network name and the record will be populated with all other known values.
An xchan record is always required in order to connect. To connect, create an abook record with the desired permissions.
Additional information that your plugin requires for communication can be stored in the xconfig table and/or abconfig table if there is no convenient or appropriate table column in the xchan or hubloc tables.
When a connection is made, we generally call the notifier (include/notifier.php) to send a message to the remote channel. This is bound to the hook 'permissions_create'. Your plugin will need to handle this in order to send a "follow" or "make friends" message to the other network.
Notes: The first stage Nomad lookup will be replaced with a webfinger lookup. This work is in progress. A separate lookup was required initially as webfinger does not allow non-SSL connections. We will provide non-SSL Nomad lookups (usually test and development sites) via the "old" XRD based webfinger to avoid this limitation.
The core application will attempt to create xchan records for projects identified as members of the "open web"; currently Hubzilla, Friendica, Diaspora, GNU-Social and Pump.io. This is so that comments can be passed amongst project sites and the network correctly identified. A federation plugin is required to fully federate with other networks, but comments may be passed to sites without such a plugin installed so that there are no unexplained holes in conversations.
The core application must also provide signing ability for Diaspora comments since they require a special signing format and must be signed by the comment author regardless of whether that channel federates with Diaspora. The owner of the conversation may federate with Diaspora so the comments must be signed. This is unfortunate but necessary.
Sending Messages
Whenever any message is sent (with the sole exception of directory communications), we invoke the notifier (include/notifier.php), and pass it the type of message and generally an identifier to lookup the information being sent from the database (items or conversational things, private mail, permissions updates, etc.).
The notifier has several hooks which may be used by plugins in different ways, depending on how their delivery loop works. For different message types and complex delivery situations you may need to tie into multiple hooks. The 'permissions_create' hook was mentioned in the first section. There is also a 'permissions_update' message if permissions have changed and the other end of the link needs to be advised. Few services will provide or handle this (as their permissions are static), but it is also used for instance to send profile and profile photo update messages and you may wish to handle this.
The next plugin hook is 'notifier_process'. It is passed an array providing the complete state of the notifier and is called once per notifier invocation. It contains the complete list of recipients (with xchan_network set for each).
There is also 'notifier_hub' which like 'notifier_process' is passed the complete state of the notifier, but the difference is that it is called for each individual hub or distinct URL delivery and may be matched on the hubloc_network type. Hub delivery is much more efficient than recipient delivery but may not be suitable for all protocol stacks.
Your plugin will be required to understand the message state and recipients and translate the sent item to the desired format. You will also be required to check privacy and block communication to anybody but the intended recipients - if it is a private communication. The plugin will often at this point stick the message into the queue and return the queue id to the notifier.
Queue handlers exist already for simple posted data. If you create a queue entry with 'post' type we'll open an HTTP POST request and post the data provided and acknowledge success or failure. You can create other forms of communication by providing a different outq_driver type and handling the processing of queue requests yourself. Delivery reporting is available if you wish to acknowledge different error conditions, or anything beyond success/failure. Advanced delivery reporting will also require a custom queue type. The basic 'post' type only deals with success (communication successful with the remote site) and failure.
Receiving Messages
Receiving messages from the remote network will probably require a 'receive' endpoint or module dedicated to your network communication protocol. This is a URL route that your plugin may need to register with the'module_loaded' hook. You module will then take responsibility for importing any data which arrives at that endpoint and translating it to the format required for this project and storing the resulting data. The basic structure we use is an extensible activitystream item but with slightly different field names and several optional fields. It can be easily mapped to an activitystream. Additional data can be stored in the "iconfig" table. item_store() and item_store_update() are generally used to store the data and send appropriate notifications. Similiar facilities are available for private mail and profile information.
Code of conduct for contributors
Our pledge
In the interest of fostering an open and welcoming environment, we as contributors and carers pledge to make participation in our project and community a harassment-free experience for everyone, regardless of age, body size, disability, ethnicity, gender identity and expression, experience level, nationality, personal appearance, ethnicity, religion or sexual identity and orientation.
Our standards
Examples of behaviours that contribute to creating a positive environment include
- Using welcoming and inclusive language
- Respecting different points of view and experiences
- Accepting constructive criticism gracefully
- Focusing on what is best for the community
- Showing empathy towards other members of the community
Examples of unacceptable behaviour from participants include
- The use of sexualised language or images and unwanted sexual attention or advances
- Trolling, offensive/degrading comments and personal or political attacks
- Public or private harassment
- Publishing the private information of others, such as a physical or electronic address, without express permission
- Other behaviour that could be considered inappropriate in a professional environment
Our responsibilities
Project maintainers are responsible for clarifying the standards of acceptable behaviour and are expected to take appropriate and fair corrective action when unacceptable behaviour is identified. Project maintainers have the right and responsibility to remove, edit or reject comments, commits, code, wiki edits, issues and other contributions that do not comply with this Code of Conduct, or to temporarily or permanently ban contributions that they deem inappropriate, threatening, offensive or harmful.
Scope
This Code of Conduct applies both within the project areas and in the public sphere when a person is representing the project or its community. Examples of representing a project or community include using an official project email address, posting via an official social media account or acting as an appointed representative at an online or offline event. The representation of a project can be further defined and specified by the project supervisors.
Enforcement
Instances of offensive, harassing or otherwise unacceptable behaviour can be reported to the project team at project@hubzilla.org. All complaints will be reviewed and investigated and will result in a response that is deemed necessary and appropriate to the circumstances. The project team is committed to confidentiality towards the person reporting an incident. Further details of specific enforcement policies may be published separately. Project supervisors who fail to follow or enforce the Code of Conduct in good faith may face temporary or permanent consequences as determined by other members of the project management team.
Attribution
This Code of Conduct is an adaptation of the Contributor Covenant, version 1.4, available at http://contributor-covenant.org/version/1/4.
The Nomad protocol
What is Nomad?
Nomad is the revolutionary protocol that powers Hubzilla, enabling communication, identity management and access control across a fully decentralised network of independent websites, often referred to as ‘the grid’. The resulting platform is a robust system that supports privacy and security while enabling the kind of rich web services typically found only in centralised, proprietary solutions.
Consider this typical scenario:
Jaquelina wants to share photos from her blog at jaquelina.org with Roberto, but with no one else. Roberto maintains his own family hub at roberto.net on a completely independent server. Nomad allows Jaquelina to publish her photos with an access control list (ACL) that only includes Roberto. This means that while Roberto can see the photos when he visits her blog, his brother Marco cannot, nor can any other family member who has an account on roberto.net.
The twist in this scenario is the fact that Roberto never logged in to Jaquelina's website. Instead, he only had to log in once with his password on his own roberto.net website. When Roberto visits jaquelina.org, he is seamlessly authenticated by their hub by querying his server in the background.
It's not uncommon for servers to have technical issues or become inaccessible for various reasons. Nomad provides robustness to Roberto's online activities by allowing him to have clones of his online identity or channel on multiple independent hubs. Imagine that Roberto's server goes down for some reason and he can no longer log in there. He simply logs into one of his clones on gadfly.com, a website run by his friend Peter. Once he has authenticated himself at gadfly.com, Roberto can view Jaquelina's blog as before, without Jaquelina having to grant additional access!
Communication
Communication and social networks are an essential part of the grid. Any channel (and any service provided by that channel) can take full advantage of feature-rich social communication on a global scale. These communications can be public or private - and private communications include not only fully encrypted transport, but also encrypted storage to protect against accidental snooping and disclosure by rogue system administrators and ISPs.
Nomad supports a wide range of background services in the grid, from friend suggestions to directory services. New content and data updates are passed in the background between hubs across the grid according to the access control lists and permissions set by the sender and receiver channels. Data is also synchronised between any number of channel clones so that hub members can access data and continue to collaborate seamlessly even if their primary hub is unavailable or offline.
Identity
Nomad's identity layer is unique. It provides an invisible single sign-on for all locations in the grid. It also provides a nomadic identity so that your communication with friends, family or other people you communicate with is not affected by the loss of your primary communication hub - either temporarily or permanently.
The important parts of your identity and relationships can be backed up on a USB stick or your laptop and appear on any node on the network at any time - with all your friends and preferences. Crucially, these nomadic instances are kept synchronised so that any instance can take over if another is compromised or corrupted. This not only protects you from major system failures, but also from temporary website overload and government tampering or censorship.
We believe that Hubzilla's nomadic identity, single sign-on and decentralisation bring a high level of resilience and consistency to internet communications, which is much needed in the face of global trends towards corporate centralisation and mass and indiscriminate government surveillance and censorship. When browsing the web, viewing channels and their unique content, you are seamlessly authenticated, even across completely different server hubs. No need to enter passwords. You don't have to type anything. You are simply greeted with your name on every new page you visit.
How does this work with Nomad? We call it ‘magic-auth’ because Hubzilla hides the details of the complexity of single sign-on logins and nomadic identities from web browsing. This is one of Hubzilla's design goals: to increase privacy and freedom on the Internet while reducing the complexity and tedium of having to enter new passwords and login names every time you visit the Internet. You only log in once to your home hub (or a nomadic backup hub of your choice). This allows you to access all authenticated services offered anywhere on the web - such as shopping, blogs, forums and access to private information. Your password is not stored on a thousand different websites, but on servers that you control or trust.
They cannot be silenced. They cannot be removed from the network unless you choose to leave it yourself.
Access control
Nomad's identity layer allows you to assign fine-grained permissions to any content you want to publish - and these permissions extend across the entire grid. It's like having a huge website made up of an army of small individual websites - where each channel in the grid can fully control its privacy and sharing preferences for all the web resources it creates.
Currently, Hubzilla supports access control for many types of data, including discussion posts and comments, photo albums, events, cloud files, web pages, wikis and more. Each item and how and with whom it is shared is completely under your control.
This type of control is trivial with large enterprise providers as they own the user database. In the Grid, you don't need a huge user database on your computer - because the Grid is your user database. It has essentially infinite capacity (limited by the total number of hubs online on the Internet) and is distributed across hundreds, possibly even millions of computers.
Access can be granted or denied to any resource, channel or group of channels - anywhere on the grid. Others can access your content if you allow them to, and they don't even need to have an account in your hub.
Technical introduction
Nomad is a JSON-based web framework for implementing secure decentralised communication and services. To provide this functionality, Nomad creates a decentralised, globally unique identifier for each node in the network. This global identifier is not inextricably linked to the DNS, ensuring the required mobility. Many of the existing decentralised communication frameworks provide the communication aspect, but no remote access control and authentication. Furthermore, most of these systems are based on the ‘web finger’, which still ties identity to domain names and cannot support nomadic identity. The main problems that Nomad addresses are
- Fully decentralised communication
- Independence from DNS-based identity
- node mobility
- seamless remote authentication
- high performance
We will rely on DNS-based user@host addresses as a ‘user-friendly’ mechanism to tell others where you are, namely on a named host with a specific username, and communication with DNS entities is handled over TCP and the web.
However, the underlying protocol provides an abstraction layer on top of this so that a communication node (e.g. ‘identity’) can move to a different DNS location and recover (to the best of its ability) from location changes and/or maintain pre-existing communication relationships. A side effect of this requirement is the ability to communicate from alternative/multiple DNS locations and service providers and still maintain a single online identity.
We call this overlay network the ‘grid’. The servers connected to this network are called ‘hubs’ and can support any number of individual identities.
An identity does not necessarily have to correspond to a person. It is merely something that requires the ability to communicate within the grid.
The ability to recover is achieved by communicating with the original location when a new or replacement identity is created, or as a fallback to a stored file describing the identity and its contacts in the event that the old location no longer responds.
At least in the short term, mobility of existing content is not the highest priority. This may or may not happen at a later date. The most important things we want to keep are your identity and your friends. Addresses that are shared by multiple people are user@host and describe the current local credentials for a particular identity. They are DNS-based addresses that are used as a seed to localise a particular identity within the network. Machine communication binds this address to a globally unique ID. A single globally unique ID can be attached or bound to any number of DNS locations. Once an identity is mapped or bound to a DNS location, communication consists only of knowing the globally unique address and the DNS (url) currently in use (to recall and verify/complete the current communication). These concepts will be specified in more detail in the future.
For an identity to persist across locations, one must be able to provide or recover
- the globally unique ID for that identity
- the private key assigned to that identity
- (if the original server no longer exists) an address book of contacts for that identity.
This information can be exported from the original server via an API and/or downloaded to a hard drive or USB stick.
We can also attempt to restore the identity with even less information, but this is vulnerable to account hijacking and requires your contacts to confirm the change.
To enable high performance communication, the data transfer format for all aspects of Nomad is JSON. XML communication requires far too much overhead.
Bi-directional encryption is based on 4096-bit RSA keys expressed in DER/ASN.1 format using the PKCS#8 encoding variant, with AES encryption of variable length or large elements. The exact encryption algorithms are negotiable between sites.
Some aspects of the well-known ‘federation protocols’ (Webfinger, Salmon, Activitystreams, Portablecontacts, etc.) can be used in Nomad, but we are not and will not be bound by them. The Hubzilla project is trying some fairly novel developments in the field of decentralised communication, and if it should be necessary to deviate from such ‘standard protocols’, we will do so without question or hesitation. To create a globally unique ID, we will base it on a whirlpool hash of the origin node's identity URL and a pseudo-random number, which should give us a 256-bit ID with an extremely low collision probability (256 bits equals about 115 quattuorviginitillion or 1.16 X 10^77 unique numbers). This is represented in the communication as a base64url encoded string. However, we will not rely on probabilities, and the ID must also be associated with a public key, using public key cryptography to provide an identity guarantee that has not been copied or somehow collided in the whirlpool hash space.
Using the DNS as the basis for the ID provides a globally unique seed, which would not be the case if the ID was based entirely on pseudo-random number generation.
We refer to the encoded globally unique uid string as zot_uid
As there may be more than one DNS location associated/connected to a particular zot_uid identity, the delivery processes should deliver to all of these locations as we do not know with certainty which hub instance can be accessed at any given time. However, we will designate one DNS location as ‘primary’ which will be the preferred location for displaying web profile information.
We also need to provide the ability to change the primary location to a new location. A lookup of information about the current primary location can provide a ‘redirect pointer’ that instructs us to update our listings and move everything to the new location. There is also the possibility that the primary location no longer exists and is no longer responding. In this case, a location that is already assigned to this zot_uid can take control and declare itself as primary. In both cases, the primary designation is automatically confirmed and moved. A request can also be made from a primary location requesting the removal of another location.
To assign a zot_uid to a second (or tertiary) location, a secure exchange is required to verify that the new location is in possession of the private key for that zot_uid. The security of the private key is therefore essential to prevent identity hijacking.
Communication then requires
- zot_uid (character string)
- uid_sig
- callback (current location Nomad endpoint url)
- callback_sig
- spec (int)
is transferred with every message. The spec is a revision number of the current Nomad specification so that communication with hubs that use older and possibly incompatible protocol specifications can be maintained. Communication is verified using a stored public key that was copied to this zot_uid when the connection was first established.
The revocation and replacement of the key must be carried out from the primary hub. The exact form for this is still being worked out, but will likely be a notification to all other bound hubs to ‘phone home’ (to the primary hub) and request a copy of the new key. This notification should be verified with a site or hub key, as the original identity key may have been compromised and cannot be trusted. To avoid confusion, there should be exactly one canonical url for each hub so that it can be indexed and uniquely referenced.
To avoid ambiguity of the scheme, it is strongly recommended that all addresses should be https with a browser valid certificate and a single valid host component (either www.domain.ext or domain.ext, but not both) used in all communication. Multiple URLs can be specified locally, but only a single URL should be used for all Nomad communication within the grid.
Test installations that are not connected to the public network can use non-SSL, but all traffic flowing over public networks should be protected from session hijacking, preferably with a ‘browser recognised’ certificate.
Where possible, the Nomad recommends the use of ‘batching’ to minimise network traffic between two hubs. This means that ‘Site A’ can send multiple messages to ‘Site B’ in a single transaction and also consolidate the delivery of identical messages to multiple recipients in the same hub.
The messages themselves may or may not be encrypted in transit, depending on the private nature of the messages. SSL (strongly recommended) provides unconditional encryption of the data stream, however it makes little sense to encrypt public messages that have been categorised as having unrestricted visibility. Encryption of data storage and so-called ‘end-to-end encryption’ are outside the scope of Nomad. It is assumed that node operators take appropriate security precautions to ensure the security of their data stores, and these are functions of application and site integrity as opposed to protocol integrity.
Messaging
Given the constraints listed above, a Nomad message should therefore be a json array of individual messages. These can be mixed and combined within the same transmission.
Each message then requires:
- Type
- (optional) recipient list
The absence of a recipient list would indicate an unencrypted public message or a site-level message. The recipient list would contain an array of zot_uid with an individual decryption key and a common iv. The decryption key is encrypted with the public key of the recipient identity. The iv is encrypted with the private key of the sender.
All messages should be digitally signed by the sender.
The type can be one of the following (this list can be extended):
- Mail (or activity)
- identity
- authenticate
Identity messages have no recipients and notify the system social graph of an identity update, which can be a new or deleted identity, a new or deleted location, or a change to the primary hub. The signature for these messages uses system keys as opposed to identity-specific keys.
Posts include many different types of activity, such as top-level posts, likes/dislikes, comments, tagging activity, etc. These types are specified in the message structure.
Authentication messages result in mutual authentication and browser redirection to protected resources on the remote hub, such as the ability to post wall-to-wall messages and view private photo albums and events, etc.
Exploration
A known URL is used to probe a hub for Nomad capabilities and identity queries, including discovery of public keys, profile locations, profile photos, and the primary hub location.
The location for this service is /.well-known/zot-info - and must be available in the root directory of the selected domain.
To perform a query, a POST request is made to the discovery location with the following parameters: Required:
Address => an address on the target system such as ‘john’
Optional:
target => the observer's Nomad ‘guid’ for the evaluation of authorisations
target_sig => an RSA signature (base64url-encoded) of the guid
key => The public key required to verify the signature
token => a character string selected by the requesting service (possibly random). If present, an entry in the discovered packet labelled ‘signed_token’ is provided, which consists of the base64url_encoded RSA signature of the concatenation of the string ‘token.’ and the provided token using the private key of the discovered channel. This can be verified with the provided ‘key’ entry and provides assurance that the server is in possession of the private key for the discovered identity. After 1 January 2017, it is required that a server provides a signed_token if a token has been specified in the request.
If no target is specified, the returned authorisations are generic authorisations for unknown or unauthenticated observers
Example of a detection package for‘mike@zothub.com’
    {

    ‘success’: true,
    ‘signed_token’: "KBJrKTq1qrctNuxF3GwVh3GAGRqmgkirlXANPcJZAeWlvSt_9TMV097slR4AYnYCBEushbVqHEJ9Rb5wHTa0HzMbfRo8cRdl2yAirvvv5d98dtwHddQgX1jB0xEypXtmIYMdPGDLvhI1RNdIBhHkkrRcNreRzoy4xD- -HM6m1W0-A8PJJ9BcNxmGPcBtLzW08wzoP9trJ3M7DQ6Gkk6j7iwVsyApw1ZBaDvabGTdc_SFV-Iegtqw3rjzT_xXWsfzMlKBy-019MYn_KS- gu23YzjvGu5tS_zDfkQb8DMUlPLz5yyxM0yOMlUDtG2qQgIJAU2O0X6T5xDdJ6mtolNyhepg845PvFDEqBQGMIH1nc47CNumeudDi8IWymEALhjG_U8KAK7JVlQTJj2EKUb0au1g6fpiBFab5mmxCMtZEX3Jreyak5GOcFFz- WpxuXJD9TdSoIvaBfBFOoJnXkg2zE4RHXeQzZ2FotmrbBG5dm8B- _6byYGoHBc08ZsWze1K96JIeRnLpBaj6ifUDcVHxZMPcGHHT27dvU2PNbgLiBjlAsxhYqkhN5qOHN8XBcg2KRjcMBaI3V0YMxlzXz5MztmZq3fcB1p-ccIoIyMPMzSj3yMB7J9CEU2LYPSTHMdPkIeDE6GaCkQKviaQJQde346tK_YjA2k7_SOBmvPYE’,
    ‘guid’: ‘sebQ-IC4rmFn9d9iu17m4BXO-kHuNutWo2ySjeV2SIW1LzksUkss12xVo3m3fykYxN5HMcc7gUZVYv26asx-Pg’,
    ‘guid_sig’: "Llenlbl4zHo6-g4sa63MlQmTP5dRCrsPmXHHFmoCHG63BLq5CUZJRLS1vRrrrr_MNxr7zob_Ykt_m5xPKe5H0_i4pDj-UdP8dPZqH2fqhhx00kuYL4YUMJ8gRr5eO17vsZQ3XxTcyKewtgeW0j7ytwMp6- hFVUx_Cq08MrXas429ZrjzaEwgTfxGnbgeQYQ0R5EXpHpEmoERnZx77VaEahftmdjAUx9R4YKAp13pGYadJOX5xnLfqofHQD8DyRHWeMJ4G1OfWPSOlXfRayrV_jhnFlZjMU7vOdQwHoCMoR5TFsRsHuzd- qepbvo3pzvQZRWnTNu6oPucgbf94p13QbalYRpBXKOxdTXJrGdESNhGvhtaZnpT9c1QVqC46jdfP0LOX2xrVdbvvvG2JMWFv7XJUVjLSk_yjzY6or2VD4V6ztYcjpCi9d_WoNHruoxro_br1YO3KatySxJs-LQ7SOkQI60FpysfbphNyvYMkotwUFI59G08IGKTMu3- GPnV1wp7NOQD1yzJbGGEGSEEysmEP0SO9vnN45kp3MiqbffBGc1r4_YM4e7DPmqOGM94qksOcLOJk1HNESw2dQYWxWQTBXPfOJT6jW9_crGLMEOsZ3Jcss0XS9KzBUA2p_9osvvhUKuKXbNztqH0oZIWlg37FEVsDs_hUwUJpv2Ar09k4’,
    ‘key’: "-----BEGIN PUBLIC KEY----- \nMIICIjANBgkqhkiG9w0BAQEFAAOCAg8AMIICCgKCAgEA7QCwvuEIwCHjhjbpz3Oc\ntyei/Pz9nDksNbsc44Cm8jxYGMXsTPFXDZYCcCB5rcAhPPdZSlzaPkv4vPVcMIrw\n5cdX0tvbwa3rNTng6uFE7qkt15D3YCTkwF0Y9FVZiZ2Ko+G23QeBt9wqb9dlDN1d\nuPmu9BLYXIT/JXoBwf0vjIPFM9WBi5W/EHGaiuqw7lt0qI7zDGw77yO5yehKE4cu\n7dt3SakrXphL70LGiZh2XGoLg9Gmpz98t+gvPAUEotAJxIUqnoiTA8jlxoiQjeRK\nHlJkwMOGmRNPS33awPos0kcSxAywuBbh2X3aSqUMjcbE4cGJ++/13zoa6RUZRObC\nZnaLYJxqYBh13/N8SfH7d005hecDxWnoYXeYuuMeT3a2hV0J84ztkJX5OoxIwk7S\nWmvBq4+m66usn6LNL+p5IAcs93KbvOxxrjtQrzohBXc6+elfLVSQ1Rr9g5xbgpub\npSc+hvzbB6p0tleDRzwAy9X16NI4DYiTj4nkmVjigNo9v2VPnAle5zSam86eiYLO\nt2u9YRqysMLPKevNdj3CIvst+BaGGQONlQalRdIcq8Lin+BhuX+1TBgqyav4XD9K\nd+JHMb1aBk/rFLI9/f2S3BJ1XqpbjXz7AbYlaCwKiJ836+HS8PmLKxwVOnpLMbfH\nPYM8k83Lip4bEKIyAuf02qkCAwEAAQ==\n- ----END PUBLIC KEY-----\n’,
    ‘name’: ‘Mike Macgirvin’,
    ‘name_updated’: ‘2012-12-06 04:59:13’,
    ‘address’: ‘mike@zothub.com’,
    ‘photo_mimetype’: ‘image/jpeg’,
    ‘photo’: ‘https://zothub.com/photo/profile/l/1’,
    ‘photo_updated’: ‘2012-12-06 05:06:11’,
    ‘url’: ‘https://zothub.com/channel/mike’,
    ‘connections_url’: ‘https://zothub.com/poco/mike’,
    ‘target’: ‘’,
    ‘target_sig’: ‘’,
    ‘searchable’: false,
    ‘permissions’: {
        ‘view_stream’: true,
        ‘view_profile’: true,
        ‘view_photos’: true,
        ‘view_contacts’: true,
        ‘view_storage’: true,
        ‘view_pages’: true,
        ‘send_stream’: false,
        ‘post_wall’: false,
        ‘post_comments’: false,
        ‘post_mail’: false,
        ‘post_photos’: false,
        ‘tag_deliver’: false,
        ‘chat’: false,
        ‘write_storage’: false,
        ‘write_pages’: false,
        ‘delegate’: false
    },
    ‘profile’: {
        ‘description’: ‘Freedom Fighter’,
        ‘birthday’: ‘0000-05-14’,
        ‘next_birthday’: ‘2013-05-14 00:00:00’,
        ‘gender’: ‘Male’,
        ‘marital’: ‘It's complicated’,
        ‘sexual’: ‘Females’,
        ‘locale’: ‘’,
        ‘region’: ‘’,
        ‘postcode’: ‘’,
        ‘country’: ‘Australia’
    },
    ‘locations’: [
        {
            ‘host’: ‘zothub.com’,
            ‘address’: ‘mike@zothub.com’,
            ‘primary’: true,
            ‘url’: ‘https://zothub.com’,
            ‘url_sig’: "eqkB_9Z8nduBYyyhaSQPPDN1AhSm5I4R0yfcFxPeFpuu17SYk7jKD7QzvmsyahM5Kq7vDW6VE8nx8kdFYpcNaurqw0_IKI2SWg15pGrhkZfrCnM- g6A6qbCv_gKCYqXvwpSMO8SMIO2mjQItbBrramSbWClUd2yO0ZAceq3Z_zhirCK1gNm6mGRJaDOCuuTQNb6D66TF80G8kGLklv0o8gBfxQTE12Gd0ThpUb5g6_1L3eDHcsArW_RWM2XnNPi_atGNyl9bS_eLI2TYq0fuxkEdcjjYx9Ka0- Ws-lXMGpTnynQNCaSFqy-Fe1aYF7X1JJVJIO01LX6cCs- kfSoz29ywnntj1I8ueYldLB6bUtu4t7eeo__4t2CUWd2PCZkY3PKcoOrrnm3TJP5_yVFV_VpjkcBCRj3skjoCwISPcGYrXDufJxfp6bayGKwgaCO6QoLPtqqjPGLFm- fbn8sVv3fYUDGilaR3sFNxdo9mQ3utxM291XE2Pd0jGgeUtpxZSRzBuhYeOybu9DPusID320QbgNcbEbEbEImO8DuGIxuVRartzEXQF4WSYRdraZzbOqCzmU0O55P836JAfrWjgxTQkXlYCic- DBk-iE75JeT72smCtZ4AOtoFWCjZAABCw42J7JELY9APixZXWriKtjy6JI0G9d3fs6r7SrXr1JMy0’,
            ‘callback’: ‘https://zothub.com/post’,
            ‘sitekey’: "-----BEGIN PUBLIC KEY----- \nMIICIjANBgkqhkiG9w0BAQEFAAOCAg8AMIICCgKCAgEA1IWXwd/BZuevq8jzNFoR\n3VkenduQH2RpR3Wy9n4+ZDpbrUKGJddUGm/zUeWEdKMVkgyllVA/xHdB7jdyKs1X\nuIet9mIdnzvhdLO/JFD5hgbNG2wpSBIUY6aSNeCFTzszqXmuSXMW5U0Ef5pCbzEA\nnhoCoGL1KAgPqyxnGKUlj7q2aDwC9IRNtAqNyFQL67oT91vOQxuMThjlDhbR/29Q\ncYR4i1RzyahgEPCnHCPkT2GbRrkAPjNZAdlnk9UesgP16o8QB3tE2j50TVrbVc/d\nYRbzC56QMPP9UgUsapNeSJBHji75Ip/E5Eg/kfJC/HEQgyCqjCGfb7XeUaeQ7lLO\nqc7CGuMP+Jqr/cE54/aSHg8boTwxkMp11Ykb+ng17fl57MHTM2RJ99qZ1KBkXezR\nuH1lyvjzeJPxEFr9rkUqc4GH74/AgfbgaFvQc8TS7ovEa5I/7Pg04m7vLSEYc6UF\nYJYxXKrzmZT2TDoKeJzaBBx5MFLhW19l68h9dQ8hJXIpTP0hJrpI+Sr6VUAEfFQC\ndIDRiFcgjz6j7T/x8anqh63/hpsyf2PMYph1+4/fxtSCWJdvf+9jCRM8F1IDfluX\n87gm+88KBNaklYpchmGIohbjivJyru41CsSLe0uinQFvA741W00w6JrcrOAX+hkS\nRQuK1dDVwGKoIY85KtTUiMcCAwEAAQ==\n- ----END PUBLIC KEY-----\n"
        }
    ],
    ‘site’: {
        ‘url’: ‘https://zothub.com’,
        ‘directory_mode’: ‘primary’,
        ‘directory_url’: ‘https://zothub.com/dirsearch’
    }

    }
Discovery returns a JSON array with the following components:
‘success’ => (true or false) Operation was successful if true. Otherwise, there may be an optional ‘message’ indicating the cause of the error.
‘signed_token’ => If a token parameter was specified in the request, it is prefixed with the text ‘token.’ and then RSA-signed and base64url-encoded with the private key of the channel and returned as ‘signed_token’.
guid' => the guid of the address on the target system
guid_sig’ => the RSA signature of the guid encoded with base64url, signed with the private key associated with this guid.
‘key’ => the public key associated with this guid
name' => name of the channel
name_updated' => timestamp in MySQL style “2012-01-01 00:00:00”, when the name was last changed (UTC)
address' => “webbie” or user@host address associated with this channel
photo' => URL of a profile photo for this channel (ideally 175x175)
photo_mimetype' => content type of the profile photo
photo_updated' => MySQL-style timestamp of when the photo was last updated (UTC)
‘url’ => location of the channel homepage
‘connections_url’ => location of the URL for portable contacts (extended for Nomad) for this channel
target' => if an authorisation target has been specified, it will be mirrored
‘target_sig’ => if an authorisation target has been specified, the signature is mirrored
‘searchable’ => (true or false) true means that this entry can be searched for in a directory
Authorisations
‘permissions’ => expandable array of permissions suitable for this target, values are true or false Permissions can include
- view_stream
- view_profile
- view_photos
- view_contacts
- view_storage
- view_pages
- send_stream
- post_wall
- post_comments
- post_mail
- post_photos
- tag_deliver
- chat
- write_storage
- write_pages
- delegate
profile
‘Profile’ => Array with important profile fields
- description
- birthday YYYY-MM-DD , all fields are optional, any field (such as year) may be zero
- next_birthday => MySQL datetime string representing the next upcoming birthday, converted from the channel's default timezone to UTC.
- gender (free form)
- marital (marital status)
- sexual (preference)
- locale (city)
- region (state)
- postcode
- country
locations
‘locations’ => Array of registered locations (DNS locations) from which this channel can be visible or can be booked
Each location is an array of
‘host’ => DNS host name, e.g. example.com
‘address’ => the webbie or user@host identifier associated with this location
‘primary’ => (true or false) whether this is the primary location for this channel where files and web pages are generally found
‘url’ => url of the root directory of this DNS location, e.g. https://example. com
url_sig' => base64url encoded RSA signature of the URL, signed with the private key of the channel
‘callback’ => Nomad communication endpoint on this site, normally https://example.com/post
sitekey' => public key of this site/host
site
‘site’ => array specifying the directory role of the site responding to this request
url' => url of this site e.g. https://example. com
directory_mode' => one of “primary”, “secondary”, “normal” or “standalone”
directory_url' => if it is a directory server or a standalone site, the URL for the directory search module
Magic Auth
The so-called ‘magic auth’ takes place via a special exchange. On the remote computer, a redirection is made to the Nomad endpoint with special GET parameters.
Endpoint: https://example.com/post/name
where ‘name’ is the left-hand side of the channel webbie, for example ‘mike’ if the webbie is ‘mike@zothub.com’.
In addition, four parameters are passed:
- auth => the webbie of the person requesting access
- dest => the desired destination URL (urlencoded)
- sec => a random string, which is also stored locally for use during the verification phase.
- version => the Zot revision
When this packet is received, a Nomad message is sent to the auth identity:
    {
      ‘type’: ‘auth_check’,
      ‘sender’:{
        ‘guid’: ‘kgVFf_1_SSbyqH-BNWjWuhAvJ2EhQBTUdw-Q1LwwssAntr8KTBgBSzNVzUm9_RwuDpxI6X8me_QQhZMf7RfjdA’,
        ‘guid_sig’: "PT9-TApzpm7QtMxC63MjtdK2nUyxNI0tUoWlOYTFGke3kNdtxSzSvDV4uzq_7SSBtlrNnVMAFx2_1FDgyKawmqVtRPmT7QSXrKOL2oPzL8Hu_nnVVTs_0YOLQJJ0GYACOOK- R5874WuXLEept5-KYg0uShifsvhHnxnPIlDM9lWuZ1hSJTrk3NN9Ds6AKpyNRqf3DUdz81- Xvs8I2kj6y5vfFtm-FPKAqu77XP05r74vGaWbqb1r8zpWC7zxXakVVOHHC4plG6rLINjQzvdSFKCQb5R_xtGsPPfvuE24bv4fvN4ZG2ILvb6X4Dly37WW_HXBqBnUs24mngoTxFaPgNmz1nDQNYQu91- ekX4-BNaovjDx4tP379qIG3-NygHTjFoOMDVUvs-pOPi1kfaoMjmYF2mdZAmVYS2nNLWxbeUymkHXF8lT_iVsJSzyaRFJS1Iqn7zbvwH1iUBjD_pB9EmtNmnUraKrCU9eHES27xTwD- yaaH_GHNc1XwXNbhWJaPFAm35U8ki1Le4WbUVRluFx0qwVqlEF3ieGO84PMidrp51FPm83B_oGt80xpvf6P8Ht5WvVpytjMU8UG7-js8hAzWQeYiK05YTXk-78xg0AO6NoNe_RSRk05zYpF6KlA2yQ_My79rZBv9GFt4kUfIxNjd9OiV1wXdidO7Iaq_Q’,
        ‘url’: ‘http:\/\/podunk.edu’,
        ‘url_sig’: "T8Bp7j5DHHhQDCFcAHXfuhUfGk2P3inPbImwaXXF1xJd3TGgluoXyyKDx6WDm07x0hqbupoAoZB1qBP3_WfvWiJVAK4N1FD77EOYttUEHZ7L43xy5PCpojJQmkppGbPJc2jnTIc_F1vvGvw5fv8gBWZvPqTdb6LWF6FLrzwesZpi7j2rsioZ3wyUkqb5TDZaNNeWQrIEYXrEnWkRI_qTSOzx0dRTsGO6SpU1fPWuOOYMZG8Nh18nay0kLpxReuHCiCdxjXRVvk5k9rkcMbDBJcBovhiSioPKv_yJxcZVBATw3z3TTE95kGi4wxCEenxwhSpvouwa5b0hT7NS4Ay70QaxoKiLb3ZjhZaUUn4igCyZM0h6fllR5I6J_sAQxiMYD0v5ouIlb0u8YVMni93j3zlqMWdDUZ4WgTI7NNbo8ug9NQDHd92TPmSE1TytPTgya3tsFMzwyq0LZ0b- g- zSXWIES__jKQ7vAtIs9EwlPxqJXEDDniZ2AJ6biXRYgE2Kd6W_nmI7w31igwQTms3ecXe5ENI3ckEPUAq__llNnND7mxp5ZrdXzd5HHU9slXwDShYcW3yDeQLEwAVomTGSFpBrCX8W77n9hF3JClkWaeS4QcZ3xUtsSS81yLrp__ifFfQqx9_Be89WVyIOoF4oydr08EkZ8zwlAsbZLG7eLXY"
      },
      ‘recipients’:{
        {
        ‘guid’: ‘ZHSqb3yGar3TYV_o9S-JkD-6o_V4DhUcxtv0VeyX8Kj_ENHPI_M3SyAUucU835-mIayGMmTpqJz3ujPkcavVhA’,
        ‘guid_sig’: "JsAAXigNghTkkbq8beGMJjj9LBKZn28hZ-pHSsoQuwYWvBJ2lSnfc4r9l--WgO6sucH-SR6RiBo78eWn1cZrh_cRMu3x3LLx4y-tjixg- oOOgtZakkBg4vmOhkKPkci0mFtzvUrpY4YHySqsWTuPwRx_vOlIYIGEY5bRXpnkNCoC8J4EJnRucDrgSARJvA8QQeQQL0H4mWEdGL7wlsZp_2VTC6nEMQ48Piu6Czu5ThvLggGPDbr7PEMUD2cZ0jE4SeaC040REYASq8IdXIEDMm6btSlGPuskNh3cD0AGzH2dMciFtWSjmMVuxBU59U1I6gHwcxYEV6BubWt_jQSfmA3EBiPhKLyu02cBMMiOvYIdJ3xmpGoMY1Cn__vhHnx_vEofFOIErb6nRzbD- pY49C28AOdBA5ffzLW3ss99d0A-6GxZmjsyYhgJu4tFUAa7JUl84tMbq28Tib0HW6qYo6QWw8K1HffxcTpHtwSL5Ifx0PAoGMJsGDZDD1y_r9a4vH5pjqmGrjL3RXJJUy- m4eLV5r7xMWXsxjqu3D8r04_dcw4hwwexpMT1Nwf8CTB0TKb8ElgeOpDFjYVgrqMYWP0XdhatcFtAJI7gsS-JtzsIwON9Kij66-VAkqy_z1IXI0ziyqV1yapSVYoUV1vMScRZ_nMqwiB5rEDx-XLfzko"
        }
      }
      ‘callback’:‘\/post’,
      ‘version’:1,
      ‘secret’:‘1eaa6613699be6ebb2adcefa5379c61a3678aa0df89025470fac871431b70467’,
      ‘secret_sig’: "eKV968b1sDkOVdSMi0tLRtOhQw4otA8yFKaVg6cA4I46_zlAQGbFptS-ODiZlSAqR7RiiZQv4E2uXCKar52dHo0vvNKbpOp_ezWYcwKRu1shvAlYyytsflH5acnDWL-FKOOgz5zqLLZ6cKXFMoR1VJGG_Od- DKjSwajyV9uVzTry58Hz_w0W2pjxwQ-Xv11rab5R2O4kKSW77YzPG2R5E6Q7HN38FrLtyWD_ai3K9wlsFOpwdYC064dk66X7BZtcIbKtM6zKwMywcfJzvS5_0U5yc5GGbIY_lY6SViSfx9shOKyxkEKHfS29Ynk9ATYYGnwO-jnlMqkJC7t149H- sI9hYWMkLuCzaeLP56k2B2B2TmtnYvE_vHNQjzVhTwuHCIRVr-p6nplQn_P3SkOpYqPi3k_tnnOLa2d3Wtga8ClEY90oLWFJC3j2UkBf_VEOBNcg-t5XO3T-j9O4Sbk96k1Qoalc-QlznbGx4bOVsGkRBBMiH4YUqiiWB_OkFHtdqv7dqGeC- u-B4u9IxzYst46vvmyA3O-Q4APSZ1RY8ITUH0jLTbh6EAV7Oki8pIbOg0t56p-8RlanOZqmFvR-grVSc7Ak1ZcD8NACmvidUpa1B7WEvRcOeffx9lype0bt5XenDnMyx6szevwxZIiM8qGM2lsSk4fu8HI9cW0mLywzZT0"
    }
auth_check messages MUST be encrypted. This message is sent to the originating site, which checks whether the ‘secret’ matches the ‘sec’ it originally transmitted. It also checks secret_sig, which is signed with the private key of the destination channel and encoded with base64url. If everything is OK, a json packet is returned:
    {
      ‘success’:1,
      ‘confirm’: "q0Ysovd1uQRsur2xG9Tg6bC23ynzw0191SkVd7CJcYoaePy6e_v0vnmPg2xBUtIaHpx_aSuhgAkd3aVjPeaVBmts6aakT6a_yAEy7l2rBydntu2tvrHhoVqRNOmw0Q1tI6hwobk1BgK9Pm0lwOeAo8Q98BqIJxf47yO9pATa0wktOg6a7LMogC2zkkhwOV5oEqjJfeHeo27TiHr1e2WaphfCusjmk27V_FAYTzw05HvW4SPCx55EeeTJYIwDfQwjLfP4aKV- I8HQCINt-2yxJvzH7Izy9AW- 7rYU0Il_gW5hrhIS5MTM12GBXLVs2Ij1CCLXIs4cO0x6e8KEIKwIjf7iAu60JPmnb_fx4QgBlF2HLw9vXMwZokor8yktESoGl1nvf5VV5GHWSIKAur3KPS2Tb0ekNh-tIk9u-xob4d9eIf6tge_d3aq1LcAtrDBDLk8AD0bho5zrVuTmZ9k- lBVPr_DRHSV_dlpu088j3ThaBsuV1olHK3vLFRhYCDIO0CqqK5IuhqtRNnRaqhlNN6fQUHpXk2SwHiJ2W36RCYMTnno6ezFk_tN-RA2ly- FomNZoC5FPA9gFwoJR7ZmVFDmUeK3bW-zYTA5vu15lpBPnt7Up_5rZKkr0WQVbhWJmylqOuwuNWbn3SrMQ8rYFZ23Tv300cOfKVgRBaePWQb4"
    }
‘confirm’ in this case is the base64url-encoded RSA signature of the concatenation of “secret” with the base64url-encoded whirlpool hash of the source guid and guid_sig; signed with the private key of the source channel. This prevents a manin-the-middle from inserting a fraudulent success packet. Upon receipt and successful verification of this packet, the destination page is redirected to the original destination URL and displays a successful remote login.
Nomad structures
Nomad signatures
All signed data in Nomad is generated by an RSA signature operation with the initiator's private key. The binary result is then encoded for transport with base64url.
Nomad encryption
Encryption is currently performed using AES256CTR. Other algorithms MAY be supported. A 32-octet key and a 16-octet initialisation vector are generated at random. The desired data is then encoded with these generated strings and the result is base64url encoded. An array is then created:
- data The base64url-encoded encrypted data
- alg The selected algorithm, in this case the character string ‘aes256ctr’.
- key The randomly generated key, RSA-encrypted with the recipient's public key, and the base64url-encoded result
- iv The randomly generated initialisation vector, RSA-encrypted with the recipient's public key, and the base64url-encoded result
Basic Nomad packet
Used to initiate a dialogue with another Nomad site. This packet MAY be encrypted. The presence of an array element ‘iv’ indicates that encryption has been performed. When sending an ‘auth_check’ packet, this packet MUST be encrypted, using the target site's public key (the site key, as opposed to a sender key).
    {
      ‘type’: ‘notify’,
      ‘sender’:{
        ‘guid’: ‘kgVFf_1_SSbyqH-BNWjWuhAvJ2EhQBTUdw-Q1LwwssAntr8KTBgBSzNVzUm9_RwuDpxI6X8me_QQhZMf7RfjdA’,
        ‘guid_sig’: "PT9-TApzpm7QtMxC63MjtdK2nUyxNI0tUoWlOYTFGke3kNdtxSzSvDV4uzq_7SSBtlrNnVMAFx2_1FDgyKawmqVtRPmT7QSXrKOL2oPzL8Hu_nnVVTs_0YOLQJJ0GYACOOK- R5874WuXLEept5-KYg0uShifsvhHnxnPIlDM9lWuZ1hSJTrk3NN9Ds6AKpyNRqf3DUdz81- Xvs8I2kj6y5vfFtm-FPKAqu77XP05r74vGaWbqb1r8zpWC7zxXakVVOHHC4plG6rLINjQzvdSFKCQb5R_xtGsPPfvuE24bv4fvN4ZG2ILvb6X4Dly37WW_HXBqBnUs24mngoTxFaPgNmz1nDQNYQu91- ekX4-BNaovjDx4tP379qIG3-NygHTjFoOMDVUvs-pOPi1kfaoMjmYF2mdZAmVYS2nNLWxbeUymkHXF8lT_iVsJSzyaRFJS1Iqn7zbvwH1iUBjD_pB9EmtNmnUraKrCU9eHES27xTwD- yaaH_GHNc1XwXNbhWJaPFAm35U8ki1Le4WbUVRluFx0qwVqlEF3ieGO84PMidrp51FPm83B_oGt80xpvf6P8Ht5WvVpytjMU8UG7-js8hAzWQeYiK05YTXk-78xg0AO6NoNe_RSRk05zYpF6KlA2yQ_My79rZBv9GFt4kUfIxNjd9OiV1wXdidO7Iaq_Q’,
        ‘url’: ‘http:\/\/podunk.edu’,
        ‘url_sig’: "T8Bp7j5DHHhQDCFcAHXfuhUfGk2P3inPbImwaXXF1xJd3TGgluoXyyKDx6WDm07x0hqbupoAoZB1qBP3_WfvWiJVAK4N1FD77EOYttUEHZ7L43xy5PCpojJQmkppGbPJc2jnTIc_F1vvGvw5fv8gBWZvPqTdb6LWF6FLrzwesZpi7j2rsioZ3wyUkqb5TDZaNNeWQrIEYXrEnWkRI_qTSOzx0dRTsGO6SpU1fPWuOOYMZG8Nh18nay0kLpxReuHCiCdxjXRVvk5k9rkcMbDBJcBovhiSioPKv_yJxcZVBATw3z3TTE95kGi4wxCEenxwhSpvouwa5b0hT7NS4Ay70QaxoKiLb3ZjhZaUUn4igCyZM0h6fllR5I6J_sAQxiMYD0v5ouIlb0u8YVMni93j3zlqMWdDUZ4WgTI7NNbo8ug9NQDHd92TPmSE1TytPTgya3tsFMzwyq0LZ0b- g- zSXWIES__jKQ7vAtIs9EwlPxqJXEDDniZ2AJ6biXRYgE2Kd6W_nmI7w31igwQTms3ecXe5ENI3ckEPUAq__llNnND7mxp5ZrdXzd5HHU9slXwDShYcW3yDeQLEwAVomTGSFpBrCX8W77n9hF3JClkWaeS4QcZ3xUtsSS81yLrp__ifFfQqx9_Be89WVyIOoF4oydr08EkZ8zwlAsbZLG7eLXY"
        ‘sitekey’:"-----BEGIN PUBLIC KEY-----
MIICIjANBgkqhkiG9w0BAQEFAAOCAg8AMIICCgKCAgEAxTeIwXZWrw/S+Ju6gewh
LgkKnNNe2uCUqCqMZoYgJar3T5sHCDhvXc4dDCbDkxVIaA/+V1mURtBV60a3IGjn
OAO0W0XGGLe2ED7G5o9U8T9mVGq8Mauv0v1oQ5wIR1gEAhBavkQ2OUGuF/YKn2nj
HlKsv9HzUAHpcDMUe3Uklc2RhQbMcnJxEgkyjCkDyrTtCZzISkTAocHvpCG1KSog
njUZdiz9UWxvM4rCFkCJvQU4RwRZJb7GA9ul+9JrF7NvUQTx8csRP2weBk1E9yyj
wbe187E0eVj9RXX2Mx3mYhgrTdodxLOVMSXZLg1/SMpeFFl7QBhuM0SiOPg8a7Et
e2iNA/RD4WiUFqCDfafasRa1TOozOm7LA+08lkAh5PeQPJsJbrX0wVVft++Y+5/z
BvcUOP73vcbz7j5hJ7HLsbQtye/UUCfODBFybuDqRM84Aet8rjZohX7vukXdMD4I
2HuB7pjR4uIfyYr0J63ANkvbsn8LR+RnirmHrK5H/OgxxjXcfYbGEQgFxvxhF6lA
FpMu6Do4dx3CIb6pRmZ8bjSImXexJ0BSo9n3gtrz0XYLecsYFlQ9+QQjm83qxyLb
M23in0xqMVsyQvzjNkpImrO/QdbEFRIIMee83IHq+adbyjQR49Z2hNEIZhkLPc3U
2cJJ2HkzkOoF2K37qwIzk68CAwEAAQ==
-----END PUBLIC KEY-----
"
      },
      ‘recipients’:{
         {
            ‘guid’: ‘lql-1VnxtiO4-WF0h72wLX1Fu8szzHDOXgQaTbELwXW77k8AKFfh-hYr70vqMrc3SSvWN-Flrc5HFhRTWB7ICw’,
            ‘guid_sig’: "PafvEL0VpKfxATxlCqDjfOeSIMdmpr3iU7X-Sysa1h5LzDpjSXsjO37tYZL- accb1M5itLlfnW5epkTa5I4flsW21zSY1A2jCuBQUTLLGV7rNyyBy7lgqJUFvAMRx0TfXzP9lcaPqlM9T1tA6jfWOsOmkdzwofGeXBnsjGfjsO2xdGYe6vwjOU0DSavukvzDMnOayB9DekpvDnaNBTxeGLM45Skzr7ZEMcNF7TeXMbnvpfLaALYEKeQs9bGH- UgAG8fBWgzVAzeBfx_XSR1rdixjyiZGP0kq0h35SlmMPcEjliodOBFwMXqpXFB7Ibp4F6o6te2p2ErViJccQVG8VNKB6SbKNXY6bhP5zVcVsJ- vR-p4xXoYJJvzTN7yTDsGAXHOLF4ZrXbo5yi5gFAlIrTLAF2EdWQwxSGyLRWKxG8PrDkzEzX6cJJ0VRcLh5z6OI5QqQNdeghPZbshMFMJSc_ApCPi9_hI4ZfctCIOi3T6bdgTNKryLm5fhy_eqjwLAZTGP- aUBgLZpb1mf2UojBn6Ey9cCyq-0T2RWyk-FcIcbV4qJ-p_8oODqw13Qs5FYkjLr1bGBq82SuolkYrXEwQClxnrfKa4KYc2_eHAXPL01iS9zVnI1ySOCNJshB97Odpooc4wk7Nb2Fo-Q6THU9zuu0uK_-JbK7IIl6go2qA"
         },
      },
      ‘callback’:‘\/post’,
      ‘version’: ‘1.2’,
      ‘encryption’:{
        ‘aes256ctr’
      },
      ‘secret’:‘1eaa6613699be6ebb2adcefa5379c61a3678aa0df89025470fac871431b70467’,
      ‘secret_sig’: "0uShifsvhHnxnPIlDM9lWuZ1hSJTrk3NN9Ds6AKpyNRqf3DUdz81-Xvs8I2kj6y5vfFtm- FPKAqu77XP05r74vGaWbqb1r8zpWC7zxXakVVOHHC4plG6rLINjQzvdSFKCQb5R_xtGsPPfvuE24bv4fvN4ZG2ILvb6X4Dly37WW_HXBqBnUs24mngoTxFaPgNmz1nDQNYQu91-ekX4-BNaovjDx4tP379qIG3-NygHTjFoOMDVUvs- pOPi1kfaoMjmYF2mdZAmVYS2nNLWxbeUymkHXF8lT_iVsJSzyaRFJS1Iqn7zbvwH1iUBjD_pB9EmtNmnUraKrCU9eHES27xTwD- yaaH_GHNc1XwXNbhWJaPFAm35U8ki1Le4WbUVRluFx0qwVqlEF3ieGO84PMidrp51FPm83B_oGt80xpvf6P8Ht5WvVpytjMU8UG7-js8hAzWQeYiK05YTXk-78xg0AO6NoNe_RSRk05zYpF6KlA2yQ_My79rZBv9GFt4kUfIxNjd9OiV1wXdidO7Iaq_Q"
    }
type
The message type: notify, purge, refresh, force_refresh, auth_check, ping or pickup. The content of the packets varies depending on the message type. The notify packet is described here.
callback
A character string that is appended to the URL and identifies the Nomad communication endpoint on this system. This is usually the character string ‘/post’.
version
The identifier of the Nomad protocol so that future protocol revisions can co-exist.
encryption
Array of supported encryption algorithms, ordered by decreasing preference. If no compatible encryption methods are specified, applications MUST use ‘aes256cbc’.
secret
A 64-character string randomly generated by the sending side.
secret_sig
The RSA signature of the secret, signed with the sender's private key.
sender
An array of four components that provide a portable identity. We can contact the given URL and download a Nomad info packet to obtain the sender's public key and use it to verify the sender's guid and the signatures of the sending URL.
- guid Usually a 64 character base64url encoded string. It is generated when an identity is created and an attempt is made to make it unique, but this is not required.
- guid_sig The RSA signature of the guid, signed with the sender's private key and base64url-encoded.
- url The base URL of the location from which this post originated.
- url_sig The RSA signature of the url, signed with the sender's private key and base64url encoded.
- sitekey The public key of the website specified in the url
recipients
Only used for private messages. An array of envelope recipients. Each recipient is represented by an array of guid and guid_sig. If recipients are specified, the entire packet is also encapsulated with a negotiated cryptographic algorithm or ‘aes256cbc’ if none could be negotiated.
- guid The guid of a private recipient.
- guid_sig The RSA signature of the guid, signed with the recipient's private key and base64url-encoded
Zot API
Many existing social applications and tools can interface directly using the Twitter/StatusNet API, which is available using the 'twitter_api' addon.
This document describes the native API; which allows direct programmatic access to several internal data structures and libraries extending beyond the basic social interface.
The API endpoints detailed below are relative to api/z/1.0, meaning that if an API is listed as channel/stream the full API URL is https://hub.hubzilla.hu/api/z/1.0/channel/stream.
channel/export/basic
Export basic channel data
Options: - sections comma-separated list of data types to export
- posts if true, return default sections plus 3 months of posts
If no sections are requested, the following sections are returned: channel, connections, config, apps, chatrooms, events, webpages, mail, wikis
Files and large collections of posts may run into memory limits; these must generally be requested separately.
channel/stream
Fetch channel conversation items
network/stream
Fetch network conversation items
files
List file storage (attach DB)
GET /api/z/1.0/files
Options:
- filehash return only entries matching hash (exactly)
- filename return only entries matching filename (substring)
- filetype return only entries matching filetype/mimetype (substring)
- start start at record (default 0)
- records number of records to return or 0 for unlimited
Example:
curl -u mychannel:mypassword https://xyz.macgirvin.com/api/z/1.0/files -d filetype=multipart/mixed
Returns:
    {

        "success": true,
        "results": [
            {
                "id": "1",
                "aid": "1",
                "uid": "2",
                "hash": "44ee8b2a1a7f36dea07b93b7747a2383a1bc0fdd08339e8928bfcbe45f65d939",
                "filename": "Profile Photos",
                "filetype": "multipart/mixed",
                "filesize": "0",
                "revision": "0",
                "folder": "",
                "os_storage": "1",
                "is_dir": "1",
                "is_photo": "0",
                "flags": "0",
                "created": "2016-01-02 21:51:17",
                "edited": "2016-01-02 21:51:17",
                "allow_cid": "",
                "allow_gid": "",
                "deny_cid": "",
                "deny_gid": ""
            },
            {
                "id": "12",
                "aid": "1",
                "uid": "2",
                "hash": "71883f1fc64af33889229cbc79c5a056deeec5fc277d765f182f19073e1b2998",
                "filename": "Cover Photos",
                "filetype": "multipart/mixed",
                "filesize": "0",
                "revision": "0",
                "folder": "",
                "os_storage": "1",
                "is_dir": "1",
                "is_photo": "0",
                "flags": "0",
                "created": "2016-01-15 00:24:33",
                "edited": "2016-01-15 00:24:33",
                "allow_cid": "",
                "allow_gid": "",
                "deny_cid": "",
                "deny_gid": ""
            },
            {
                "id": "16",
                "aid": "1",
                "uid": "2",
                "hash": "f48f7ec3278499d1dd86b72c3207beaaf4717b07df5cc9b373f14d7aad2e1bcd",
                "filename": "2016-01",
                "filetype": "multipart/mixed",
                "filesize": "0",
                "revision": "0",
                "folder": "",
                "os_storage": "1",
                "is_dir": "1",
                "is_photo": "0",
                "flags": "0",
                "created": "2016-01-22 03:24:55",
                "edited": "2016-01-22 03:26:57",
                "allow_cid": "",
                "allow_gid": "",
                "deny_cid": "",
                "deny_gid": ""
            }
        ]
    }
filemeta
Export file metadata for any uploaded file
filedata
Provides the ability to download a file from cloud storage in chunks
GET /api/z/1.0/filedata
Required:
- file_id attach.hash of desired file ('begins with' match)
Optional:
- start starting byte of returned data in file (counting from 0)
- length length (prior to base64 encoding) of chunk to download
Returns:
attach (DB) structure with base64 encoded 'content' comprised of the desired chunk
Example:
https://xyz.macgirvin.com/api/z/1.0/filedata?f=&file_id=9f5217770fd&start=0&length=48
Returns:
    {

        "attach": {
            "id": "107",
            "aid": "1",
            "uid": "2",
            "hash": "9f5217770fd55d563bd77f84d534d8e119a187514bbd391714626cd9c0e60207",
            "creator": "pgcJx1IQjuPkx8aI9qheJlBMZzJz-oTPjHy3h5pWlOVOriBO_cSiUhhqwhuZ74TYJ8_ECO3pPiRMWC0q8YPCQg",
            "filename": "pcxtopbm.c",
            "filetype": "application/octet-stream",
            "filesize": "3934",
            "revision": "0",
            "folder": "",
            "flags": "0",
            "is_dir": "0",
            "is_photo": "0",
            "os_storage": "1",
            "os_path": "",
            "display_path": "",
            "content": "LyogcGN4dG9wYm0uYyAtIGNvbnZlcnQgUEMgcGFpbnRicnVzaCAoLnBjeCkgZmls",
            "created": "2016-07-24 23:13:01",
            "edited": "2016-07-24 23:13:01",
            "allow_cid": "",
            "allow_gid": "",
            "deny_cid": "",
            "deny_gid": "",
            "start": 0,
            "length": 48
        }

    }
file/export
file
albums
Description: list photo albums
GET /api/z/1.0/albums
Output:
text - textual name
total - number of photos in this album
url - web URL
urlencode - textual name, urlencoded
bin2hex - textual name using bin2hex (which is used in the web URL link)
Example:
    {

        "success": true,
        "albums": [
            {
                "text": "/",
                "total": "2",
                "url": "https://xyz.macgirvin.com/photos/hubzilla/album/",
                "urlencode": "",
                "bin2hex": ""
            },
                {
                "text": "2016-01",
                "total": "6",
                "url": "https://xyz.macgirvin.com/photos/hubzilla/album/323031362d3031",
                "urlencode": "2016-01",
                "bin2hex": "323031362d3031"
            },
            {
                "text": "2016-02",
                "total": "7",
                "url": "https://xyz.macgirvin.com/photos/hubzilla/album/323031362d3032",
                "urlencode": "2016-02",
                "bin2hex": "323031362d3032"
            },
            {
                "text": "Cover Photos",
                "total": "5",
                "url": "https://xyz.macgirvin.com/photos/hubzilla/album/436f7665722050686f746f73",
                "urlencode": "Cover+Photos",
                "bin2hex": "436f7665722050686f746f73"
            },
            {
                "text": "Profile Photos",
                "total": "26",
                "url": "https://xyz.macgirvin.com/photos/hubzilla/album/50726f66696c652050686f746f73",
                "urlencode": "Profile+Photos",
                "bin2hex": "50726f66696c652050686f746f73"
            }
        ]

    }
photos
list photo metadata
photo
group
GET /api/z/1.0/group
Description: list privacy groups
Returns: DB tables of all privacy groups.
To use with API group_members, provide either 'group_id' from the id element returned in this call, or 'group_name' from the gname returned in this call.
    [

        {
            "id": "1",
            "hash": "966c946394f3e2627bbb8a55026b5725e582407098415c02f85232de3f3fde76Friends",
            "uid": "2",
            "visible": "0",
            "deleted": "0",
            "gname": "Friends"
        },
        {
            "id": "2",
            "hash": "852ebc17f8c3ed4866f2162e384ded0f9b9d1048f93822c0c84196745f6eec66Family",
            "uid": "2",
            "visible": "1",
            "deleted": "0",
            "gname": "Family"
        },
        {
            "id": "3",
            "hash": "cc3cb5a7f9818effd7c7c80a58b09a189b62efa698a74319117babe33ee30ab9Co-workers",
            "uid": "2",
            "visible": "0",
            "deleted": "0",
            "gname": "Co-workers"
        }
    ]
group_members
GET /api/z/1.0/group_members
Required:
group_id or group_name
Returns:
group_member+abook+xchan (DB join) for each member of the privacy group
    [

        {
            "id": "1",
            "uid": "2",
            "gid": "1",
            "xchan": "pgcJx1IQjuPkx8aI9qheJlBMZzJz-oTPjHy3h5pWlOVOriBO_cSiUhhqwhuZ74TYJ8_ECO3pPiRMWC0q8YPCQg",
            "abook_id": "2",
            "abook_account": "1",
            "abook_channel": "2",
            "abook_xchan": "pgcJx1IQjuPkx8aI9qheJlBMZzJz-oTPjHy3h5pWlOVOriBO_cSiUhhqwhuZ74TYJ8_ECO3pPiRMWC0q8YPCQg",
            "abook_my_perms": "218555",
            "abook_their_perms": "0",
            "abook_closeness": "0",
            "abook_created": "2016-01-02 21:16:26",
            "abook_updated": "2016-01-02 21:16:26",
            "abook_connected": "0000-00-00 00:00:00",
            "abook_dob": "0000-00-00 00:00:00",
            "abook_flags": "0",
            "abook_blocked": "0",
            "abook_ignored": "0",
            "abook_hidden": "0",
            "abook_archived": "0",
            "abook_pending": "0",
            "abook_unconnected": "0",
            "abook_self": "1",
            "abook_feed": "0",
            "abook_profile": "",
            "abook_incl": "",
            "abook_excl": "",
            "abook_instance": "",
            "xchan_hash": "pgcJx1IQjuPkx8aI9qheJlBMZzJz-oTPjHy3h5pWlOVOriBO_cSiUhhqwhuZ74TYJ8_ECO3pPiRMWC0q8YPCQg",
            "xchan_guid": "lql-1VnxtiO4-WF0h72wLX1Fu8szzHDOXgQaTbELwXW77k8AKFfh-hYr70vqMrc3SSvWN-Flrc5HFhRTWB7ICw",
            "xchan_guid_sig": "PafvEL0VpKfxATxlCqDjfOeSIMdmpr3iU7X-Sysa1h5LzDpjSXsjO37tYZL-accb1M5itLlfnW5epkTa5I4flsW21zSY1A2jCuBQUTLLGV7rNyyBy7lgqJUFvAMRx0TfXzP9lcaPqlM9T1tA6jfWOsOmkdzwofGeXBnsjGfjsO2xdGYe6vwjOU0DSavukvzDMnOayB9DekpvDnaNBTxeGLM45Skzr7ZEMcNF7TeXMbnvpfLaALYEKeQs9bGH-UgAG8fBWgzVAzeBfx_XSR1rdixjyiZGP0kq0h35SlmMPcEjliodOBFwMXqpXFB7Ibp4F6o6te2p2ErViJccQVG8VNKB6SbKNXY6bhP5zVcVsJ-vR-p4xXoYJJvzTN7yTDsGAXHOLF4ZrXbo5yi5gFAlIrTLAF2EdWQwxSGyLRWKxG8PrDkzEzX6cJJ0VRcLh5z6OI5QqQNdeghPZbshMFMJSc_ApCPi9_hI4ZfctCIOi3T6bdgTNKryLm5fhy_eqjwLAZTGP-aUBgLZpb1mf2UojBn6Ey9cCyq-0T2RWyk-FcIcbV4qJ-p_8oODqw13Qs5FYkjLr1bGBq82SuolkYrXEwQClxnrfKa4KYc2_eHAXPL01iS9zVnI1ySOCNJshB97Odpooc4wk7Nb2Fo-Q6THU9zuu0uK_-JbK7IIl6go2qA",
            "xchan_pubkey": "-----BEGIN PUBLIC KEY-----\nMIICIjANBgkqhkiG9w0BAQEFAAOCAg8AMIICCgKCAgEA18JB76lyP4zzL/y7BCej\neJnfZIWZNtM3MZvI1zEVMWmmwOS+u/yH8oPwyaDk4Y/tnj8GzMPj1lCGVRcd8EJa\nNrCMd50HODA5EsJtxpsOzRcILYjOcTtIAG1K4LtKqELi9ICAaFp0fNfa+Jf0eCek\nvPusx2/ORhy+o23hFoSMhL86o2gmaiRnmnA3Vz4ZMG92ieJEDMXt9IA1EkIqS4y5\nBPZfVPLD1pv8iivj+dtN1XjwplgjUbtxmU0/Ej808nHppscRIqx/XJ0XZU90oNGw\n/wYoK2EzJlPbRsAkwNqoFrAYlr5HPpn4BJ2ebFYQgWBUraD7HwS5atsQEaxGfO21\nlUP0+lDg9t3CXvudDj0UG1jiEKbVIGA+4aG0GN2DSC5AyRq/GRxqyay5W2vQbAZH\nyvxPGrZFO24I65g3pjhpjEsLqZ4ilTLQoLMs0drCIcRm5RxMUo4s/LMg16lT4cEk\n1qRtk2X0Sb1AMQQ2uRXiVtWz77QHMONEYkf6OW4SHbwcv5umvlv69NYEGfCcbgq0\nAV7U4/BWztUz/SWj4r194CG43I9I8dmaEx9CFA/XMePIAXQUuABfe1QMOR6IxLpq\nTHG1peZgHQKeGz4aSGrhQkZNNoOVNaZoIfcvopxcHDTZLigseEIaPPha4WFYoKPi\nUPbZ5o8gTLc750uzrnb2jwcCAwEAAQ==\n-----END PUBLIC KEY-----\n",
            "xchan_photo_mimetype": "image/png",
            "xchan_photo_l": "https://xyz.macgirvin.com/photo/profile/l/2",
            "xchan_photo_m": "https://xyz.macgirvin.com/photo/profile/m/2",
            "xchan_photo_s": "https://xyz.macgirvin.com/photo/profile/s/2",
            "xchan_addr": "teller@xyz.macgirvin.com",
            "xchan_url": "https://xyz.macgirvin.com/channel/teller",
            "xchan_connurl": "https://xyz.macgirvin.com/poco/teller",
            "xchan_follow": "https://xyz.macgirvin.com/follow?f=&url=%s",
            "xchan_connpage": "",
            "xchan_name": "Teller",
            "xchan_network": "zot",
            "xchan_instance_url": "",
            "xchan_flags": "0",
            "xchan_photo_date": "2016-10-19 01:26:50",
            "xchan_name_date": "2016-01-02 21:16:26",
            "xchan_hidden": "0",
            "xchan_orphan": "0",
            "xchan_censored": "0",
            "xchan_selfcensored": "0",
            "xchan_system": "0",
            "xchan_pubforum": "0",
            "xchan_deleted": "0"
        },
        {
            "id": "12",
            "uid": "2",
            "gid": "1",
            "xchan": "xuSMUYxw1djBB97qXsbrBN1nzJH_gFwQL6pS4zIy8fuusOfBxNlMiVb4h_q5tOEvpE7tYf1EsryjNciMuPIj5w",
            "abook_id": "24",
            "abook_account": "1",
            "abook_channel": "2",
            "abook_xchan": "xuSMUYxw1djBB97qXsbrBN1nzJH_gFwQL6pS4zIy8fuusOfBxNlMiVb4h_q5tOEvpE7tYf1EsryjNciMuPIj5w",
            "abook_my_perms": "218555",
            "abook_their_perms": "218555",
            "abook_closeness": "80",
            "abook_created": "2016-01-27 00:48:43",
            "abook_updated": "2016-12-04 17:16:58",
            "abook_connected": "2016-12-04 17:16:58",
            "abook_dob": "0001-01-01 00:00:00",
            "abook_flags": "0",
            "abook_blocked": "0",
            "abook_ignored": "0",
            "abook_hidden": "0",
            "abook_archived": "0",
            "abook_pending": "0",
            "abook_unconnected": "0",
            "abook_self": "0",
            "abook_feed": "0",
            "abook_profile": "debb5236efb1626cfbad33ccb49892801e5f844aa04bf81f580cfa7d13204819",
            "abook_incl": "",
            "abook_excl": "",
            "abook_instance": "",
            "xchan_hash": "xuSMUYxw1djBB97qXsbrBN1nzJH_gFwQL6pS4zIy8fuusOfBxNlMiVb4h_q5tOEvpE7tYf1EsryjNciMuPIj5w",
            "xchan_guid": "d5EMLlt1tHHZ0dANoA7B5Wq9UgXoWcFS9-gXOkL_AAejcPApoQRyxfHTuu8DoTbUaO-bYmX5HPuWuK9PHyqNmA",
            "xchan_guid_sig": "CVWEMRPtzI1YcHfnnWHTuv3H964OAmSElgUfxMoX6RdQdxNpqb_POirpVuyP8s3W17mVCfO5V9IAjkg5iKcqCk6YcvOD_egmMy-AnM9TC1kKndQHw55CunD82Q8K_xBNSXkSROizcNkKh9DVLjJPFjW1AqtI4njkZ3EMgrWqnbFRM1qPToUoCY9zM3tEMHoAD9YX1zP90wl40LzfN-dtcNWpSBbiz9owou62uzLbN7mrCwKOMlXLjwwGswRnxIsEnb3O-FXOs8hs0mArKe9snq1-BKeD16LyzxgwlpVLElzIJZGEZGtMdIJgeRzKuBvPjsOIpQ1yAkuOpFJ3nGCM-IPOIIjAmyVl5zD3xPVcxxpZlJRn5fG1Y-gnqTgsrEQCA7M6XPWQdrdHU4akZfyUyFJDhv3uM-jon9VzrYTBw68R0WA-1Z8WafEHA4qh5OWAj85lUarwhr7iTiEckH51ypPCPs6VbT6Pw7yMaxfjFOcipashQagx0tfOlDhE5dQANOXKASFtH1J9-CZY2MQdLPQ6u54d5whuHKMGaJ0V68pnmZ2rOn7g344Ah2WCJrm17jj60QsRMorqRFj7GMdPIA1XB8Wrk88MuYOe3Dhyuu6ZWKI7YTWJS690ZVkKUqAiNHqj0W86DtaiPUc_mmGR0fHl4Gksnko3WmCFv9q2X2E",
            "xchan_pubkey": "-----BEGIN PUBLIC KEY-----\nMIICIjANBgkqhkiG9w0BAQEFAAOCAg8AMIICCgKCAgEAoj2xCJktBA8Ww7Hp+ZNL\nrNuQpo8UB/bfvRkIy+yua3xpF1TuXcnAH61kyRz8vXgOu/l2CyxQbIoaGslCV5Sy\n8JKeNXe+IilUdSSEjMIwCPfSPsYnMHsSnHWmPmclvJwEtQUKOZmW5mMuVBvXy7D2\njomFwc69AYphdyys6eQ7Dcn6+FRBiQbyMprZ5lxyVW+O4DuXVNa3ej2ebx0gCJZ4\ntTIlBoKwEey91dY+FyKVFjdwfNczpmL7LgmZXqcVx+MG3mYgibwdVMiXVj5X06cs\nV9hJ5Xi+Aklsv/UWJtjw9FVt7y9TLptnhh4Ra6T/MDmnBBIAkOR7P/X8cRv078MT\nl0IMsP0RJcDEtTLtwHFVtDs6p52KDFqclKWbqmxmxqV3OTPVYtArRGIzgnJi/5ur\nHRr5G6Cif7QY3UowsIOf78Qvy28LwSbdymgBAWwPPKIviXWxGO+9kMWdmPSUQrWy\nK0+7YA9P9fBUFfn9Hc+p8SJQmQ6OAqLwrDGiPSOlGaNrbEqwqLGgIpXwK+lEFcFJ\n3SPOjJRWdR2whlMxvpwX+39+H7dWN3vSa3Al4/Sq7qW8yW2rYwf+eGyp4Z0lRR+8\nJxFMCwZkSw5g14YdlikAPojv5V1c6KuA5ieg8G1hwyONV7A4JHPyEdPt0W0TZi6C\nCOVkPaC3xGrguETZpJfVpwUCAwEAAQ==\n-----END PUBLIC KEY-----\n",
            "xchan_photo_mimetype": "image/png",
            "xchan_photo_l": "https://xyz.macgirvin.com/photo/9da63aa910ea14e1501ee1a749d181a6-4",
            "xchan_photo_m": "https://xyz.macgirvin.com/photo/9da63aa910ea14e1501ee1a749d181a6-5",
            "xchan_photo_s": "https://xyz.macgirvin.com/photo/9da63aa910ea14e1501ee1a749d181a6-6",
            "xchan_addr": "cloner@xyz.macgirvin.com",
            "xchan_url": "http://abc.macgirvin.com/channel/cloner",
            "xchan_connurl": "http://abc.macgirvin.com/poco/cloner",
            "xchan_follow": "https://xyz.macgirvin.com/follow?f=&url=%s",
            "xchan_connpage": "",
            "xchan_name": "Karen",
            "xchan_network": "zot",
            "xchan_instance_url": "",
            "xchan_flags": "0",
            "xchan_photo_date": "2016-03-31 19:59:20",
            "xchan_name_date": "2016-01-26 23:23:42",
            "xchan_hidden": "0",
            "xchan_orphan": "0",
            "xchan_censored": "0",
            "xchan_selfcensored": "0",
            "xchan_system": "0",
            "xchan_pubforum": "0",
            "xchan_deleted": "0"
        }

    ]
xchan
An xchan is a global location independent channel and is the primary record for a network identity. It may refer to channels on other websites, networks, or services.
GET /api/z/1.0/xchan
Required: one of [ address, hash, guid ] as GET parameters
Returns a portable xchan structure
Example: https://xyz.macgirvin.com/api/z/1.0/xchan?f=&address=mike@macgirvin.com
Returns:
    {
        "hash": "jr54M_y2l5NgHX5wBvP0KqWcAHuW23p1ld-6Vn63_pGTZklrI36LF8vUHMSKJMD8xzzkz7s2xxCx4-BOLNPaVA",
        "guid": "sebQ-IC4rmFn9d9iu17m4BXO-kHuNutWo2ySjeV2SIW1LzksUkss12xVo3m3fykYxN5HMcc7gUZVYv26asx-Pg",
        "guid_sig": "Llenlbl4zHo6-g4sa63MlQmTP5dRCrsPmXHHFmoCHG63BLq5CUZJRLS1vRrrr_MNxr7zob_Ykt_m5xPKe5H0_i4pDj-UdP8dPZqH2fqhhx00kuYL4YUMJ8gRr5eO17vsZQ3XxTcyKewtgeW0j7ytwMp6-hFVUx_Cq08MrXas429ZrjzaEwgTfxGnbgeQYQ0R5EXpHpEmoERnZx77VaEahftmdjAUx9R4YKAp13pGYadJOX5xnLfqofHQD8DyRHWeMJ4G1OfWPSOlXfRayrV_jhnFlZjMU7vOdQwHoCMoR5TFsRsHuzd-qepbvo3pzvQZRWnTNu6oPucgbf94p13QbalYRpBXKOxdTXJrGdESNhGvhtaZnpT9c1QVqC46jdfP0LOX2xrVdbvvG2JMWFv7XJUVjLSk_yjzY6or2VD4V6ztYcjpCi9d_WoNHruoxro_br1YO3KatySxJs-LQ7SOkQI60FpysfbphNyvYMkotwUFI59G08IGKTMu3-GPnV1wp7NOQD1yzJbGGEGSEEysmEP0SO9vnN45kp3MiqbffBGc1r4_YM4e7DPmqOGM94qksOcLOJk1HNESw2dQYWxWQTBXPfOJT6jW9_crGLMEOsZ3Jcss0XS9KzBUA2p_9osvvhUKuKXbNztqH0oZIWlg37FEVsDs_hUwUJpv2Ar09k4",
        "pubkey": "-----BEGIN PUBLIC KEY-----\nMIICIjANBgkqhkiG9w0BAQEFAAOCAg8AMIICCgKCAgEA7QCwvuEIwCHjhjbpz3Oc\ntyei/Pz9nDksNbsc44Cm8jxYGMXsTPFXDZYCcCB5rcAhPPdZSlzaPkv4vPVcMIrw\n5cdX0tvbwa3rNTng6uFE7qkt15D3YCTkwF0Y9FVZiZ2Ko+G23QeBt9wqb9dlDN1d\nuPmu9BLYXIT/JXoBwf0vjIPFM9WBi5W/EHGaiuqw7lt0qI7zDGw77yO5yehKE4cu\n7dt3SakrXphL70LGiZh2XGoLg9Gmpz98t+gvPAUEotAJxIUqnoiTA8jlxoiQjeRK\nHlJkwMOGmRNPS33awPos0kcSxAywuBbh2X3aSqUMjcbE4cGJ++/13zoa6RUZRObC\nZnaLYJxqYBh13/N8SfH7d005hecDxWnoYXeYuuMeT3a2hV0J84ztkJX5OoxIwk7S\nWmvBq4+m66usn6LNL+p5IAcs93KbvOxxrjtQrzohBXc6+elfLVSQ1Rr9g5xbgpub\npSc+hvzbB6p0tleDRzwAy9X16NI4DYiTj4nkmVjigNo9v2VPnAle5zSam86eiYLO\nt2u9YRqysMLPKevNdj3CIvst+BaGGQONlQalRdIcq8Lin+BhuX+1TBgqyav4XD9K\nd+JHMb1aBk/rFLI9/f2S3BJ1XqpbjXz7AbYlaCwKiJ836+HS8PmLKxwVOnpLMbfH\nPYM8k83Lip4bEKIyAuf02qkCAwEAAQ==\n-----END PUBLIC KEY-----\n",
        "photo_mimetype": "image/jpeg",
        "photo_l": "https://xyz.macgirvin.com/photo/350b74555c04429148f2e12775f6c403-4",
        "photo_m": "https://xyz.macgirvin.com/photo/350b74555c04429148f2e12775f6c403-5",
        "photo_s": "https://xyz.macgirvin.com/photo/350b74555c04429148f2e12775f6c403-6",
        "address": "mike@macgirvin.com",
        "url": "https://macgirvin.com/channel/mike",
        "connurl": "https://macgirvin.com/poco/mike",
        "follow": "https://macgirvin.com/follow?f=&url=%s",
        "connpage": "https://macgirvin.com/connect/mike",
        "name": "Mike Macgirvin",
        "network": "zot",
        "instance_url": "",
        "flags": "0",
        "photo_date": "2012-12-06 05:06:11",
        "name_date": "2012-12-06 04:59:13",
        "hidden": "1",
        "orphan": "0",
        "censored": "0",
        "selfcensored": "0",
        "system": "0",
        "pubforum": "0",
        "deleted": "0"
    }
item/update
Create or update an item (post, activity, webpage, etc.)
Usage: POST /api/z/1.0/item/update
Description: item/update posts an item (typically a conversation item or post, but can be any item) using form input.
Required:
- body
text/bbcode contents by default.
Optional:
- $_FILES['media']
uploaded media file to include with post
- title
title of post/item
- contact_allow
array of xchan.xchan_hash allowed to view this item
- group_allow
array of group.hash allowed to view this item
- contact_deny
array of xchan.xchan_hash not allowed to view this item
- group_deny
array of group.hash not allowed to view this item
- coord
geographic coordinates
- location
freefrom location
- expire
datetime this post will expire or be removed
- mimetype
mimetype if not text/bbcode
- parent
item.id of parent to this post (makes it a comment)
- parent_mid
alternate form of parent using message_id
- remote_xchan
xchan.xchan_hash of this message author if not the channel owner
- consensus
boolean set to true if this is a consensus or voting item (default false)
- nocomment
boolean set to true if comments are to be disabled (default false)
- origin
do not use this without reading the code
- namespace
persistent identity for a remote network or service
- remote_id
message_id of this resource on a remote network or service
- message_id
message_id of this item (leave unset to generate one)
- created
datetime of message creation
- post_id
existing item.id if this is an edit operation
- app
application or network name to display with item
- category
comma separated categories for this item
- webpage
item.page_type if not 0
- pagetitle
for webpage and design elements, the 'page name'
- layout_mid
item.mid of layout for this design element
- plink
permalink for this item if different than the default
- verb
activitystream verb for this item/activity
- obj_type
activitystream object type for this item/activity
Example:
curl -u mychannel:mypassword https://xyz.macgirvin.com/api/z/1.0/item/update -d body="hello world"
Returns:
    {

        "success": true,
        "item_id": "2245",
        "item": {
            "id": "2245",
            "mid": "14135cdecf6b8e3891224e4391748722114da6668eebbcb56fe4667b60b88249@xyz.macgirvin.com",
            "aid": "1",
            "uid": "2",
            "parent": "2245",
            "parent_mid": "14135cdecf6b8e3891224e4391748722114da6668eebbcb56fe4667b60b88249@xyz.macgirvin.com",
            "thr_parent": "14135cdecf6b8e3891224e4391748722114da6668eebbcb56fe4667b60b88249@xyz.macgirvin.com",
            "created": "2016-12-03 20:00:12",
            "edited": "2016-12-03 20:00:12",
            "expires": "0001-01-01 00:00:00",
            "commented": "2016-12-03 20:00:12",
            "received": "2016-12-03 20:00:12",
            "changed": "2016-12-03 20:00:12",
            "comments_closed": "0001-01-01 00:00:00",
            "owner_xchan": "pgcJx1IQjuPkx8aI9qheJlBMZzJz-oTPjHy3h5pWlOVOriBO_cSiUhhqwhuZ74TYJ8_ECO3pPiRMWC0q8YPCQg",
            "author_xchan": "pgcJx1IQjuPkx8aI9qheJlBMZzJz-oTPjHy3h5pWlOVOriBO_cSiUhhqwhuZ74TYJ8_ECO3pPiRMWC0q8YPCQg",
            "source_xchan": "",
            "mimetype": "text/bbcode",
            "title": "",
            "body": "hello world",
            "html": "",
            "app": "",
            "lang": "",
            "revision": "0",
            "verb": "http://activitystrea.ms/schema/1.0/post",
            "obj_type": "http://activitystrea.ms/schema/1.0/note",
            "obj": "",
            "tgt_type": "",
            "target": "",
            "layout_mid": "",
            "postopts": "",
            "route": "",
            "llink": "https://xyz.macgirvin.com/display/14135cdecf6b8e3891224e4391748722114da6668eebbcb56fe4667b60b88249@xyz.macgirvin.com",
            "plink": "https://xyz.macgirvin.com/channel/mychannel/?f=&mid=14135cdecf6b8e3891224e4391748722114da6668eebbcb56fe4667b60b88249@xyz.macgirvin.com",
            "resource_id": "",
            "resource_type": "",
            "attach": "",
            "sig": "sa4TOQNfHtV13HDZ1tuQGWNBpZp-nWhT2GMrZEmelXxa_IvEepD2SEsCTWOBqM8OKPJLfNy8_i-ORXjrOIIgAa_aT8cw5vka7Q0C8L9eEb_LegwQ_BtH0CXO5uT30e_8uowkwzh6kmlVg1ntD8QqrGgD5jTET_fMQOIw4gQUBh40GDG9RB4QnPp_MKsgemGrADnRk2vHO7-bR32yQ0JI-8G-eyeqGaaJmIwkHoi0vXsfjZtU7ijSLuKEBWboNjKEDU89-vQ1c5Kh1r0pmjiDk-a5JzZTYShpuhVA-vQgEcADA7wkf4lJZCYNwu3FRwHTvhSMdF0nmyv3aPFglQDky38-SAXZyQSvd7qlABHGCVVDmYrYaiq7Dh4rRENbAUf-UJFHPCVB7NRg34R8HIqmOKq1Su99bIWaoI2zuAQEVma9wLqMoFsluFhxX58KeVtlCZlro7tZ6z619-dthS_fwt0cL_2dZ3QwjG1P36Q4Y4KrCTpntn9ot5osh-HjVQ01h1I9yNCj6XPgYJ8Im3KT_G4hmMDFM7H9RUrYLl2o9XYyiS2nRrf4aJHa0UweBlAY4zcQG34bw2AMGCY53mwsSArf4Hs3rKu5GrGphuwYX0lHa7XEKMglwBWPWHI49q7-oNWr7aWwn1FnfaMfl4cQppCMtKESMNRKm_nb9Dsh5e0",
            "diaspora_meta": "",
            "location": "",
            "coord": "",
            "public_policy": "",
            "comment_policy": "contacts",
            "allow_cid": "",
            "allow_gid": "",
            "deny_cid": "",
            "deny_gid": "",
            "item_restrict": "0",
            "item_flags": "0",
            "item_private": "0",
            "item_origin": "1",
            "item_unseen": "0",
            "item_starred": "0",
            "item_uplink": "0",
            "item_consensus": "0",
            "item_wall": "1",
            "item_thread_top": "1",
            "item_notshown": "0",
            "item_nsfw": "0",
            "item_relay": "0",
            "item_mentionsme": "0",
            "item_nocomment": "0",
            "item_obscured": "0",
            "item_verified": "1",
            "item_retained": "0",
            "item_rss": "0",
            "item_deleted": "0",
            "item_type": "0",
            "item_hidden": "0",
            "item_unpublished": "0",
            "item_delayed": "0",
            "item_pending_remove": "0",
            "item_blocked": "0"
        }

    }
item/full
Get all data associated with an item
abook
Connections
abconfig
Connection metadata (such as permissions)
perm_allowed
Check a permission for a given xchan
Hooks
Hooks allow plugins/addons to ‘hook’ into the code in many places and change the behaviour or otherwise perform independent actions when an activity takes place or certain data structures are accessed. There are many hooks that allow you to hook into the software at almost any point and do something other than what is intended by default. Two variables are passed to these hooks. The first is the app structure, which contains details about the overall state of the page request as we build the resulting page. The second is unique to the specific hook being called and provides specific details about what is happening in the software at the time the hook is called.
Created index of all hooks and the files they call
module_mod_aftercontent General hook for each module, executed after mod_content(). Replace ‘module’ with the name of the module, e.g. ‘photos_mod_aftercontent’.
module_mod_content General hook for any module, executed before mod_content(). Replace ‘module’ with the module name, e.g. ‘photos_mod_content’.
module_mod_init General hook for any module, executed before mod_init(). Replace ‘module’ with the module name, e.g. ‘photos_mod_init’.
module_mod_post General hook for any module, executed before mod_post(). Replace ‘module’ with the name of the module, e.g. ‘photos_mod_post’.
about_hook Called from the siteinfo page
accept_follow Called when a connection is accepted (friend request)
account_downgrade Called when an account has expired, indicating a possible downgrade to the ‘basic’ class of service
account_settings Called when the account settings form is created
account_settings_post Called when posting from the account settings form
activity_filter Called when creating the list of filters for the network page
activity_mapper Called when determining the activity type for the transfer.
activity_decode_mapper Called when the activity type for the transfer is determined.
activity_obj_mapper Called when the object type for the transfer is determined.
activity_obj_decode_mapper Is called when the object type for the transfer is determined.
activity_order Called when generating the list of order options for the network page
addon_app_installed_filter Called when determining whether an addon_app isinstalled
activity_received Called when an activity (post, comment, like, etc.) has been received from a Nomad source
admin_aside Is called when the sidebar widget of the administration page is created
affinity_labels Is used to generate alternative labels for the affinity slider.
api_perm_is_allowed Called when perm_is_allowed() is executed by an API call.
app_destroy Called when an app is deleted.
app_installed_filter Called when it is determined whether an app isinstalled
app_menu Called when the app_menu dropdown is created (may be deprecated)
attach_delete Called when attachments are deleted from the attach table
atom_author Called when an author or owner element is created for an Atom ActivityStream feed
atom_entry Called when generating each entry of an Atom ActivityStream feed
atom_feed Called when an Atom ActivityStreams feed is generated
atom_feed_end Called when the generation of an Atom ActivityStreams feed is complete
attach_upload_file Called when a file is uploaded
authenticate Can provide alternative authentication mechanisms
author_is_pmable Called from the thread's action menu to determine if we can send a private email to the author of the post
bb2diaspora Called when converting bbcode to Markdown
bbcode Called at the end of the conversion from bbcode to HTML
bbcode_filter Called at the beginning of the conversion from bbcode to HTML
bb_translate_video Called when extracting embedded services from bbcode video elements (rarely used)
build_pagehead Called when the HTML page header is created
can_comment_on_post Called when deciding whether or not to display a comment field for a post
change_channel Called when you log in to a channel (either during login or afterwards via the channel manager)
channel_remove Called when a channel is removed
channel_links Is called when the link is generated: HTTP header for a channel
channel_settings Called when the channel settings page is displayed
chat_message Called to create a chat message.
chat_post Called when a chat message has been posted.
check_account_email Checks the email specified during account registration
check_account_invite Validation of an invitation code when using website invitations check_account_password Used to check account passwords (minimum length, inclusion of character sets, etc.) check_channelallowed Used to override or bypass black and white channel block lists.
check_siteallowed Is used to override or bypass the black/white block lists for websites.
collect_public_recipients Used to create a list of recipients to send a public message to.
comment_buttons Called when the comment edit buttons are displayed.
comments_are_now_closed Called when deciding whether or not to display a comment box for a post
connect_premium Called when a connection to a premium channel is established
connection_remove Called when a connection is deleted/removed
connector_settings Called when the page with the features/addon settings is called up
construct_page General hook for providing content for specific page areas. Is called when the Comanche page is created.
contact_block_end Called when the ‘Connections’ widget is created in the sidebar
contact_edit Called when editing a connection via connedit
contact_edit_post Is called when a post is sent to connedit contact_selection_options Deprecated/unused
content_security_policy Called before the Content-Security-Policy header is output
conversation_start Called at the beginning of the rendering of a conversation (message or message collection or stream)
cover_photo_content_end Called after a cover photo has been uploaded
create_identity Called when a channel is created
cron Called when a scheduled task (poller) is executed
cron_daily Called when daily scheduled tasks are executed
cron_weekly Called when weekly scheduled tasks are executed
crypto_methods Called when a list of crypto algorithms is created in the locally preferred order
daemon_addon Called when the extensible background daemon is called
daemon_master_release Called at the beginning of the processing of \Zotlabs\Daemon\Master::Release()
directory_item Called when creating a directory listing for display
discover_channel_webfinger Called when a webfinger lookup is performed
display_item Called for each element that is displayed in a conversation thread
display_settings Called by the settings module when the ‘display settings’ section is displayed
display_settings_post Called when a post from the ‘display settings’ form of the settings module is displayed
donate_contributors Called by the ‘donate’ addon when a list of donation recipients is created
donate_plugin is called by the ‘donate’ addon
donate_sponsors Called by the ‘donate’ addon
dreport_is_storable is called before saving a Dreport record to determine if it should be saved
dreport_process is called for each valid delivery report
dropdown_extras Add additional items to the dropdown menu when item/threads are displayed.
drop_item is called when an ‘item’ is removed
encode_object is called when an object is encoded for transmission.
enotify is called before each notification
enotify_mail is called when a notification email is sent
enotify_store is called when a notification data record is saved
enotify_store_end is called after a notification record has been saved
event_created is called when an event record is created
event_store_event is called when an event record is created or updated
event_updated is called when an event record is changed
externals_url_select is called when a list of random websites from which to retrieve public posts is created
feature_enabled is called when ‘feature_enabled()’ is used
feature_settings is called from the settings page when visiting ‘addon/feature settings’
feature_settings_post is called from the settings page when posting from ‘addon/feature settings’
fetch_and_store is called to enable filtering of ‘decrypted’ elements before saving.
file_thumbnail is called when creating thumbnails for the cloud page in ‘show tiles’ mode
follow is called when a follow operation takes place
follow_from_feed is called when a follow operation takes place in an RSS feed
follow_allow is called before the results of a follow operation are saved
gender_selector is called when the ‘Gender’ drop-down list is created (extended profile)
gender_selector_min is called when the ‘Gender’ drop-down list is created (normal profile)
generate_map is called to generate the HTML code for displaying a location on the map by coordinates
generate_named_map is called to generate the HTML file for displaying a map location by text
get_all_api_perms Called when the permissions for API uses are retrieved
get_all_perms is called when get_all_perms() is used get_best_language is called when the preferred language for the page is selected get_default_export_sections Called to get the default list of function data groups to be exported in identity_basic_export()
get_features Called when get_features() is called
get_photo Called when photo content (except profile photos) is retrieved in mod_photo
get_profile_photo Called when the content of the local profile photo is retrieved in mod_photo
get_role_perms Called when get_role_perms() is called to get permissions for named permission roles
global_permissions Called when the global permissions list is created
home_content Called by mod_home to replace the content of the home page
home_init Called by the home_init() function of the home page
hostxrd Called when generating .well-known/hosts-meta for ‘old webfinger’ (used by the Diaspora protocol)
html2bb_video Called when html2bbcode translation is used to handle embedded media
html2bbcode Called when using the html2bbcode translation
identity_basic_export Called when the basic information of a channel is exported for backup or transfer.
import_author_xchan Called when searching for an author of a post with xchan_hash to make sure they have an xchan entry on our website
import_channel Called when a channel is imported from a file or API source
import_directory_profile Called when processing the delivery of a profile structure from an external source (usually for storage in directories)
import_xchan Called when processing the result of zot_finger() to save the result
item_photo_menu Called when the list of actions associated with a displayed conversation item is generated
item_store Called when item_store() stores a record of type item
item_stored Called after item_store() has stored a record of type item in the database.
item_custom Is called before item_store() saves a data record of the type item (so that addons can process ITEM_TYPE_CUSTOM elements).
item_store_update Called when item_store_update() is called to update a stored item.
item_stored_update Called after item_store_update() has updated astored item.
item_translate Called by item_store and item_store_update after the language of the item has been automatically recognised.
jot_networks Called to generate the list of additional post plugins to be activated from the ACL form
jot_tool Obsolete and possibly superfluous. Enables action buttons to be added to the post editor.
jot_tpl_filter Called to filter template variables before replacing them in jot.tpl.
jot_header_tpl_filter Called to filter template variables before replacing them in jot_header.tpl.
legal_webbie Called to validate a channel address
legal_webbie_text Provides an explanation of the text/character restrictions for legal_webbie()
load_pdl Called when we load a PDL file or description
local_dir_update Called when a directory update is processed by a channel on the directory server
location_move Called when a UNO channel has been notified of a new location (indicating a move and not a clone)
logged Called when authentication was successful in any way
Logger Called when an entry is made in the application's log file
logging_out Called when loggingout
login_hook Called when the login form is generated
magic_auth Called when processing a magic-auth sequence
markdown_to_bb Called when processing the Markdown conversion
match_webfinger_location Called when processing webfinger requests
magic_auth_openid_success Called when a magic-auth was successful due to openid credentials
magic_auth_success Called when a magic-auth was successful
main_slider Called when the affinity tool is generated
marital_selector Called when the selection list for the drop-down menu of the ‘Marital status’ profile is created (extended profile)
marital_selector_min Called when the selection list for the ‘Marital status’ drop-down profile is created (normal profile)
module_loaded Is called when a module has been successfully localised for a URL request on the server.
mood_verbs Called when the list of moods is created nav Called when the navigation bar is created
network_content_init Called when loading the content for the network page
network_ping Called when a ping request is made network_to_name Deprecated
notifier_end Called when a delivery loop is completed
notifier_hub Called when a hub has been delivered
notifier_normal Called when the notifier is called for a ‘normal’ delivery
notifier_process Called when the notifier processes a message/event
obj_verbs Called when the list of verbs available for the ‘things’ profile is created.
oembed_action Called when deciding whether to filter, block or approve an oembed url
oembed_probe Called when a search for Oembed content is performed.
other_encapsulate Called when encrypting content for which the algorithm is unknown (see also crypto_methods)
other_unencapsulate Called when decrypting content for which the algorithm is unknown (see also crypto_methods)
page_content_top Called when we generate a web page (before calling the module content function)
page_end Called after we have generated the page content
page_header Called when the navigation bar is generated
page_meta Called when generating the metadata in the page header.
parse_atom Called when an Atom/RSS feed element is parsed.
parse_link Is called when a URL is queried to generate a post from it
pdl_selector Called when creating a layout selection in a form
perm_is_allowed Called during perm_is_allowed() to determine whether authorisation is permitted for this channel and observer
permissions_create Called when a book entry (connection) is created
permissions_update Is called when an authorisation update is transferred
permit_hook Called before a registered hook is actually executed to determine whether it should be allowed or blocked
personal_xrd Called when generating the personal XRD for ‘old webfinger’ (Diaspora)
photo_post_end Called after a photo has been uploaded
photo_upload_begin Called when an attempt is made to upload a photo
photo_upload_end Called when a photo upload has been processed
photo_upload_file Called to generate alternative file names for an upload
photo_upload_form Called when a photo upload form is generated
photo_view_filter Called before the data is passed to the photo_view template
poke_verbs Called when creating the list of actions for the ‘poke’ module
post_local Called when an article has been set on this computer via mod/item.php (also via API)
post_local_end Is called when a local post process has been completed
post_local_start Is called when a local post process begins post_mail Called when a mail message has been created
post_mail_end Called when a mail message has been delivered
post_remote Called when an activity arrives from another location
post_remote_end Called after a remote post has been processed
post_remote_update Called when processing a remote post that includes an edit or update
post_remote_update_end Called after processing a remote post that included an edit or update
prepare_body Is called when the HTML code for a displayed conversation object is generated.
prepare_body_final Called after the HTML for a displayed conversation item has been generated
prepare_body_init Called before the HTML for a displayed conversation element is generated
privacygroup_extras Called before generating the HTML for the privacy group editing options
privacygroup_extras_delete Called after the privacy group has been deleted.
privacygroup_extras_post Is called when the form for editing the privacy group is sent.
proc_run Called when PHP sub-processes are called process_channel_sync_delivery Called when a ‘sync package’ with structure and table updates is received from a channel clone.
profile_advanced Called when an advanced profile page is generated
profile_edit Called when editing a profile
profile_photo_content_end Called when a profile photo is changed
profile_post Called when an edited profile is posted
profile_sidebar Is called up when the ‘channel sidebar’ or the mini profile is created
profile_sidebar_enter Called before the ‘channel sidebar’ or mini-profile is created
queue_deliver Called when a message is delivered in the queue
register_account Called when an account has been created
render_location Called to create an inactive inline map
replace_macros Called before the template processor is called
reverse_magic_auth Called before calling reverse magic auth to send you to your own website so you can authenticate on that website
settings_account Called when the account settings form is created
settings_form Called when creating the channel settings form
settings_post Called when posting from the channel settings form
sexpref_selector Called when creating a drop-down menu for sexual preferences (advanced profile)
sexpref_selector_min Called when a drop-down list of sexual preferences is created (normal profile)
smilie Called when translating emoticons
status_editor Called when the status_editor is created.
stream_item Called for each item that is rendered for display via conversation()
system_app_installed_filter Called when it is determined whether a system app isinstalled.
tagged Called when a delivery is processed that results in you being tagged
thumbnail Called when creating thumbnails for the cloud storage tile view
update_unseen Called before automatically tagging programmes loaded in the browser that have been viewed
validate_channelname Used to validate the names used by a channel
webfinger Called when visiting the webfinger service (RFC7033)
well_known Called when accessing the special ‘.well-known’ site addresses
wiki_preprocess Called before markdown/bcode processors are executed for wiki pages
zot_best_algorithm Called when negotiating encryption algorithms with remote sites
zid Called when the observer's zid is added to a URL
zid_init Called when authenticating a visitor who has used zid
zot_finger Called when a Nomad info packet has been requested (this is our web finger detection mechanism)
To-be-organized information
Here is how you can join us.
First, get yourself a working git package on the system where you will be doing development.
Create your own github account.
You may fork/clone the Red repository from https://framagit.org/hubzilla/core.git.
Follow the instructions provided here: http://help.github.com/fork-a-repo/ to create and use your own tracking fork on github
Then go to your github page and create a "Pull request" when you are ready to notify us to merge your work.
Important
Please pull in any changes from the project repository and merge them with your work before issuing a pull request. We reserve the right to reject any patch which results in a large number of merge conflicts. This is especially true in the case of language translations - where we may not be able to understand the subtle differences between conflicting versions.
Also - test your changes. Don't assume that a simple fix won't break something else. If possible get an experienced Red developer to review the code.
How to theme Hubzilla
This is a short documentation on what I found while trying to modify Hubzilla's appearance.
First, you'll need to create a new theme. This is in /view/theme, and I chose to copy 'redbasic' since it's the only available for now. Let's assume I named it .
Oh, and don't forget to rename the _init function in /php/theme.php to be _init() instead of redbasic_init().
At that point, if you need to add javascript or css files, add them to /js or /css, and then "register" them in _init() through head_add_js('file.js') and head_add_css('file.css').
Now you'll probably want to alter a template. These can be found in in /view/tpl OR view//tpl. All you should have to do is copy whatever you want to tweak from the first place to your theme's own tpl directory.
We're pretty relaxed when it comes to developers. We don't have a lot of rules. Some of us are over-worked and if you want to help we're happy to let you help. That said, attention to a few guidelines will make the process smoother and make it easier to work together. We have developers from across the globe with different abilities and different cultural backgrounds and different levels of patience. Our primary rule is to respect others. Sometimes this is hard and sometimes we have very different opinions of how things should work, but if everybody makes an effort, we'll get along just fine.
Here is how you can join us.
First, get yourself a working git package on the system where you will be doing development.
Create your own github account.
You may fork/clone the hubzilla repository from https://framagit.org/hubzilla/core.git
Follow the instructions provided here: http://help.github.com/fork-a-repo/]http://help.github.com/fork-a-repo/ to create and use your own tracking fork on github
Then go to your github page and create a "Pull request" when you are ready to notify us to merge your work.
Important
Please pull in any changes from the project repository and merge them with your work before issuing a pull request. We reserve the right to reject any patch which results in a large number of merge conflicts. This is especially true in the case of language translations - where we may not be able to understand the subtle differences between conflicting versions.
Also - test your changes. Don't assume that a simple fix won't break something else. If possible get an experienced Red developer to review the code.
Further documentation can be found at the Github wiki pages at: https://github.com/friendica/red/wiki
Concensus Building
Code changes which fix an obvious bug are pretty straight-forward. For instance if you click "Save" and the thing you're trying to save isn't saved, it's fairly obvious what the intended behaviour should be. Often when developing feature requests, it may affect large numbers of community members and it's possible that other members of the community won't agree with the need for the feature, or with your proposed implementation. They may not see something as a bug or a desirable feature.
We encourage consensus building within the community when it comes to any feature which might be considered controversial or where there isn't unanimous decision that the proposed feature is the correct way to accomplish the task. The first place to pitch your ideas is to Channel One]. Others may have some input or be able to point out facets of your concept which might be problematic in our environment. But also, you may encounter opposition to your plan. This doesn't mean you should stop and/or ignore the feature. Listen to the concerns of others and try and work through any implementation issues.
There are places where opposition cannot be resolved. In these cases, please consider making your feature optional or non-default behaviour that must be specifically enabled. This technique can often be used when a feature has significant but less than unanimous support. Those who desire the feature can turn it on and those who don't want it - will leave it turned off.
If a feature uses other networks or websites and or is only seen as desirable by a small minority of the community, consider making the functionality available via an addon or plugin. Once again, those who don't desire the feature won't need to install it. Plugins are relatively easy to create and "hooks" can be easily added or modified if the current hooks do not do what is needed to allow your plugin to work.
The Hubzilla project
Hubzilla Governance
Governance refers to the management of a project and in particular how this relates to conflict resolution.
Community management
The project is managed and decisions are made by the ‘community’. The governance structure is still under development. Until the structure is finalised, decisions are made in the following order:
- Lazy consensus If a project proposal is made in one of the community governance forums and no serious objections are raised within a ‘reasonable’ period of time from the date of the proposal (we usually give all interested parties 2 to 3 days to comment), no vote is required and the proposal is deemed accepted. Concerns may be raised at this stage, but if these are resolved during the discussion and possible solutions are offered, the proposal is still considered approved.
- Veto Experienced developers who have already committed to many projects can veto any decision. The decision cannot proceed until the veto is lifted or an alternative proposal is submitted.
- Community vote A decision for which there is no clear mandate or consensus, but which has not been vetoed, can be put to a Community vote. Currently, this is a simple referendum in one of the relevant community forums. At present, the people decide the outcome. This may change in the future if the community adopts a ‘council’ governance model. This document will be updated with the updated governance rules at that time.
Community voting does not always lead to a pleasant outcome and can lead to polarised factions in the community (so other models are also being considered). If the proposal is rejected, there are still various ways to resubmit the proposal with slightly different parameters (turning it into an addon, turning it into an optional feature that is disabled by default, etc.). If there is a lot of interest in the feature and the vote is ‘close’, this can cause a lot of bad feelings for the losing voters. In such close votes, it is strongly recommended that the requester take steps to address any concerns and resubmit the request.
Privacy
Q: Who can see my content? A: By default, EVERYONE on the Internet, unless you restrict it. Hubzilla allows you to choose the level of privacy you want. Restricted content is NOT visible to ‘spy networks’ and advertisers. You are protected against eavesdropping by outsiders - as much as possible. Hub administrators with sufficient knowledge and patience may be able to intercept some private communications, but they must make an effort to do so. There are privacy modes within Hubzilla that are tap-proof even for experienced and determined hub administrators.
Q: Can my content be censored? A: Hubzilla (the network) CANNOT censor your content. Server and hub administrators are subject to local laws and MAY remove objectionable content from their site/hub. Anyone CAN become a hub administrator, including you, and therefore post content that might otherwise be censored. You MAY still be subject to local laws.
Definitions
Hubzilla, also referred to as ‘the network’, is a collection of individual computers/servers (also called hubs ) that are connected together to form a larger co-operative network.
Hub A single computer or server that is connected to Hubzilla. These are provided by a hub administrator and can be public or private, paid or free.
Hub administrator The system operator of a single hub.
Policies
Public information
Any information or content you post within Hubzilla MAY be public or visible to anyone on the Internet. Where possible, Hubzilla allows you to protect content and restrict who can see it. Your profile photo, channel name, and the location (URL or network address) of your channel are visible to anyone on the Internet, and privacy controls do not affect the display of these items. You MAY additionally provide other profile information. Any information you provide in your ‘standard’ or public profile MAY be transmitted to other hubs in Hubzilla and additionally displayed in the channel directory. You can restrict access to this profile information. You can restrict it to members of your Hub only, to connections (friends) only, or to other limited groups of viewers as you wish. If you want your profile to be restricted, you must make the appropriate privacy settings or simply NOT provide any additional information.
Content
The content you provide (status messages, photos, files, etc.) belongs to you. Hubzilla's default setting is that content is published openly and visible to everyone on the internet (PUBLIC). You CAN control this in your channel settings and restrict the default permissions or you CAN restrict the visibility of each published item separately (PRIVATE). Hubzilla developers ensure that restricted content is ONLY visible to those listed in the restriction list - as best they can. Content (especially status messages) that you share with other networks or that you have made visible to everyone on the internet (PUBLIC) cannot simply be taken back after it has been published. They MAY be shared with other networks and made available via RSS/Atom feeds. They can also be syndicated to other Hubzilla sites. They MAY appear on other networks and websites and be visible in web searches. If you do not want this default behaviour, please adjust your channel settings and restrict who can see your content.
Comments and forum posts
Comments on posts created by others and posts labelled as forum posts belong to you as the creator/author, but the distribution of these posts is not under your direct control and you relinquish SOME rights to these elements. These posts/comments MAY be shared with others and MAY be visible to anyone on the Internet. In the case of comments, the creator of the ‘first post’ in the thread (conversation) you are replying to controls the distribution of all comments and replies to that post. He is the ‘owner’ and therefore has certain rights over the entire conversation (including all comments contained therein). You can still edit or delete the comment, but the owner of the conversation also has the right to edit, delete, redistribute and save/restore the entire content of the conversation.
Private information
Hubzilla developers ensure that all content you provide that is labelled PRIVATE is protected against eavesdropping to the best of their ability. Private channel content MAY be seen in the database of any Hub administrator involved, but private messages are obscured in the database. The latter means that it is very difficult, but NOT impossible, for this content to be seen by a hub administrator. Private channel content and private messages are also removed from email notifications. End-to-end encryption is an optional feature that can NOT be seen even by a determined administrator.
Identity protection
Protecting your identity is another aspect. Since you have a decentralised identity in Hubzilla, your privacy extends beyond your home hub. If you want to have complete control over your privacy and security, you should run your own hub on your own server. For many people, this is complicated and can overwhelm their technical skills. So let's list some precautions you can take to protect your privacy as much as possible. A decentralised identity has many advantages and offers you many interesting features, but you should be aware of the fact that your identity is known to other hubs in the Hubzilla network. One of these benefits is that other channels can offer you customised content and allow you to see private things (such as private photos that others want to share with you). For this reason, these channels need to know who you are. But we understand that sometimes these other channels know more about you than you might want them to. For example, the Visage plug-in, which can tell a channel owner when you last visited their profile. You can easily opt out of this minor and, we think, harmless tracking.
* You can enable Do Not Track (DNT)(http://donottrack.us/)?f=&zid=pepecyb@hub.hubzilla.hu)?f=&zid=pepecyb@hub.hubzilla.hu)) in your web browser. We respect this new privacy proposal. All modern browsers support DNT. You can find it in the privacy settings of your browser or you can consult the manual of your web browser. This will not affect the functionality of Hubzilla. This setting is probably sufficient for most people.
*You can disable the publication of your channel in our channel directory. If you want others to find your channel, you should tell them your channel address directly. We think this is a good indication that you prefer extra privacy and will automatically enable ‘Do Not Track’ if this is the case.
* You can have a blocked hub. This means that all channels and content in this hub are not public and not visible to the outside world. Only your hub administrator can do this. We also respect this and automatically activate ‘Do Not Track’ if it is set.
Censorship
Hubzilla is a global network that includes all religions and cultures. This does not mean that every member of the network feels the same way you do about controversial topics, and some people may OBJECT to the content you post. If you want to post something that you know may not be accepted by everyone, it is best to limit the publicity to a small circle of friends using the privacy controls.
Hubzilla as a network provider cannot censor content. Hub administrators CAN, however, censor content that appears on their hub to comply with local laws or even personal judgement. Their decision is final. If you have issues with a hub administrator, you can move your account and posts to another site that better meets your expectations. Please check your Hub's Terms of Service (regularly) to be aware of any rules or guidelines. If your content consists of illegal or problematic material, we STRONGLY recommend that you run your own hub (become a hub administrator). Your content may be blocked on some hubs, but Hubzilla as a network cannot prevent it from being published.
Hubzilla RECOMMENDS that hub administrators allow a 1-2 day grace period between warning an account owner of content to be removed and the physical removal or deactivation of the account. This gives the content owner the opportunity to export their channel metadata and import it to another site. In rare cases, the content may be of such a nature that immediate account cancellation is warranted. This is a Hub decision, not a Hubzilla decision.
If you typically and regularly post content of a harmful or offensive nature, you are STRONGLY encouraged to flag your account as ‘NSFW’ (Not Safe For Work). This will prevent your profile photo from being displayed in the directory, except to viewers who have disabled ‘safe mode’. If your profile photo is deemed adult or offensive by the directory administrators, the directory administrator MAY flag your profile photo as NSFW. Currently, there is no official mechanism to appeal or reverse this decision. Therefore, you SHOULD flag your own account as NSFW if it may be inappropriate for a general audience.
Credits
Many thanks to everyone who has contributed to this project and its predecessors over the years. It is possible that we have not mentioned your name, but this is not intentional. We also thank the community and its members who have provided valuable input and without whom all this work would be pointless. It is also worth acknowledging the contributions and problem solving that resulted from discussions between members and developers of other, somewhat related and competing projects; even if we had occasional disagreements.
- Mike Macgirvin
- Mario Vavti
- Scott M. Stolz
- Chris Burger
- Emanuel Han
- Fabio Comuni
- Simon L'nu
- marijus
- Tobias Diekershoff
- fabrixxm
- tommy tomson
- Simon
- zottel
- Christian Vogeley
- jeroenpraat
- Michael Vogel
- erik
- Zach Prezkuta
- Paolo T
- Michael Meer
- Michael
- Abinoam P. Marques Jr
- Tobias Hößl
- Alexander Kampmann
- Olaf Conradi
- Paolo Tacconi
- tobiasd
- Devlon Duthie
- Zvi ben Yaakov (a.k.a rdc)
- Alexandre Hannud Abdo
- Olivier Migeot
- Chris Case
- Klaus Weidenbach
- Michael Johnston
- olivierm
- Vasudev Kamath
- pixelroot
- Max Weller
- duthied
- Martin Schmitt
- Sebastian Egbers
- Erkan Yilmaz
- sasiflo
- Stefan Parviainen
- Haakon Meland Eriksen
- Oliver Hartmann (23n)
- Erik Lundin
- habeascodice
- sirius
- Charles
- Tony Baldwin
- Hauke Zuehl
- Keith Fernie
- Anne Walk
- toclimb
- Daniel Frank
- Matthew Exon
- Michal Supler
- Tobias Luther
- U-SOUND\mike
- mrjive
- nostupidzone
- tonnerkiller
- Antoine G
- Christian Drechsler
- Ludovic Grossard
- RedmatrixCanada
- Stanislav Lechev [0xAF]
- aweiher
- bufalo1973
- dsp1986
- felixgilles
- ike
- maase2
- mycocham
- ndurchx
- pafcu
- Simó Albert i Beltran
- Manuel Reva
- Manuel Jiménez Friaza
- Gustav Wall aka "neue medienordnung plus"